This edition of the DDD Europe was a kind of a restart at a new venue (and city) and with a new format: three conferences in three days. The complementary conferences (Event Centric and Data Mesh) felt like the natural step for a DDD conference, and I was excited to go to some of the sessions, but I failed. I did not have enough bandwidth for that.
I don’t know about you, but during such conferences, my brain is continuously receiving inputs and weaves them together so that it takes some time to have a “final” summary of the all the new things I learned, tools I saw, ideas I got corrected or thrown away as a result of the talks and the floor-conversations I had the opportunity to enjoy. What follows is my “braindump” shared with my colleagues after a few days as an answer to Nick Tune‘s question What are your biggest takeaways from DDD EU. What are the things we should start thinking about and learning now?
Gregor Hohpe‘s description of a platform (or what is not a platform)
The idea of building software that can do everything and requires only configuration is not valid for platforms; we need to forget that. A platform is not a framework, but an enabler.
 Nobody can anticipate every use case. Platforms should not try to do that.
If you haven’t heard about any case when the teams used your platform in an anexpected way, you didn’t build a platform.
Gregor Hohpe – Platform Engineering is Domain-Driven Design
Platforms are like bearings: they must ensure that the “machine” runs smoothly without any intervention. (This is a key requirement of a bearing: one must not know about its existence during “runtime”.)
 No requests for help to release, grant access, or assign permissions. Self-service is the key principle.
Before I became a software person, I studied mechanical engineering, specialised in trains. It is also not a surprise that Gregor’s advice regarding guardrails hit home.

Railways keep us on track. They ensure that we don’t derail. They are enabling constraints which help to travel fast and straight. Guardrails have a different job. They can’t tell us how to travel straight forward. They can’t stop us from going in circles and hitting them again and again.
The talk was not new, but I had never seen it before, so it was new to me. It contains a lot of other dos and don’ts too, so it is worth repeating until everyone building a platform “gets the message”. Here is a version from 2024:
Cyrille Martraire’s advice to be unconventional when modelling
Who should present a talk called ‘Breaking Conventions for More Performant Models’ if not Cyrille Martraire, a very unconventional person himself? Afterwards, Cyrille called this talk “basic, common sense”. I would say, yes, it is, after you’ve made enough mistakes to improve your common sense. It was an excellent talk on how to avoid those mistakes.

I think that we all agree with this definition of what modelling means. The difference starts two minutes afterwards  . How much to simplify??
When talking about time in the hotel business, how many concepts of time do you have? And what kind of “time” models are those?

My take is that the time concept for a guest and the time concept of the cleaning personnel should not have much in common.
The tips of Cyrille didn’t stop here. Finding the right model is challenging because, if chosen well, it will not only solve a problem but also lead to new ideas.

“Indexing” is a technical term. But wouldn’t you, as a user of a service for managing appointments, consider a view about “very soon, soon, later” much more helpful than an accurate but very noisy hour-by-hour list? The need to balance reports can lead to an improved user experience.
Alberto Brandolini‘s “fast-forward” towards a multi-model world
I always enjoy Alberto’s talks, and this one wasn’t an exception. The clarity, the necessary portion of irony and the conclusion at the end speak for themselves.
 What is a Bounded Context?
What happens if your product goes multi-country? Which characteristics remain as clear as described on the slide? Well … it depends.

This is the usual way, and it is a recipe for disaster.

But it does not need to be.

The final advice for everyone working on a long-lasting product: Maps & disciplined thinking, because words are just not enough.

Apropos, product development:
The rollercoaster called product development, or how Xin Yao and John Cutler call it: The Beautiful Mess
What a combo! Xin, a software architect and DDD change agent, and John, a product expert with extraordinary visualisation skills, have shared the stage for an hour to show us the differences and the synergies of this industry in which we still talk about “the two sides”.

I can’t distil this talk because each slide is a gem, and each explanation should be heard from the speakers. I can share my favourite slide, though, because it shows my day-to-day work as a single picture.

Additionally …
… I brought back some old and new tips from these talks.
The tool: https://tryitwithann.com/ A tool for rapid prototyping AND automatic specification generation (as unit tests) for event-based systems, based on miro.
The talks which made our brains go in circles:
Barry O’Reilly’s Residuality Theory. Not new, but still a provocative and must-heard-about concept.

Dr. Jabe Bloom’s university-level talk ‘Through the Looking Glass: Applying Architecture Principles to Social Systems’ began with the history and analysis of Conway’s Law and concluded with the definition of socio-technical architecture.

This experience report feels probably unstructured, confusing, “a lot!”, and I won’t disagree. It is always “a lot” because we live in complex times and address complicated problems. However, learning about these things helps to stay in control as much as possible, and accepting the lack of control when necessary.
I will call it just like my friend Xin does: The DDD magic.
 Xin Yao and John Cutler – Modelling Stories of the Beautiful Mess – DDD Europe 2025
Edition 4 of IEC 61131-3 has been available online since May 2025. In the following post, I will briefly explain the most important differences between Edition 3 and Edition 4.
I was unable to test the new features of Edition 4 as I did not have a development environment that supported the new functions of Edition 4 at the time of the comparison. I can therefore only offer a general overview of the differences. I used IEC 61131-3 (Edition 3.0) 2013-02 and IEC 61131-3 (Edition 4.0) 2025-05 for the comparison. However, if you want or need to familiarise yourself more intensively with IEC 61131-3, there is no getting around the standard.
The first impression
When comparing the tables of contents, it is noticeable that in Edition 3 the appendix begins on page 221, while in Edition 4 the appendix begins on page 241.
A new addition is the 6-page chapter 6.9 Synchronisation of concurrent execution. The corresponding sub-chapters reveal that this is about mutexes and semaphores.
Chapter 7.2 Instruction List (IL) is no longer included in Edition 4. This means that IL is no longer part of IEC 61131-3, but this does not necessarily mean that IL is no longer offered by manufacturers. Each manufacturer can continue to decide for themselves whether they want to offer IL in their development environment or not.
Octal literals
In addition to the integer literals (e.g. -43), the floating point literals (e.g. -43.8), the binary literals (e.g. 2#1101_0110) and the hexadecimal literals (e.g. 16#E26B), there are also octal literals (e.g. 8#267) in Edition 3. The octal literals are no longer supported by Edition 4. In Edition 3, the octal literals were already labelled as deprecated.
USTRING and UCHAR data types
With the two new data types USTRING and UCHAR, character strings are now also supported in which each character is encoded according to UTF-8.
While a WSTRING / WCHAR is encoded as UTF-16 and always requires 2 bytes per character, UTF-8 encodes each character with a sequence of 1 to 4 bytes.
UTF-8, or Unicode Transformation Format – 8 bit, is backwards compatible with 7-bit ASCII, as the first 128 characters in UTF-8 and ASCII are identical in the English character set. This means that every valid ASCII character string is also a valid UTF-8 character string, so that most programmes written for ASCII can be easily adapted to UTF-8.
UTF-8 is particularly widespread in Internet applications. Both the Internet Mail Consortium (IMC) and the Word Wide Web Consortium (W3C) recommend the use of UTF-8 as a standardised encoding.
USTRING and UCHAR literals are specified as follows:
x : USTRING := USTRING#'ABC';
x : USTRING := U#'ABC';
y : UCHAR := UCHAR#'A';
y : UCHAR := U#'A';
LEN_MAX and LEN_CODE_UNIT
The character string functions are described in chapter 6.6.2.5.12. The functions LEN_MAX and LEN_CODE_UNIT are new additions.
LEN_MAX gibt die maximale Länge des Strings zurück:
VAR
   x   : STRING[100] := 'Hello';
   y   : WSTRING[100] := WSTRING#'Hello';
   z   : USTRING[100] := USTRING#'Hello';
END_VAR
a := LEN_MAX(x);   // a = 100
b := LEN_MAX(y);   // b = 100
c := LEN_MAX(z);   // c = 100
LEN_CODE_UNIT returns the number of code units occupied by the string. For the data types STRING and WSTRING, LEN_CODE_UNIT returns the same value as for LEN. With USTRING, however, the value of LEN_CODE_UNIT can be greater than that of LEN.
a := LEN_CODE_UNIT(x);   // a = 5
b := LEN_CODE_UNIT(y);   // b = 5
c := LEN_CODE_UNIT(z);   // c = 5
As the strings in this example only contain ASCII characters, LEN_CODE_UNIT returns the same value for all three data types.
Specification of characters by character code
In a string or character literal, any character can be specified by the character code. This is specified in hexadecimal notation after a $ in curly brackets:
VAR
   x   : STRING := '${9}'; // Control character for tabulator
   y   : WSTRING := WSTRING#'${2211}';  // Character Σ
   z   : USTRING := USTRING#'${1F579}'; // Emoji ‚Joystick’
END_VAR
The previous support of character codes with fixed lengths (e.g. ‘$0A’ or “$00C4”) is still supported.
Note: For the representation of the character code, I would have liked the usual coding for the respective number system to be used, i.e. 16#1F579 instead of just 1F579. Even if it is usual to specify character codes in hexadecimal, it is easier to recognise in which number system the character code was specified.
Unfortunately, the Char Map under Windows only allows the entry of character codes with a maximum of 4 digits. The function Insert -> Symbol in Word is much more helpful in finding the right character code:

The string and character literals are described in chapter 6.3.3 Character string literals.
Data type conversion
Figure 11 in chapter 6.6.1.6 Data type conversion provides an overview of the implicit and explicit data type conversions. Compared to Edition 3, there are some adjustments and extensions here.
Edition 4 defines some explicit data type conversions that are not included in Edition 3:
- LWORD_TO_BOOL, DWORD_TO_BOOL, WORD_TO_BOOL and BYTE_TO_BOOL
- UINT_TO_WCHAR and USINT_TO_CHAR
- WSTRING_TO_WCHAR
- WCHAR_TO_UINT
Some explicit data type conversions have been changed to implicit data type conversions:
- STRING_TO_WSTRING
- CHAR_TO_WCHAR
Some implicit and explicit data type conversions have been added for the USTRING and UCHAR data types:
- UDINT_TO_UCHAR and DWORD_TO_UCHAR
- USTRING_TO_WSTRING, USTRING_TO_STRING and USTRING_TO_UCHAR
- UCHAR_TO_UDINT, UCHAR_TO_LWORD, UCHAR_TO_DWORD, UCHAR_TO_USTRING, UCHAR_TO_WCHAR and UCHAR_TO_CHAR
- WSTRING_TO_USTRING and STRING_TO_USTRING
- CHAR_TO_UCHAR
Data type conversion between strings and ARRAY OF BYTE
The functions for data type conversion between strings and ARRAY OF BYTE are new additions. These are described in chapter 6.6.2.5.8 Data type conversion between string types and array of bytes:
- STRING_TO_ARRAY_OF_BYTE, WSTRING_TO_ARRAY_OF_BYTE and USTRING_TO_ARRAY_OF_BYTE
- ARRAY_OF_BYTE_TO_STRING, ARRAY_OF_BYTE_TO_WSTRING and ARRAY_OF_BYTE_TO_USTRING
TRUNC was removed
The TRUNC function is defined as a typed and overloaded function. In the typed notation, the source data type and the target data type are specified in the function name, e.g. LREAL_TRUNC_DINT(x), while in the overloaded notation, only the target data type is specified, e.g. TRUNC_DINT(x). The source data type is determined from the transferred parameter.
Edition 3 still had the notation without specifying a data type definiert, i.e. TRUNC(x). Here the source data type always had to be ANY_REAL and the target data type always ANY_INT. This notation was already labelled as deprecated in the edition 3 and has now been removed from edition 4.
Properties
Edition 4 (finally) defines properties. Properties are part of a CLASS, FUNCTION_BLOCK or INTERFACE. Setter and getter methods are declared so that the value of a property can be set or read. The declaration is similar to that of a method. However, the keywords PROPERTY_GET and PROPERTY_SET are used instead of the METHOD keyword.
PROPERTY_GET PUBLIC nFoo : INT
   ;
END_PROPERTY
PROPERTY_SET PUBLIC nFoo : INT
   ;
END_PROPERTY
If setter and getter methods are defined, the data type must be the same for both methods.
The same access specifiers can be used for properties as for methods, i.e. INTERNAL, PRIVATE, PROTECTED and PUBLIC. The keywords ABSTRACT and FINAL are also possible. If no access specifier is specified, the property is PROTECTED.
If a property is only to be readable, the setter method can be omitted or set to PRIVATE.
A property can be used like an instance variable:
VAR
   fbFoo    : FB_Foo;
   x        : INT := 10;
END_VAR
fbFoo.nFoo := x;   // Write to the property
x := fbFoo.nFoo;   // Read from the property
Program code is stored in the setter and getter methods to manage the value of the property internally.
FUNCTION_BLOCK FB_Foo
   VAR PRIVATE
      _nFoo   : INT; // Backing variable
   END_VAR
   PROPERTY_GET PUBLIC nFoo : INT
      nFoo := _nFoo;
   END_PROPERTY
   PROPERTY_SET PUBLIC nFoo : INT
      _nFoo := nFoo;
   END_PROPERTY
END_FUNCTION_BLOCK
The properties are described in chapter 6.6.5.11 Properties.
Assertions
In chapter 6.6.2.5.17 Assertions, Edition 4 defines the ASSERT function, which has the input parameter IN of type BOOL and no return value. ASSERT is used to check the validity of expressions or variables during development.
If IN is TRUE when called, the function has no effect. However, if IN is FALSE, ASSERT should ‘inform’ the developer of this. Each manufacturer (of the development environment) can individually define what the message looks like.
Once development is complete, calling ASSERT no longer has any effect, regardless of the value of the input parameter IN. How this is communicated to the development environment can be determined by the manufacturer.
Synchronization of concurrent execution
Chapter 6.9 Synchronization of concurrent execution has been added in Edition 4 and defines objects and functions to synchronize program code that has been split into several tasks. Synchronization is required, for example, if two parallel programs access a common variable, whereby one program also changes this variable.
Mutexes and Semaphores are defined in Edition 4 to make it easier to synchronize programs running in parallel.
I will only briefly introduce the functions that define Edition 4. A detailed description of these concepts would be too extensive at this point, but could be the subject of a separate post.
Mutex
Mutexes are usually used to model critical sections. A mutex can be locked and unlocked.
Both an object-oriented approach and an approach based on functions are defined. The object-oriented approach is based on the MUTEX function block. This has the following methods:
MUTEX also has the properties LOCK_COUNT and OWNER. OWNER is used to store a value that identifies the task.
In the approach based on functions, the corresponding functions are available:
- MUTEX_UNLOCK
- MUTEX_LOCK
- MUTEX_TRYLOCK
Semaphore
Here too, both an object-oriented approach and an approach based on functions are defined. The SEMA function block was defined for the object-oriented approach. This has the methods:
- RELEASE
- ACQUIRE
- TRY_ACQUIRE
The following functions have been defined accordingly:
- SEMA_RELEASE
- SEMA_ACQUIRE
- SEMA_TRY_ACQUIRE
Support of BCD numbers discontinued
In future, BCD numbers will no longer be supported. In Edition 4, the following functions are marked as deprecated:
- IS_VALID_BCD
- BCD_TO_out and in_BCD_TO_out
- TO_BCD_out and in_TO_BCD_out
Conclusion
My personal highlight is the support of mutexes and semaphores. In times when CPUs have more and more cores, appropriate tools must also be provided to distribute a program across several tasks.
I would describe the remaining changes as general care and maintenance. It’s good that things are also removed from the standard if they are no longer relevant. This includes, for example, the removal of IL as and the omission of octal literals.
Some points have also been defined in more detail, for example the question of whether ARRAY[1..1] and ARRAY[1..0] are permitted and how they behave (chapter 6.4.4.5.1).
Otherwise, I don’t see the differences as extensive as between Edition 2 (published in 2003) and Edition 3 (published in 2013).
However, I also miss some points. These include the implicit enumeration, optional parameters for methods and functions, as well as the option to overload methods.
Seit Mai 2025 ist die Edition 4 der IEC 61131-3 online verfügbar. Im folgenden Post gehe ich kurz auf die wichtigsten Unterschiede zwischen der Edition 3 und der Edition 4 ein.
Die Neuerungen der Edition 4 habe ich nicht testen können, da zum Zeitpunkt des Vergleichs mir keine Entwicklungsumgebung zur Verfügung stand, die die neuen Funktionen der Edition 4 unterstützt. Somit kann ich nur einen allgemeinen Überblick über die Unterschiede bieten. Für den Vergleich habe ich die IEC 61131-3 (Edition 3.0) 2013-02 und die IEC 61131-3 (Edition 4.0) 2025-05 verwendet. Wer sich intensiver mit der IEC 61131-3 auseinandersetzen will oder muss, kommt um die Norm allerdings nicht herum.
Der erste Eindruck
Bei dem Vergleich der Inhaltsverzeichnisse fällt auf, dass bei der Edition 3 der Anhang ab Seite 221 beginnt, während die Edition 4 ab Seite 241 den Anhang enthält.
Neu hinzugekommen ist das 6 Seiten umfassende Kapitel 6.9 Synchronization of concurrent execution. Die entsprechenden Unterkapitel verraten, dass es hier um Mutexe und Semaphoren geht.
Das Kapitel 7.2 Instruction List (IL) ist in der Edition 4 nicht mehr enthalten. Somit ist IL (zu Deutsch: AWL) nicht mehr Bestandteil der IEC 61131-3. Das muss aber nicht heißen, dass IL von den Herstellern nicht mehr angeboten wird. Jeder Hersteller kann weiterhin selbst entscheiden, ob er IL in seiner Entwicklungsumgebung anbieten möchte oder nicht.
Oktal-Literale
Neben den Ganzzahl-Literalen (z.B. -43), den Fließkomma-Literalen (z.B. -43.8), den Binar-Literalen (z.B. 2#1101_0110) und den Hexadezimal-Literalen (z.B. 16#E26B) gibt es in der Edition 3 auch die Oktal-Literal (z.B. 8#267). Die Oktal-Literale werden von Edition 4 nicht mehr unterstützt. In der Edition 3 waren die Oktal-Literale schon als deprecated gekennzeichnet.
Datentypen USTRING und UCHAR
Mit den beiden neuen Datentypen USTRING und UCHAR werden nun auch Zeichenketten unterstützt, bei denen jedes Zeichen nach UTF-8 kodiert ist.
Während ein WSTRING / WCHAR als UTF-16 kodiert wird und immer 2 Byte pro Zeichen benötigt, codiert UTF-8 jedes Zeichen mit einer Folge von 1 bis 4 Bytes.
UTF-8, oder Unicode Transformation Format – 8 Bit, ist abwärtskompatibel zu 7-Bit-ASCII, da die ersten 128 Zeichen in UTF-8 und ASCII im englischen Zeichensatz identisch sind. Somit ist jede gültige ASCII-Zeichenkette auch eine gültige UTF-8-Zeichenkette, sodass die meisten für ASCII geschriebenen Programme leicht an UTF-8 angepasst werden können.
UTF-8 ist besonders bei Internetanwendungen stark verbreiten. Sowohl das Internet-Mail Consortium (IMC) als auch das Word Wide Web Consortium (W3C) empfehlen die Verwendung von UTF-8 als einheitliche Codierung.
USTRING– und UCHAR-Literale werden wie folgt angegeben:
x    : USTRING := USTRING#'ABC';
x    : USTRING := U#'ABC';
y    : UCHAR := UCHAR#'A';
y    : UCHAR := U#'A';
LEN_MAX und LEN_CODE_UNIT
In Kapitel 6.6.2.5.12 werden die Character string functions beschrieben. Neu hinzugekommen sind die Funktionen LEN_MAX und LEN_CODE_UNIT.
LEN_MAX gibt die maximale Länge des Strings zurück:
VAR
   x   : STRING[100] := 'Hello';
   y   : WSTRING[100] := WSTRING#'Hello';
   z   : USTRING[100] := USTRING#'Hello';
END_VAR
a := LEN_MAX(x);  // a = 100
b := LEN_MAX(y);  // b = 100
c := LEN_MAX(z);  // c = 100
LEN_CODE_UNIT gibt die Anzahl der von dem String belegten Code-Einheiten zurück. Bei den Datentypen STRING und WSTRING gibt LEN_CODE_UNIT den gleichen Wert zurück wie bei LEN. Bei USTRING kann der Wert von LEN_CODE_UNIT allerdings größer sein als von LEN.
a := LEN_CODE_UNIT(x);  // a = 5
b := LEN_CODE_UNIT(y);  // b = 5
c := LEN_CODE_UNIT(z);  // c = 5
Da die Strings in diesem Beispiel nur ASCII-Zeichen enthalten, liefert LEN_CODE_UNIT für alle drei Datentypen denselben Wert zurück.
Angabe von Zeichen durch Zeichencodes
In einem String- oder Zeichen-Literal können beliebige Zeichen durch den Zeichencode angegeben werden. Dieser wird in Hexadezimaldarstellung nach einem $ in geschweifte Klammern angegeben:
VAR
   x   : STRING := '${9}'; // Steuerzeichen für Tabulator
   y   : WSTRING := WSTRING#'${2211}';  // Zeichen ∑
   z   : USTRING := USTRING#'${1F579}'; // Emoji 'Joystick'
END_VAR
Die bisherige Unterstützung von Zeichencodes mit festen Längen (z.B. ‘$0A’ bzw. “$00C4”) wird weiterhin unterstützt.
Anmerkung: Für die Darstellung des Zeichencodes hätte ich mir gewünscht, dass die übliche Codierung für das jeweilige Zahlensystem verwendet wird; also 16#1F579 statt nur 1F579. Auch wenn es üblich ist, Zeichencodes in hexadezimal anzugeben, so ist doch eindeutiger zu erkennen in welchem Zahlensystem der Zeichencode angegeben wurde.
Die Char Map (Zeichentabelle) unter Windows erlaubt leider nur die Eingabe von Zeichencodes mit max. 4 Ziffern. Die Funktion Einfügen -> Symbol in Word ist deutlich hilfreicher, den passenden Zeichencode zu finden:
Beschrieben werden die String- und Zeichen-Literale im Kapitel 6.3.3 Character string literals.
Datentypkonvertierung
In Bild 11 des Kapitels 6.6.1.6 Data type conversion ist eine Übersicht über die impliziten und expliziten Datentypkonvertierungen zu sehen. Gegenüber der Edition 3 gibt es hier einige Anpassungen und Erweiterungen.
Die Edition 4 definiert einige explizite Datentypkonvertierungen, die in der Edition 3 nicht enthalten sind:
- LWORD_TO_BOOL, DWORD_TO_BOOL, WORD_TO_BOOL und BYTE_TO_BOOL
- UINT_TO_WCHAR und USINT_TO_CHAR
- WSTRING_TO_WCHAR
- WCHAR_TO_UINT
Einige explizite Datentypkonvertierungen wurden in implizite Datentypkonvertierungen geändert:
- STRING_TO_WSTRING
- CHAR_TO_WCHAR
Für die Datentypen USTRING und UCHAR sind einige implizite und explizite Datentypkonvertierungen hinzugekommen:
- UDINT_TO_UCHAR und DWORD_TO_UCHAR
- USTRING_TO_WSTRING, USTRING_TO_STRING und USTRING_TO_UCHAR
- UCHAR_TO_UDINT, UCHAR_TO_LWORD, UCHAR_TO_DWORD, UCHAR_TO_USTRING, UCHAR_TO_WCHAR und UCHAR_TO_CHAR
- WSTRING_TO_USTRING und STRING_TO_USTRING
- CHAR_TO_UCHAR
Datentypkonvertierung zwischen Strings und ARRAY OF BYTE
Neu hinzugekommen sind Funktionen für die Datentypkonvertierung zwischen Zeichenketten und ARRAY OF BYTE. Beschrieben werden diese im Kapitel 6.6.2.5.8 Data type conversion between string types and array of bytes:
- STRING_TO_ARRAY_OF_BYTE, WSTRING_TO_ARRAY_OF_BYTE und USTRING_TO_ARRAY_OF_BYTE
- ARRAY_OF_BYTE_TO_STRING, ARRAY_OF_BYTE_TO_WSTRING und ARRAY_OF_BYTE_TO_USTRING
TRUNC entfällt
Die Funktion TRUNC wird als typisierte und überladene Funktion definiert. In der typisierten Schreibweise wird der Quelldatentyp und der Zieldatentyp im Funktionsnamen angegeben, z.B. LREAL_TRUNC_DINT(x), während bei der überladenen Schreibweise nur der Zieldatentyp angegeben wird, z.B. TRUNC_DINT(x). Der Quelldatentyp wird aus dem übergebenen Parameter ermittelt.
Die Edition 3 hatte noch die Schreibweise ohne die Angabe eines Datentyps definiert, also TRUNC(x). Hierbei musste der Quelldatentyp immer ANY_REAL und der Zieldatentyp immer ANY_INT sein. Diese Schreibeweise war in der Edition 3 schon als Deprecated gekennzeichnet und ist jetzt aus der Edition 4 entfernt worden.
Eigenschaften
Mit der Edition 4 werden (endlich) Eigenschaften definiert. Eigenschaften sind Teil einer CLASS, FUNCTION_BLOCK oder INTERFACE. Damit der Wert einer Eigenschaft gesetzt oder gelesen werden kann, werden Setter- und Getter-Methoden deklariert. Die Deklaration ähnelnd der einer Methode. Allerdings wird statt dem Schlüsselwort METHOD die Schlüsselwörter PROPERTY_GET und PROPERTY_SET verwendet.
PROPERTY_GET PUBLIC nFoo : INT
	;
END_PROPERTY
PROPERTY_SET PUBLIC nFoo : INT
	;
END_PROPERTY
Sind Setter- als auch Getter-Methode definiert, so muss der Datentyp bei beiden Methoden gleich sein.
Für Eigenschaften können die gleichen Zugriffsbezeichner (Access Specifier) wie für Methoden verwendet werden, also INTERNAL, PRIVATE, PROTECTED und PUBLIC. Zusätzlich sind noch die Schlüsselwörter ABSTRACT und FINAL möglich. Wird kein Zugriffsbezeichner angegeben, so ist die Eigenschaft PROTECTED.
Soll eine Eigenschaft nur lesbar sein, so kann auf die Setter-Methode verzichtet werden oder diese wird auf PRIVATE gesetzt.
Eine Eigenschaft kann, wie eine Instanzvariable verwendet werden:
VAR
   fbFoo   : FB_Foo;
   x       : INT := 10;
END_VAR
fbFoo.nFoo := x;  // Schreiben der Eigenschaft
x := fbFoo.nFoo;  // Lesen der Eigenschaft
In der Setter- und Getter-Methode wird der Programmcode hinterlegt, um den Wert der Eigenschaft intern zu verwalten.
FUNCTION_BLOCK FB_Foo
   VAR PRIVATE
      _nFoo : INT;   // Backing variable
   END_VAR
   PROPERTY_GET PUBLIC nFoo : INT
      nFoo := _nFoo;
   END_PROPERTY
   PROPERTY_SET PUBLIC nFoo : INT
      _nFoo := nFoo;
   END_PROPERTY
END_FUNCTION_BLOCK
Beschrieben werden die Eigenschaften im Kapitel 6.6.5.11 Properties.
Assertions
Die Edition 4 definiert im Kapitel 6.6.2.5.17 Assertions die Funktion ASSERT, die den Eingangsparameter IN vom Typ BOOL und keinen Rückgabewert besitzt. ASSERT soll dazu dienen die Gültigkeit von Ausdrücken oder Variablen während der Entwicklung zu überprüfen.
Ist IN bei dem Aufruf TRUE, so hat die Funktion keine Auswirkungen. Ist IN aber FALSE, so soll ASSERT dem Entwickler dieses ‚mitteilen‘. Wie die Mitteilung aussieht, kann jeder Hersteller (der Entwicklungsumgebung) individuell definieren.
Ist die Entwicklung abgeschlossen hat der Aufruf von ASSERT keine Auswirkungen mehr, unabhängig welchen Wert der Eingangsparameter IN besitzt. Wie der Entwicklungsumgebung dieses mitgeteilt wird, kann vom Hersteller festgelegt werden.
Synchronisierung paralleler Programmausführung
Das Kapitel 6.9 Synchronization of concurrent execution ist in der Edition 4 neu hinzugekommen und definiert Objekte und Funktionen um Programmcode, der auf mehrere Tasks aufgeteilt wurde, zu synchronisieren. Eine Synchronisation ist beispielsweise dann erforderlich, wenn z.B. zwei parallele Programme auf eine gemeinsame Variable zugreifen, wobei ein Programm diese Variable auch verändert.
Damit parallellaufende Programme einfacher synchronisierbar sind, werden in der Edition 4 Mutexe und Semaphoren definiert.
Ich werde nur kurz die Funktionen vorstellen, die die Edition 4 definiert. Eine genaue Beschreibung dieser Konzepte wäre an dieser Stelle zu umfangreich, könnte aber Thema eines eigenen Post werden.
Mutex
Mutexe werden üblicherweise zur Modellierung kritischer Abschnitte verwendet. Ein Mutex kann gesperrt und entsperrt werden.
Es wird sowohl ein objektorientierter Ansatz definiert als auch ein Ansatz, der auf Funktionen basiert. Bei dem objektorientierter Ansatz ist die Basis der Funktionsblock MUTEX. Dieser besitzt die folgenden Methoden:
Zusätzlich besitzt MUTEX noch die Eigenschaften LOCK_COUNT und OWNER. OWNER dient dazu einen Wert zu speichern, der die Task identifiziert.
Bei dem Ansatz auf Basis von Funktionen stehen die entsprechenden Funktionen bereit:
- MUTEX_UNLOCK
- MUTEX_LOCK
- MUTEX_TRYLOCK
Semaphore
Auch hier wird sowohl ein objektorientierter Ansatz als auch ein Ansatz, der auf Funktionen basiert definiert. Für den objektorientierten Ansatz wurde der Funktionsblock SEMA definiert. Dieser besitzt die Methoden:
- RELEASE
- ACQUIRE
- TRY_ACQUIRE
Entsprechend wurden auch die folgenden Funktionen festgelegt:
- SEMA_RELEASE
- SEMA_ACQUIRE
- SEMA_TRY_ACQUIRE
Unterstützung BCD-Zahlen ist abgekündigt
In Zukunft werden BCD-Zahlen nicht weiter unterstützt. In der Edition 4 sind die folgenden Funktionen als Deprecated gekennzeichnet:
- IS_VALID_BCD
- BCD_TO_out und in_BCD_TO_out
- TO_BCD_out und in_TO_BCD_out
Fazit
Mein persönliches Highlight ist die Unterstützung von Mutexe und Semaphoren. In Zeiten, wo die CPUs immer mehr Kerne besitzen, müssen auch entsprechende Hilfsmittel bereitgestellt werden, um ein Programm auf mehrere Tasks zu verteilen.
Die restlichen Änderungen würde ich als allgemeine Pflege und Wartung bezeichnen. Gut, das hierbei auch Sachen aus der Norm entfernt werden, wenn diese keine Bedeutung mehr haben. Dazu gehört z.B. das Entfernen von IL als auch der Wegfall der Oktal-Literale.
Es wurden auch einige Punkte genauer definiert, beispielsweise die Frage, ob ARRAY[1..1] und ARRAY[1..0] erlaubt sind und wie sie sich verhalten (Kapitel 6.4.4.5.1).
Ansonsten sehe ich die Unterschiede nicht so umfangreich, wie zwischen Edition 2 (erschienen 2003) und Edition 3 (erschienen 2013).
Allerdings vermisse ich auch einige Punkte. Dazu gehören die lokalen Enums (implicit enumeration), optionale Parameter bei Methoden und Funktionen, als auch die Möglichkeit Methoden zu Überladen.
Im letzten Beitrag zu GreatBlogs ging es um die Resourcen-Optimierung der bereits bestehenden Software. Nachdem ein erster Nutzen des Projektes vorhanden ist, geht es ans Eingemachte. Um das eigentliche Suchthema. Dazu braucht es mehrere Dinge, eines davon ist ein Webcrawler, der nach Inhalten sucht.
Grundlegende Idee
Die Idee des Webcrawler ist, von einem Startpunkt ausgehend, neue Seiten bzw. Aktualisierungen zu finden. Diese wandern in einen Index und werden in weiterer Folge von einem anderen Prozess thematisch kategorisiert und mit einer Relevanz versehen.
Erste Iterationen und Learnings
Theoretisch ist ein Webcrawler eine einfache Sache. Aber wie immer in der Softwareentwicklung trifft Theorie auf Praxis und es gibt Themen, die unerwartet sind, aber auch solche, die bewusst auf später verschoben werden.
Ich wählte einen iterativen Ansatz mit dem Ziel, einen einfachen Crawler funktional zu haben und diesen in weiterer Folge kontinuierlich zu optimieren und um neue Features anzureichern.
Webcrawler v0.1.0
Wie auch das bisherige Backend, ist der Webcrawler mit Go geschrieben. Er gibt sich als gbbot zu erkennen. Ausgehend von einer Startdomain wird diese durchsucht und sowohl die einzelnen Seiten dieser Domain, als auch weitere Domains persistiert.
Im nächsten Schritt werden die neu gefundenen Domains durchsucht – nach demselben Verfahren.
Mit net/http und net/url bring Go alles mit, was man braucht.
Webcrawler v0.2.0
Bereits nach dem dritten Durchlauf gab es eine Unmenge an Domains, die natürlich mit dem Thema Blogs nichts mehr zu tun hat. Im Grunde finden sich alle Social Media-Plattformen und großen Tech-Buden in der Liste. Es muss also doch eine manuelle Freischaltung her.
Es werden zwar weiterhin alle gefundenen Domains gespeichert, allerdings müssen die zu crawlenden Domains manuell aktiviert werden. Das ist zwar aktuell Handarbeit, aber ohne eindeutige Erkennung, dass es sich hierbei um ein Blog handelt, gibt es keine andere Möglichkeit.
Der bisherige Nachteil: Das Parsen und Verfolgen ist nicht ganz billig.
Webcrawler v0.3.0
Um den gesamten Parsing-Prozess zu verbessern, wird nun zu Beginn überprüft, ob es eine sitemap.xml gibt. Wenn ja, wird diese herangezogen. Sitemap-Index-Dateien werden genauso unterstützt, wie Standard-Sitemap-Dateien.
In diesem Fall werden nur diese Seiten evaluiert und lediglich neue gefundene Domains mitgeschrieben, aber keinen weiteren Links gefolgt.
Das ist in Summe wesentlich performanter bzw. speichereffizienter, als sich alle gecrawlten Seiten zu merken und beim Durchsuchen des Trees zu prüfen, ob der gefundene Link bereits überprüft wurde.
Für die Arbeit mit den Sitemap-Dateien setze ich auf gopher-parse-sitemap. Die Lib ist schon älter, aber die Abhängigkeiten sind überschaubar und am Sitemap-Standard hat sich nichts weiter geändert, also kein Problem.
Learnings
Defensives Programmieren und so, ihr kennt das.
Aber das, was der Crawler da so findet, ist teilweise schon sehr grenzwertig. Auf jeden Fall muss er mit zahlreichen “Edge-Cases” umgehen können:
- Veraltete Links in Form von HTTP statt HTTPS
- Client-Links
- Malformed Links
- Dead-Links
- Nicht mehr existierende Domains
Und da gibt es noch weitere Fälle. Manchmal würde ich tatsächlich gerne einige Domaininhaber*innen anschreiben und ihnen einen Liste von unsinnigen Links mitteilen – aber das ist eine völlig andere Geschichte.
Weitere Verbesserungen
Natürlich gibt es noch viel zu tun, denn der Webcrawler ist bei weitem noch nicht optimal. Das sind die Themen, die als nächstes anstehen.
- Berücksichtigung robots.txt
- Einschränkung Sprache (vorerst Deutsch)
- Berücksichtigung /slashes
Danach wird es in Richtung “Themen-Erkennung” der Beiträge gehen.
Bei Interesse also bitte gerne bei GreatBlogs vorbeischauen.
Der Beitrag GreatBlogs – Ein Webcrawler entsteht erschien zuerst auf Norbert Eder.
In GreatBlogs – Technik-Umschwung am Frontend habe ich schon Änderungen an der Technologie-Auswahl angekündigt. Ein Teil dessen wurde mittlerweile auch umgesetzt. Schauen wir uns die Änderungen im Detail an.
Feed-Generierung
Der Beitrags-Feed wurde im ersten Schritt mit Vue.js realisiert. Das ist nett, aber im Grunde ergibt das dann doch bei jedem Aufrung eine Query gegen die Datenbank. Nun ist es nicht so relevant, auf Sekundenbasis neue Beiträge tatsächlich auch zu listen. Die Entscheidung, den Feed-Reader zu generieren und statisch auszuliefern, war daher sehr einfach.
Go bietet eine Templating-Engine an, die für diese Zwecke perfekt ist. Also habe ich Templates und Styles entworfen und per Go hole ich die relevanten Daten, jage sie durch die Templating-Engine und fertig ist das Ergebnis.

Da ohnehin alle 30 Minuten per Cronjob die registrierten Feeds aktualisiert wird, wird im Zuge dessen auch die Feed-Seite im Anschluss neu generiert.
Blogger Auflistung
In dieselbe Kerbe schlägt die neue Blogger-Auflistung. Diese zeigt alle registrierten Blogs an. Da sich diese noch seltener ändert, reicht eine Aktualisierung einmal am Tag. Auch dies wird über einen Cronjob durchgeführt.
RSS-Feeds
Wie im Screenshot oben zu sehen ist, werden mittlerweile auch RSS-Feeds angeboten. Hierfür gibt es eine praktische Go-Bibliothek: Gorilla Feeds.
Mit dieser Bibliothek können Atam bzw. RSS 2.0 Feeds sehr einfach erzeugt werden. Die Einbindung von Feeds ist damit ein Kinderspiel.
Hilfsmittel
Es gibt ja neben der technischen Aspekte weitere Themen zu bedienen: Usability, Accessability, Performance und natürlich auch IT-Themen. Das Einrichten und Konfigurieren von Cronjobs oder des Webservers zum Beispiel. Hier ein paar Links zu hilfreichen Webseiten:
Der Beitrag GreatBlogs – Ressourcen-Optimierung, RSS und Co. erschien zuerst auf Norbert Eder.
Go bietet in der Standardlibrary gleich eine Templateengine an. Damit können sowohl beliebige Textdateien, als auch HTML-Dateien per Templates generiert werden. Das ist eine ziemlich coole und hilfreiche Geschichte.
Konkret sprechen wir von den Standard-Libraries html/template und text/template. Für meine Arbeit mit GreatBlogs habe ich html/template verwendet.
Das Templating ist relativ easy. Hier ein Beispiel:
<div class="grid bloggers">
    {{ range .Bloggers }}
	<div class="card" data-category="{{ .Category }}">
		<a href="{{ .URL }}" class="card-title">{{ .Title}}</a><br/>
		<div class="card-info">
			<span>{{ translate .Category }}</span>
		</div>
	</div>
	{{ end }}
</div>
Dazu das Datenkonstrukt, das an die Templating-Engine übergeben wird:
var feedData = FeedData{
	Articles:       articles,
	Bloggers:       bloggers,
	BloggersCount:  len(bloggers),
	WaitingBlogs:   count,
	GenerationDate: time.Now(),
}
Im obigen Beispiel werden articles, bloggers etc. aus einer Datenbank gelesen und damit die Datenstruktur aufgefüllt. Damit das gesamte Templating funktioniert, kann man diesen Code heranziehen:
templateFilename := path.Base("index.tmpl")
tmpl, err := template.New(templateFilename).ParseFiles(templateFilename)
Hier ist darauf zu achten, dass sowohl für New, als auch für ParseFiles derselbe Dateiname verwendet wird, da es sonst zu einer Ausnahme kommt.
In weiterer Folge ist dann der Generierungsvorgang anzustarten:
var f *os.File
f, err = os.Create("index.html")
checkError(err)

err = tmpl.Execute(f, feedData)
checkError(err)

err = f.Close()
checkError(err)
Der Vollständigkeit halber die Funktion checkError:
func checkError(err error) {
	if err != nil {
		panic(err)
	}
}
Das war es im Grunde auch schon.
Detailliertere Informationen bzw. zusätzliche Funktionalitäten, sind in der Dokumentation der Standardbibliothek zu finden.
Der Beitrag HTML-Dateien mit Go generieren erschien zuerst auf Norbert Eder.
Es tut sich was bei GreatBlogs. Ich hatte ja im Beitrag GreatBlogs – Projekt und Technik geschrieben, dass ich großteils einen neuen Dev-Stack einsetze. Wie das dann so ist, kann sich sehr schnell etwas daran ändern und das wird es auch. Den Grund und noch weitere Themen gibt es in diesem Beitrag.
Statische Seiten brauchen weniger Ressourcen
Er war doch schon nett, der Gedanke, ein neues JavaScript-UI-Framework zu verwenden. Bei genauerer Überlegung, nach etwas Einarbeitungszeit und auch einigen Gesprächen bin ich nun an dem Punkt angelangt, dass ich das nicht brauche.
Vielmehr möchte ich auf möglichst viel JavaScript verzichten. Ein Großteil der Seiten soll auch ohne JavaScript auskommen können. Welche Gründe sprechen dafür?
- Geringerer Ressourcenverbrauch
- Läuft auch bei ausgeschaltenem JavaScript
- Besseres Caching
- Geringere Komplexität

Als Beispiel ist der Artikel-Feed zu nennen. Dieser zeigt, bis wieder neue Artikel verfügbar sind, immer dieselben Informationen an. Sie müssen nicht immer wieder aufs Neue aus der Datenbank geholt werden. Mit einer Templating Engine lässt sich die Feedseite bei neuen Artikeln einmal generieren. Weitere Zugriffe auf die Datenbank sind nicht notwendig. Mit zunehmender Besucheranzahl macht sich das bemerkbar.
Da im Hintergrund in regelmäßigen Abständen eine Artikelabfrage läuft, ist auch ein entsprechender Triggerpunkt vorhanden.
Entsprechend wurde der Feed nun auch umgebaut.
Go bietet bereits in der Standardbibliothek eine Template-Engine an, mit der sehr schnell und einfach HTML-Seiten (aber auch normale Text-Dateien) generiert werden können.
Das Ergebnis läuft ab sofort unter read.greatblogs.org. Noch setzt der Kategorie-Filter auf JavaScript, aber auch dieser wird in Bälde ersetzt.
Die nächsten technischen Schritte?
search.greatblogs.org läuft nun schon noch mit der Vue.js-App, aber auch hier wird es bald zu Änderungen kommen. Und dann geht es langsam aber sicher in Richtung Suchmaschine. Vorher gibt es noch ein paar Features für den Feed, aber dann geht es ans Eingemachte.
Bisherige Learnings?
Von Zeit zu Zeit ist es gut, sich in einen gänzlich neuen Tech-Stack zu werfen. Man lernt so unheimlich viel. Hier ein kurzer Ausschnitt:
- Golang: WebAPI, Templating, Datenbankzugriffe
- Linux Administration: Services, Automatisierung, Metriken, Logging
- PostgreSQL: Administration, Backup
Auch wenn einige Dinge vorher schon bekannt waren: Es ist die Anwendung, die Herausforderung an der man wächst. Ein großes Stichwort ist auch Automatisierung. Das nimmt unheimlich viel (dumpfe) Arbeit ab und hilft zudem Fehler zu vermeiden.
Ich bin mir sicher, da kommt noch Vieles hinzu …
Der Beitrag GreatBlogs – Technik-Umschwung am Frontend erschien zuerst auf Norbert Eder.
I took over two more roles in the company for a while. Besides being a software engineer, I'm also responsible for sharing knowledge, raising awareness, and supporting projects regarding quality assurance and application security. The latter is the topic for which I'm writing these lines.
Package Vulnerabilities
In Visual Studio, NuGet is checking the referenced packages for vulnerabilities, which is a great new feature. We now see a notification in VS if a referenced or transitive package has vulnerabilities. We can also run a dotnet CLI command to see if a package has vulnerabilities, which is also great. The CLI command can be used in build pipelines to check for vulnerabilities during build time automatically. Awesome.
For a while now, our company has been using a separate tool that scans our repositories during code changes on the main branches and PRs. This tool does not use NuGet but reads all files that have NuGet references, such as project files and other package reference files. It checks the package names and version against CVE Databases for published vulnerabilities and reports them directly to us via Slack notifications. We can also create Jira tickets directly within the tool and assign them to the right project and the right person to solve the problem. Also, this tool is scanning transitive packages, which is cool in general.
Vulnerable Transitive Packages
In the previous section, I mentioned transitive packages two times. These are packages referenced by the packages you are referencing on your projects directly—they are kind of second—or third-level references.
What's the problem with those?
Counter question:
Who would you solve vulnerabilities in that kind of package?
Exactly! That's the problem!
Vulnerabilities in directly referenced packages can be updated really simply. Just update to a patched package version, and the problem is solved, right?
In most cases, CVE databases list vulnerabilities that have already been patched. Otherwise, you would make a vulnerability publicly known that can't be patched, which is dangerous for the user of a vulnerable package. The tool we use and the NuGet audit feature check against CVE databases.
Vulnerabilities that are not listed in those databases cannot be found using those tools. These are called Zero-Day vulnerabilities.
Since transitive packages are not directly referenced, you can't easily increase the version number to a patched version.
We need a solution for it.
Central Package Management (CPM)
A quick research (=googling) points me to Central Package Management for NuGet. This is a little bit hidden feature in the .NET ecosystem. It is supported by SDK-style projects in VS, VS Code, and the dotnet CLI.
Imagine you can manage your packages and package versions in a central place for all the projects in your solution. This solves several problems:
- All projects use the same package version.
- You can manage the package version in one place.
Projects than reference the packages without a version number. VS supports it, NuGet supports it, and the dotnet CLI supports it. On the other hand, when I wrote it is a kind of hidden feature, I mean it like this. You can't change to CPM in VS. You can't create a file in VS to manage your packages centrally.
CPM is basically yet another XML file called Directoy.Packages.props that need to be located in the same folder as your solution file.
What you can do to create such a file is to create a new XML file and rename it to Directoy.Packages.props, google for the docs, and add the base structure of the XML into the file. Or you can use an easier way using the dotnet CLI to create such a file:
dotnet new packagesprops
Type dotnet new list to find the file in the list of templates:

This will create a file like this:
<Project>
  <PropertyGroup>
    <!-- Enable central package management, https://learn.microsoft.com/en-us/nuget/consume-packages/Central-Package-Management -->
    <ManagePackageVersionsCentrally>true</ManagePackageVersionsCentrally>
  </PropertyGroup>
  <ItemGroup>
  </ItemGroup>
</Project>
Even if the NuGet explorer supports this file, you will probably need to touch it from time to time. Therefore, I'd propose to add it to a solution folder in VS to have quick access to it while developing. Usually I create a solution folder called _default or _shared to every solution that contains files like this, or the .gitignore or whatever file that is not part of any projects and needs to be edited from time to time.
Now the work starts, and you should add all the packages referenced in your projects within this file without having duplications. Duplications lead to NuGet errors when adding references or at build time.
<Project>
  <PropertyGroup>
    <ManagePackageVersionsCentrally>true</ManagePackageVersionsCentrally>
  </PropertyGroup>
  <ItemGroup>
    <PackageVersion Include="Aspire.Hosting.AppHost" Version="9.1.0" />
    <PackageVersion Include="CodeHollow.FeedReader" Version="1.2.6" />
    <PackageVersion Include="coverlet.collector" Version="6.0.4" />
    <PackageVersion Include="Duende.IdentityServer" Version="7.2.0" />
    <PackageVersion Include="EfCore.SchemaCompare" Version="9.0.0" />
    <PackageVersion Include="FluentAssertions" Version="8.2.0" />
    <PackageVersion Include="Microsoft.AspNetCore.Authentication.Google" Version="9.0.3" />
    <PackageVersion Include="Microsoft.AspNetCore.Authentication.OpenIdConnect" Version="9.0.3" />
    <PackageVersion Include="Microsoft.EntityFrameworkCore.Design" Version="9.0.3" />
    <PackageVersion Include="Microsoft.EntityFrameworkCore.SqlServer" Version="9.0.3" />
You can do this manually on small projects. Unfortunately, the dotnet CLI or VS does not support automatically converting all NuGet references in a solution to CPM.
As an alternative, I propose to use a dotnet tool called centralisedpackageconverter (more information) that you can install with a single command:
dotnet tool install CentralisedPackageConverter --global
After it's installed, run it with the following command and it does its job:
central-pkg-converter .
What about vulnerabilities in transitive packages?
Transitive Pinning
If you run the previous command with the option -t or --transitive-pinning, it adds an XML tag to the PropertyGroup that I was looking for:
<Project>
  <PropertyGroup>
    <ManagePackageVersionsCentrally>true</ManagePackageVersionsCentrally>
    <CentralPackageTransitivePinningEnabled>true</CentralPackageTransitivePinningEnabled>
  </PropertyGroup>
  <ItemGroup>
    <PackageVersion Include="Aspire.Hosting.AppHost" Version="9.1.0" />
This setting enables transitive pinning with CPM. This allows you to add entries for transitive packages to pin them to a specific version.
For example: You are using the latest version of a package 4.0.0 that references a transitive vulnerable package 3.3.13 that is already patched in version 3.3.14 . You cannot update the direct reference to solve the problem because you have already used the latest version of the directly referenced package. You can add an entry for the transitive package and set it to version 3.3.14. This way, you are pinning that transitive package to a patched later version. This package doesn't need to be referenced in any project. When NuGet tries to solve the transitive references, it finds the entry and loads the patched package.
This will solve the problem with vulnerable transitive packages.
Again, VS and NuGet are supporting this feature in general. You can still use VS and the NuGet package explorer to manage and update your packages. If you reference a new package to a project, it will add the reference without a version number to the project file when it comes to migrating to CPM.
Conclusion
CPM is great for managing your package versions in a central place. Sure, you can do it with the NuGet package explorer on the solution level as well, but it actually sets the package versions on each project file, which will work until a team member updates a package on the project level instead of the solution level. CPM is always on the solution level.
CPM also solves the security problem of vulnerable transitive package references by using transitive pinning, which allows you to update a transitive package reference to a patched version.
Lastly
One last thing to mention: If you really want to use different versions of packages within your solution's projects, you cannot use CPM. CPM and regular NuGet references can't be mixed yet. Managing the package versions centrally really means for all projects in your solution.
Mit GreatBlogs.org habe ich ein kleines, feines privates Projekt gestartet. Ziel wird die Durchsuchbarkeit von privaten Blogs sein. Einfach die vielen tollen Beiträge da draußen, unabhängig von den großen Datenkraken aufzufinden. Ohne Werbung und ohne Daten einzusammeln, um sie dann zu verkaufen. Hier werde ich das Projekt aus der technischen Sicht begleiten.
Ankündigungen (wie die initiale Ankündigung von BlogSearch) finden auf C0D1 Online statt. Hier geht es rein um die technischen Aspekte.
Der Tech-Stack
Für jedes Projekt muss man sich für einen Tech-Stack entscheiden. Oftmals greift man zu dem, das man gut beherrscht um schnell Fortschritte zu machen. Für mich steht aber auch im Vordergrund, Neues zu lernen und eben einen Stack zu verwenden, den ich so noch nicht hatte.
Backend
Ohne viele Worte gleich eine Schnellübersicht:
- Linux
- PostgreSQL
- Golang
- nginx
Seit meinem Umstieg auf Linux muss klarerweise alles auf diesem Betriebssystem laufen. Auch wenn ich vorher schon teilweise plattformunabhängige Entwicklungswerkzeuge eingesetzt habe, gibt es doch hie und da einige Lücken. Aber die Herausforderung liegt nicht in der Programmiersprache oder der Datenbank, sondern bei administrativen Themen auf der Linux-Seite.
Alle paar Jahre legte ich Cronjobs an oder musste ein Service konfigurieren. Aber das war einfach zu selten. De facto muss ich mir alles wieder neu raussuchen und anlernen. Das dauert natürlich, aber man lernt ja schnell und das freudige Gefühl, wenn es dann auch tatsächlich funktioniert ist nachwievor eine schöne Sache.
Für das Web API verwende ich das Gin Web Framework. Es bietet eigentlich alles, was man braucht und ist zudem Middleware-fähig und somit einfach und vielfältig zu konfigurieren.
Auch wenn ich schon einige Kleinigkeiten mit Go gemacht habe, steht eine größere Real-World-Anwendung noch aus. D.h. es gibt auch diesbezüglich einiges zu lernen, vor allem, wenn es dann um diverse Wartungs- und Diagnose-Aufgaben geht.
Frontend
Auf der Clientseite habe ich mich für Vue.js mit Vite entschieden. Einen speziellen Grund hierfür gibt es nicht. Es erscheint mir durchaus ausgereift zu sein, bietet zahlreiche Unterstützungen. Für dieses Projekt wollte ich nicht wieder zu Angular greifen, sondern eine neue Variante kennenlernen.
Ob die Entscheidung gut war, wird sich zeigen.
Wie geht es weiter?
Im ersten Schwung ging es darum, eine erste Infrastruktur aufzusetzen und einen Start zu liefern. Der Start bedeutet Mitmachende Blogs zu finden, um einen guten Datengrundstock für die ersten Features zu liefern.
Einfachere Features werden bald folgen und werden dann durchaus den ersten Nutzen für alle Websitebesuchenden bringen.
Infrastrukturell müssen einige Aufgaben automatisiert werden. Vor allem die Releaseerstellung und das anschließende Deployment. Hier wird dann wohl Docker o.Ä. zum Einsatz kommen.
Danach geht es an die eingemachten Themen einer Suche und dann wird da wohl noch die eine oder andere Technologie hinzukommen.
Der Beitrag GreatBlogs – Projekt und Technik erschien zuerst auf Norbert Eder.
This is more of a “Today-I-Learned” post and not a “full-blown How-To article.” If something is completely wrong, please let me know - thanks!
Fuslogvw.exe – Wait, What? Ohhh!
This might sound like a blast from the .NET past – but this little tool actually saved our day during a real customer issue.
Here’s the situation: We had a good old .NET Framework app (yes, still alive and kicking!) that worked perfectly everywhere – except on a few mysterious machines. Right on startup: Crash. No clear error, just some DLL failing to resolve its dependencies.
But! The error message did mention something called Fuslogvw.exe (Docs) – a tool I had never actually used before. So let’s take a look.
What does Fuslogvw.exe do?
In short: it logs how assemblies are loaded, where they were found, and – more importantly – where they weren’t.
If you have Visual Studio installed, you can start it via the developer prompt and type: fuslogvw.
The tool itself looks like it hasn’t changed since the Windows XP days, but hey – it gets the job done:

At the end, you get handy little reports like this one:
*** Assembly Binder Log Entry  (3/5/2007 @ 12:54:20 PM) ***

The operation failed.
Bind result: hr = 0x80070002. The system cannot find the file specified.

Assembly manager loaded from:  C:\WINNT\Microsoft.NET\Framework\v2.0.50727\fusion.dll
Running under executable  C:\Program Files\Microsoft.NET\FrameworkSDK\Samples\Tutorials\resourcesandlocalization\graphic\cs\graphicfailtest.exe
--- A detailed error log follows.

=== Pre-bind state information ===
LOG: DisplayName = graphicfailtest.resources, Version=0.0.0.0, Culture=en-US, PublicKeyToken=null
 (Fully-specified)
LOG: Appbase = C:\Program Files\Microsoft.NET\FrameworkSDK\Samples\Tutorials\resourcesandlocalization\graphic\cs\
LOG: Initial PrivatePath = NULL
LOG: Dynamic Base = NULL
LOG: Cache Base = NULL
LOG: AppName = NULL
Calling assembly : graphicfailtest, Version=0.0.0.0, Culture=neutral, PublicKeyToken=null.
===

LOG: Processing DEVPATH.
LOG: DEVPATH is not set. Falling through to regular bind.
LOG: Policy not being applied to reference at this time (private, custom, partial, or location-based assembly bind).
LOG: Post-policy reference: graphicfailtest.resources, Version=0.0.0.0, Culture=en-US, PublicKeyToken=null
LOG: Attempting download of new URL file:///C:/Program Files/Microsoft.NET/FrameworkSDK/Samples/Tutorials/resourcesandlocalization/graphic/cs/graphicfailtest.resources.DLL.
LOG: Attempting download of new URL file:///C:/Program Files/Microsoft.NET/FrameworkSDK/Samples/Tutorials/resourcesandlocalization/graphic/cs/graphicfailtest.resources/graphicfailtest.resources.DLL.
LOG: Attempting download of new URL file:///C:/Program Files/Microsoft.NET/FrameworkSDK/Samples/Tutorials/resourcesandlocalization/graphic/cs/graphicfailtest.resources.EXE.
LOG: Attempting download of new URL file:///C:/Program Files/Microsoft.NET/FrameworkSDK/Samples/Tutorials/resourcesandlocalization/graphic/cs/graphicfailtest.resources/graphicfailtest.resources.EXE.
LOG: All probing URLs attempted and failed.
And in our case, that was exactly what we needed: One of the machines had an old, incorrect DLL sitting in the Global Assembly Cache (GAC) – something that shouldn’t have been there at all. It got loaded, messed everything up, and was a pain to track down… until Fuslogvw pointed us right to it.
What about .NET Core / modern .NET?
Fuslogvw won’t help you there – things work differently in the new world. But there are other tools like dotnet trace that can help with similar issues.
Hope this helps!
This is more of a “Today-I-Learned” post and not a “full-blown How-To article.” If something is completely wrong, please let me know - thanks!
Last week I had to upgrade an old SharePoint Framework (SPFX) project, and surprisingly, the process was smoother than expected.
For those unfamiliar, SPFX is a framework for building extensions for SharePoint Online. Here is an example of an SPFX extension: Microsoft Docs.
The upgrade approach I took was a combination of:
- Creating a completely new SPFX project to see the latest project structure.
- Using the M365 CLI to generate a step-by-step upgrade guide.
Overall, it turned out to be a pretty smooth experience and the CLI was quite new for me, and I wanted to document it here.
Hope this helps!
ASP.NET Core Policies
ASP.NET Core policies provide a structured and reusable way to enforce authorization rules across your application.
The built-in features are very flexible, but we had trouble with one scenario - but depending how you write your “Requirements” this might even be possible with the built-in features.
Our approach was to use the authorization service to check certain policies manually - which works quite good!
The Challenge: Combining Policies with OR Logic
In one of our API use cases, we needed to allow access either for certain clients (e.g., specific admininstrative applications) or for certain users in the database. The two approaches differ:
- Client Authorization: This is relatively straightforward and can be handled using the built-in
RequireClaim approach.
- User Authorization: This required checking database permissions, meaning a custom authorization requirement was necessary.
Since both authorization paths are valid, they need to be evaluated using OR logic: if either condition is met, access should be granted.
Solution: Using the Authorization Service for Manual Policy Checks
Instead of relying solely on [Authorize] attributes, we can leverage the IAuthorizationService to manually check policies in our code.
Step 1: Define the Authorization Policies
In Program.cs, we define multiple policies:
builder.Services.AddAuthorization(options =>
{
    options.AddPolicy(KnownApiPolicies.AdminApiPolicyForServiceAccount, policy =>
    {
        policy.RequireClaim("scope", "admin-client");
    });
    options.AddPolicy(KnownApiPolicies.AdminApiPolicyForLoggedInUserAdministrator, policy =>
    {
        policy.Requirements.Add(new DbRoleRequirement(Custom.UserAdminInDatabase));
    });
});
Step 2: Manually Validate User Authorization
Using IAuthorizationService, we can manually check if the user meets either of the defined policies.
private async Task<AuthorizationResultType> ValidateUserAuthorization()
{
    var user = User;

    var serviceAccountAuth = await _authorizationService.AuthorizeAsync(user, KnownApiPolicies.AdminApiPolicyForServiceAccount);
    if (serviceAccountAuth.Succeeded)
    {
        return AuthorizationResultType.ServiceAccount;
    }

    var userAuth = await _authorizationService.AuthorizeAsync(user, KnownApiPolicies.AdminApiPolicyForLoggedInUserAdministrator);
    if (userAuth.Succeeded)
    {
        return AuthorizationResultType.LoggedInUser;
    }

    return AuthorizationResultType.None;
}
Step 3: Apply the Authorization Logic in the Controller
[HttpGet]
public async Task<ActionResult<...>> GetAsync()
{
    var authResult = await ValidateUserAuthorization();

    if (authResult == AuthorizationResultType.None)
    {
        return Forbid(); // Return 403 if unauthorized
    }

    using var contextScope = authResult switch
    {
        AuthorizationResultType.ServiceAccount => // ... do something with the result,
        AuthorizationResultType.LoggedInUser => // ...,
        _ => throw new UnauthorizedAccessException()
    };

    return Ok(_userService.GetUsers(...));
}
Recap
We use the IAuthorizationService.AuthorizeAsync method to check multiple policies and depending on the outcome, we can handle it depending on our needs.
This approach retains the same overall structure as the “default” policy-based authorization in ASP.NET Core but provides more flexibility by allowing policies to be evaluated dynamically via the service.
Keep in mind (as mentioned at the beginning): This is just one way of handling authorization. As far as we know, it works well without drawbacks while offering the flexibility we need.
General
An Azure Resource Group is more or less one of the first things you need to create under your Azure subscription because most services need to be placed in an Azure Resource Group.
A resource group has a name and a region, and it feels just like a “folder,” but it’s (sadly) more complicated, and I want to showcase this with App Service Plans.
What is an App Service Plan?
If you run a Website/Web Service/Web API on Azure, one option would be Web Apps-Service.
If you are a traditional IIS developer, the “Web Apps-Service” is somewhat like a “Web Site” in IIS.
When you create a brand-new “Web Apps-Service,” you will need to create an “App Service Plan” as well.
The “App Service Plan” is the system that hosts your “Web App-Service.” The “App Service Plan” is also what actually costs you money, and you can host multiple “Web App-Services” under one “App Service Plan.”
All services need to be created in a resource group.
Recap
An “App Service Plan” can host multiple “Web App-Services.” The price is related to the instance count and the actual plan.
Here is a screenshot from one of our app plans:

So far, so good, right?
A few months later, we created another resource group in a different region with a new app plan and discovered that there were more plans to choose from:

Especially those memory-optimized plans (“P1mV3” etc.) are interesting for our product.
The problem
So we have two different “App Service Plans” in different resource groups, and one App Service Plan did not show the option for the memory-optimized plans.
This raises a simple question: Why and is there an easy way to fix it?
Things that won’t work
First, I created a new “App Service Plan” within the same resource group as the “old” “App Service Plan,” but this operation failed:

Then I tried to just move the existing “App Service Plan” to a new resource group, but even then, I could not change the SKU to the memory-optimized plan.
The “reason” & solution
After some frustration - since we had existing services and wanted to maintain our structure - I found this documentation site.
Scale up from an unsupported resource group and region combination
If your app runs in an App Service deployment where Premium V3 isn’t available, or if your app runs in a region that currently does not support Premium V3, you need to re-deploy your app to take advantage of Premium V3. Alternatively newer Premium V3 SKUs may not be available, in which case you also need to re-deploy your app to take advantage of newer SKUs within Premium V3. …
It seems the behavior is “as designed,” but I would say that the design is a hassle.
The documentation points out two options for this, but in the end, we will need to create a new app plan and recreate all “Web App-Services” in a new resource group.
Lessons learned?
At first glance, I thought that “resource groups” acted like folders, but underneath—depending on the region, subscription, and existing services within that resource group—some options might not be available.
Bummer, but hey… at least we learned something.
This is more of a “Today-I-Learned” post and not a “full-blown How-To article.” If something is completely wrong, please let me know - thanks!
A customer inquiry brought the topic of “WinINet” and “WinHTTP” to my attention. This blog post is about finding out what this is all about and how and whether or not these components are related to the HttpClient of the .NET Framework or .NET Core.
General
Both WinINet and WinHTTP are APIs for communication via the HTTP/HTTPS protocol and Windows components. A detailed comparison page can be found here.
WinINet
WinINet is intended in particular for client applications (such as a browser or other applications that communicate via HTTP).
In addition to pure HTTP communication, WinINet also has configuration options for proxies, cookie and cache management.
However, WinINet is not intended for building server-side applications or very scalable applications.
WinHTTP
WinHTTP is responsible for the last use case, which even runs a “kernel module” and is therefore much more performant.
.NET HttpClient
At first glance, it sounds as if the HttpClient should access WinINet from the .NET Framework or .NET Core (or .NET 5, 6, 7, …) - but this is not the case.
Instead:
The .NET Framework relies on WinHTTP. Until .NET Core 2.1, the substructure was also based on WinHTTP.
Since .NET Core 2.1, however, a platform-independent “SocketsHttpHandler” works under the HttpClient by default.
However, the HttpClient can partially read the Proxy settings from the WinINet world.
The “WinHttpHandler” is still available as an option, although the use case for this is unknown to me.
During my research, I noticed this GitHub issue. This issue is about the new SocketsHttpHandler implementation not being able to access the same WinINet features for cache management. The topic is rather theoretical and the issue is already several years old.
Summary
What have we learned now? Microsoft has implemented several Http stacks and in “modern” .NET the HttpClient uses its own handler.
Hope this helps!
Eric Evans published the original book about DDD, “Domain-Driven Design, Tackling Complexity in the Heart of Software, ” in 2004. It took more than 10 years to become a thing and even longer to not be considered “exotic” and “a theoretical but unnecessarily complicated paradigm.”
In 2024, DDD can be considered a commodity in the sense of the word defined in Wardley mapping (at least in Europe). There are conferences with thousands of attendees, new books every year, and tech start-ups looking for engineers with DDD experience or at least awareness. As usual in this young industry full of people packing old ideas in shiny new envelopes and selling them for the big bucks, one question returns: “Is DDD a hype?”.
The picture in the header of this post is from computerhistory.org (thank you). It shows the first Colossus operational at Bletchley Park in 1944. Computers and information technology, in general, have changed since that picture, going from punched cards to cloud computing and AI. The key booster was the Internet, paving the way to “Space, the final frontier… to boldly go where no man (and women and everything in-between) has gone before” (Star Trek: Enterprise).
When I became a software developer in 2003, the usual jobs were automating manual processes, connecting servers, and using the web to communicate with users instead of snail mail and fax. (Ok, in Germany, both are still heavily used  .)
.)
The main goal was to ease the sellers’ jobs and day-to-day lives. SaaS was just defined. Software was used to automate existing manual processes, hence slow processes. Understanding the business domain was not important because the innovation was done on the technical level. Engineers could lay back and let product managers and designers tell you everything they need from a computer to execute —ideally, as an ordered list, in very exact words  .
.
Then, mobile phones became the rulers of our lives. They were more powerful than personal computers, not only because of their RAM and CPU but also because they were portable. They allowed us to take and share pictures and videos, ask for timetables, buy tickets, and look for weather changes while moving. 24 hours a day. The differentiators of a product changed from “how usable” to “how easy to use” and “how fast it evolves”. The colour of a button became irrelevant compared to the whole user experience and the user’s perception of a product.
Today, anyone with a logical brain can learn and write software. Infrastructure is cheap and easily accessible without a substantial up-front investment. Being on-demand, companies can run short-term experiences without significant risks. Understanding tech is no longer a key differentiator. Understanding the User became the key to sustainable market shares.
After the phase of simply automating existing processes followed at work or to achieve a goal, the game has changed. Engineers must not only ensure that the software they create works and is maintainable (readable and extendable) with an acceptable effort, but they also must not ignore the “world outside of bits and bytes” anymore. Product development needs to be collaborative work. Adapting to new market needs, trying new ways, and getting fast feedback are more important than ever. These experiments are not about technology (the users don’t really care if we use MySQL or MongoDB) but about speeding up the users to get their jobs done.
“Are you telling me I can’t build software that solves users’ needs without DDD?! ” That’s a valid remark; I am not. Developers have always written software to solve someone’s goals, even pet projects.
The need for collaboration changes the rules of the game. It changes how we work, understand the underlying problem, and decide what to build (and what not). During collaborative discovery, the user leaves the desks of the product managers and designers and joins our commonly maintained miro boards. DDD enables us to represent the domain understanding in our software and organisation. The strategic design of DDD gives us options for the future without knowing what the future will look like. The tactical patterns give us strong weapons against continuously deteriorating software. DDD unveils how useless questions like “How small is a micro-service?” are. It eliminates the (again) useless answer “It depends”. The answer depends on the context. When asked in a digital context, the answer must always be put in the context of the user’s needs and the socio-technical organisation. It does not depend on the mood of the consultant.
Unlike the usual cases, when an old solution is hyped again in a refurbished version, DDD is not a paradigm invented, forgotten and resurrected after years. It is a paradigm for solving problems in a way that has always been valid, but until a few years ago, it has not been considered important enough. It has needed years of businesses wasting money, engineers feeling the pain while handling “big bulls of mud” and anger because “the requirements have changed” and the technical decisions of the past became a heavy blocker instead of an enabler.
 Event storming with domain experts
This is more of a “Today-I-Learned” post and not a “full-blown How-To article.” If something is completely wrong, please let me know - thanks!
A customer notified us that our product was slowing down their Microsoft Office installation at startup.
Everything on our side seemed fine, but sometimes Office took 10–15 seconds to start.
After some research, I stumbled upon this: Performance analyzer for Microsoft Defender Antivirus.
The best part about this application is how easy it is to use (as long as you have a prompt with admin privileges). Simply run this PowerShell command:
New-MpPerformanceRecording -RecordTo recording.etl
This will start the recording session. After that, launch the program you want to analyze (e.g., Microsoft Office). When you’re done, press Enter to stop the recording.
The generated recording.etl file can be complex to read and understand. However, there’s another command to extract the “Top X” scans, which makes the data way more readable.
Use this command to generate a CSV file containing the top 1,000 files scanned by Defender during that time:
(Get-MpPerformanceReport -Path .\recording.etl -Topscans 1000).TopScans | Export-CSV -Path .\recording.csv -Encoding UTF8 -NoTypeInformation
Using this tool, we discovered that Microsoft Defender was scanning all our assemblies, which was causing Office to start so slowly.
Now you know: If you ever suspect that Microsoft Defender is slowing down your application, just check the logs.
Note: After this discovery, the customer adjusted their Defender settings, and everything worked as expected.
Hope this helps!
This is more of a “Today-I-Learned” post and not a “full-blown How-To article.” If something is completely wrong, please let me know - thanks!
I had the opportunity to attend the .NET User Group Dresden at the beginning of September for the exciting topic “Using Open Source LLMs” and learned a couple of things.
How to choose an LLM?
There are tons of LLMs (= Large Language Models) that can be used, but which one should we choose? There is no general answer to that - of course - but there is a Chatbot Arena Leaderboard, which measures the “cleverness” between those models. Be aware of the license of each model.
There is also a HuggingChat, where you can pick some models and experiment with them.
For your first steps on your local hardware: Phi3 does a good job and is not a huge model.
LM Studio
Ok, you have a model and an idea, but how to play with it on your local machine?
The best tool for such a job is: LM Studio.
The most interesting part was (and this was “new” to me), that you run those local models in an local, OpenAI compatible (!!!) server.

OpenAI Compatible server?!
If you want to experiment with a lightweight model on your system and interact with it, then it is super handy, if you can use the standard OpenAI client and just run against your local “OpenAI”-like server.
Just start the server, use the localhost endpoint and you can use a code like this:
using OpenAI.Chat;
using System.ClientModel;

ChatClient client = new(model: "model", "key",
        new OpenAI.OpenAIClientOptions()
        { Endpoint = new Uri("http://localhost:1234/v1") });

ChatCompletion chatCompletion = client.CompleteChat(
    [
        new UserChatMessage("Say 'this is a test.'"),
    ]);

Console.WriteLine(chatCompletion.Content[0].Text);
The model and the key don’t seem to matter that much (or at least I worked on my machine). The localhost:1234 service is hosted by LM Studio on my machine. The actual model can be configured in LM Studio and there is a huge choice available.
Even streaming is supported:
AsyncCollectionResult<StreamingChatCompletionUpdate> updates
    = client.CompleteChatStreamingAsync("Write a short story about a pirate.");

Console.WriteLine($"[ASSISTANT]:");
await foreach (StreamingChatCompletionUpdate update in updates)
{
    foreach (ChatMessageContentPart updatePart in update.ContentUpdate)
    {
        Console.Write(updatePart.Text);
    }
}
Ollama
The obvious next question is: How can I run my own LLM on my own server? LM Studio works fine, but it’s just a development tool.
One answer could be: Ollama, which can run large language models and has a compatibility to the OpenAI API.
Is there an Ollama for .NET devs?
Ollama looks cool, but I was hoping to find an “OpenAI compatible .NET facade”. I already played with LLamaSharp, but LLamaSharp doesn’t offer currently a WebApi, but there are some ideas around.
My friend Gregor Biswanger released OllamaApiFacade, which looks promising, but at least it doesn’t offer a real OpenAI compatible .NET facade, but maybe this will be added in the future.
Acknowledgment
Thanks to the .NET User Group for hosting the meetup, and a special thanks to my good friend Oliver Guhr, who was also the speaker!
Hope this helps!
We recently switched from .NET 6 to .NET 8 and encountered the following Entity Framework Core error:
Microsoft.Data.SqlClient.SqlException: 'Incorrect syntax near the keyword 'WITH'....
The EF code uses the Contains method as shown below:
var names = new[] { "Blog1", "Blog2" };

var blogs = await context.Blogs
    .Where(b => names.Contains(b.Name))
    .ToArrayAsync();
Before .NET 8 this would result in the following Sql statement:
SELECT [b].[Id], [b].[Name]
FROM [Blogs] AS [b]
WHERE [b].[Name] IN (N'Blog1', N'Blog2')
… and with .NET 8 it uses the OPENJSON function, which is not supported on older versions like SQL Server 2014 or if the compatibility level is below 130 (!)
- See this blogpost for more information about the
OPENJSON change.
The fix is “simple”
Ensure you’re not using an unsupported SQL version and that the Compatibility Level is at least on level 130.
If you can’t change the system, then you could also enforce the “old” behavior with a setting like this (not recommended, because it is slower!)
...
.UseSqlServer(@"<CONNECTION STRING>", o => o.UseCompatibilityLevel(120));
How to make sure your database is on Compatibility Level 130?
Run this statement to check the compatibility level:
SELECT name, compatibility_level FROM sys.databases;
We updated our test/dev SQL Server and then moved all databases to the latest version with this SQL statement:
DECLARE @DBName NVARCHAR(255)
DECLARE @SQL NVARCHAR(MAX)

-- Cursor to loop through all databases
DECLARE db_cursor CURSOR FOR
SELECT name
FROM sys.databases
WHERE name NOT IN ('master', 'tempdb', 'model', 'msdb') -- Exclude system databases

OPEN db_cursor
FETCH NEXT FROM db_cursor INTO @DBName

WHILE @@FETCH_STATUS = 0
BEGIN
    -- Construct the ALTER DATABASE command
    SET @SQL = 'ALTER DATABASE [' + @DBName + '] SET COMPATIBILITY_LEVEL = 150;'
    EXEC sp_executesql @SQL

    FETCH NEXT FROM db_cursor INTO @DBName
END

CLOSE db_cursor
DEALLOCATE db_cursor
Check EF Core Breaking Changes
There are other breaking changes, but only the first one affected us: Breaking Changes
Hope this helps!
This is more of a “Today-I-Learned” post and not a “full-blown How-To article.” If something is completely wrong, please let me know - thanks!
If you work with SQL Azure you might find this familiar:
Unexpected exception occurred: An exception has been raised that is likely due to a transient failure. Consider enabling transient error resiliency by adding ‘EnableRetryOnFailure’ to the ‘UseSqlServer’ call.
EF Core Resiliency
The above error already shows a very simple attempt to “stabilize” your application. If you are using Entity Framework Core, this could look like this:
protected override void OnConfiguring(DbContextOptionsBuilder optionsBuilder)
{
    optionsBuilder
        .UseSqlServer(
            @"Server=(localdb)\mssqllocaldb;Database=EFMiscellanous.ConnectionResiliency;Trusted_Connection=True;ConnectRetryCount=0",
            options => options.EnableRetryOnFailure());
}
The EnableRetryOnFailure-Method has a couple of options, like a retry count or the retry delay.
If you don’t use the UseSqlServer-method to configure your context, there are other ways to enable this behavior: See Microsoft Docs
Microsoft.Data.SqlClient - Retry Provider
If you use the “plain” Microsoft.Data.SqlClient NuGet Package to connect to your database have a look at Retry Logic Providers
A basic implementation would look like this:
// Define the retry logic parameters
var options = new SqlRetryLogicOption()
{
    // Tries 5 times before throwing an exception
    NumberOfTries = 5,
    // Preferred gap time to delay before retry
    DeltaTime = TimeSpan.FromSeconds(1),
    // Maximum gap time for each delay time before retry
    MaxTimeInterval = TimeSpan.FromSeconds(20)
};

// Create a retry logic provider
SqlRetryLogicBaseProvider provider = SqlConfigurableRetryFactory.CreateExponentialRetryProvider(options);

// Assumes that connection is a valid SqlConnection object
// Set the retry logic provider on the connection instance
connection.RetryLogicProvider = provider;
// Establishing the connection will retry if a transient failure occurs.
connection.Open();
You can set a RetryLogicProvider on a Connection and on a SqlCommand.
Some more links and tips
These two options seem to be the “low-level-entry-points”.
Of course could you wrap each action with a library like Polly.
During my research I found a good overview: Implementing Resilient Applications.
Hope this helps!
This is more of a “Today-I-Learned” post and not a “full-blown How-To article.” If something is completely wrong, please let me know - thanks!
This might seem trivial, but last week I noticed that the HttpUtility.UrlEncode(string) encodes a space ` ` into +, whereas the JavaScript encodeURI(string) method encodes a space as %20.
This brings up the question:
Why?
It seems that in the early specifications, a space was encoded into a +, see this Wikipedia entry:
When data that has been entered into HTML forms is submitted, the form field names and values are encoded and sent to the server in an HTTP request message using method GET or POST, or, historically, via email.[3] The encoding used by default is based on an early version of the general URI percent-encoding rules,[4] with a number of modifications such as newline normalization and replacing spaces with + instead of %20. The media type of data encoded this way is application/x-www-form-urlencoded, and it is currently defined in the HTML and XForms specifications. In addition, the CGI specification contains rules for how web servers decode data of this type and make it available to applications.
This convention has persisted to this day. For instance, when you search something on Google or Bing with a space in the query, the space is encoded as a +.
There seems to be some rules however, e.g. it is only “allowed” in the query string or as form parameters.
I found the question & answers on StackOverflow quite informative, and this answer summarizes it well enough for me:
| standard      | +   | %20 |
|---------------+-----+-----|
| URL           | no  | yes |
| query string  | yes | yes |
| form params   | yes | no  |
| mailto query  | no  | yes |
What about .NET?
If you want to always encode spaces as %20, use the UrlPathEncode method, see here.
You can encode a URL using with the UrlEncode method or the UrlPathEncode method. However, the methods return different results. The UrlEncode method converts each space character to a plus character (+). The UrlPathEncode method converts each space character into the string “%20”, which represents a space in hexadecimal notation. Use the UrlPathEncode method when you encode the path portion of a URL in order to guarantee a consistent decoded URL, regardless of which platform or browser performs the decoding.
Hope this helps!
This is more of a “Today-I-Learned” post and not a “full-blown How-To article.” If something is completely wrong, please let me know - thanks!
I was researching if it is possible to have a “real” single-sign-on experience with Azure AD/Entra ID and third-party desktop applications and I stumbled across a few things during my trip.
“Real” SSO?
There are a bunch of definitions out there about SSO.
Most of the time, SSO just means: You can use the same account in different applications.
But some argue that a “real” SSO experience should mean: You log in to your Windows Desktop environment, and that’s it - each application should just use the existing Windows account.
Problems
With “Integrated Windows Auth,” this was quite easy, but with Entra ID, it seems really hard. Even Microsoft seems to struggle with this task, because even Microsoft Teams and Office need at least a hint like an email address to sign in the actual user.
Solution?
I _didn’t__ found a solution for this (complex) problem, but I found a few interesting tools/links that might help achieve it.
Please let me know if you find a solution 😉
“dsregcmd”
There is a tool called dsregcmd, which stands for “Directory Service Registration” and shows how your device is connected to Azure AD.
PS C:\Users\muehsig> dsregcmd /?
DSREGCMD switches
                        /? : Displays the help message for DSREGCMD
                   /status : Displays the device join status
               /status_old : Displays the device join status in old format
                     /join : Schedules and monitors the Autojoin task to Hybrid Join the device
                    /leave : Performs Hybrid Unjoin
                    /debug : Displays debug messages
               /refreshprt : Refreshes PRT in the CloudAP cache
          /refreshp2pcerts : Refreshes P2P certificates
          /cleanupaccounts : Deletes all WAM accounts
             /listaccounts : Lists all WAM accounts
             /UpdateDevice : Update device attributes to Azure AD
In Windows 11 - as far as I know - a new command was implemented: /listaccounts
dsregcmd /listaccounts
This command lists all “WAM” accounts from my current profile:
The ...xxxx... is used to hide information
PS C:\Users\muehsig> dsregcmd /listaccounts
Call ListAccounts to list WAM accounts from the current user profile.
User accounts:
Account: u:a17axxxx-xxxx-xxxx-xxxx-1caa2b93xxxx.85c7xxxx-xxxx-xxxx-xxxx-34dc6b33xxxx, user: xxxx.xxxx@xxxx.com, authority: https://login.microsoftonline.com/85c7xxxx-xxxx-xxxx-xxxx-34dc6b33xxxx.
Accounts found: 1.
Application accounts:
Accounts found: 0.
Default account: u:a17axxxx-xxxx-xxxx-xxxx-1caa2b93xxxx.85c7xxxx-xxxx-xxxx-xxxx-34dc6b33xxxx, user: xxxx.xxxx@xxxx.com.
What is WAM?
It’s not the cool x-mas band with the fancy song (that we all love!).
WAM stands for Web Account Manager and it integrates with the Windows Email & accounts setting:

WAM can also be used to obtain a Token - which might be the right direction for my SSO question, but I couldn’t find the time to test this out.
“Connected to Windows”
This is now pure speculation, because I couldn’t find any information about it, but I think the “Connected to Windows” hint here:

… is based on the Email & accounts setting (= WAM), and with dsregcmd /listaccounts I can see diagnostic information about it.
“Seamless single sign-on”
I found this troubleshooting guide and it seems that there is a thing called “seamless single sign-on”, but I’m not 100% sure if this is more a “Development” topic or “IT-Pro” topic (or a mix of both).
TIL
I (and you!) have learned about a tool called dsregcmd.
Try out the dsregcmd /status, it’s like ipconfig /all, but for information about AD connectivity.
WAM plays an important part with the “Email & accounts” setting and maybe this is the right direction for the actual SSO topic.
Open questions…
Some open questions:
- Why does
dsregcmd /listAccounts only list one account when I have two accounts attached under the “WAM” (see screenshot - a Azure AD account AND an Microsoft account)?
- Where does “Connected to Windows” come from? How does the browser know this?
- What is “seamless single-sign-on”?
Hope this helps!
This is more of a “Today-I-Learned” post and not a “full-blown How-To article.” If something is completely wrong, please let me know - thanks!
In our product, we store all data in an MS SQL database. One of our clients had issues with the SQL connection, and I want to share what I learned about SQL Encryption and how (some) properties of the Connection String affect the behavior.
Basic SQL Connection String
In general, we have a pretty easy setup:
Our application reads a typical connection string that looks like this Data Source=your-sql-server.yourcorp.local;Initial Catalog=database_x;User ID=username;Password=password_here;MultipleActiveResultSets=True;Encrypt=False or (for Windows Authentication) Integrated Security=true instead of User ID=username;Password=password_here, and uses the (new) Microsoft.Data.SqlClient to connect to the database.
Let’s look at all applied properties:
Since Version 4.0 of the Microsoft.Data.SqlClient the Encrypt property defaults to true instead of false, and now we are entering the field of encryption…
Encryption
We usally use Encrypt=False, because in most cases, there is no proper certificate installed on the SQL Server - at least this is our experience with our clients. If a client has a proper setup, we recommend using it, of course, but most of the time there is none.
With Encrypt=True, the data between the client and the server is TLS encrypted (and this is a good thing, and the breaking change therefore had a good intention).
If you are interested how to set it up, this might be a good starting point for you: Configure SQL Server Database Engine for encrypting connections
In some cases, your client might not be able to trust the server certificate (e.g. there is just a self-signed cert installed on the SQL server). Then you can disable the certification validation via TrustServerCertification, but this shouldn’t be used (at least in production) or handled with care. If the certificate doesn’t match the name of the Data Source, then you can use HostNameInCertificate.
What have I learned?
I already knew about Encrypt=True or Encrypt=False, but the behavior of TrustServerCertification (and when to use it) was new for me. This Stackoverflow-question helped me a lot to discover it.
Hope this helps!
Seit ich mein Beruf ausübe bin ich von macOS Benutzern umgeben. Der erste MacBook User begleitet mich seit 2005 und die letzten vier Jahre gab es quasi ein MacBook-Boom. In meiner Rolle als Cloud Architeckt für Modern Collaboration im Microsoft 365 Umfeld hatte ich also immer Gelegenheit, das Leiden meiner Mac-Freunde mit Microsoft-Software zu begleiten. Es ist 2024 und “alles ist Gut”, also wollte ich selbst wissen, was dran ist am Hype des (Arbeits-)Leben im Apple-Ökosystem.

Ausgangssituation
Ich habe meine Computerbegeisterung mit einem C64 (danke an meinen Vater) gestartet und etwas später durfte ich einen Commodore 116 mit Datasette mein Eigen nennen. Der nächste Schritt war schon ein Microsoft PC (286). Ich habe schon immer mit Begeisterung die Apple Keynotes verfolgt. Steve Jobs Keynotes sind unerreicht und nur Steve Balmer kam einmal ganz kurz ganz nah (Developer, Developer, Developer, …).
Ich habe in einer Webagentur gearbeitet und bin seit 2005 beim meiner Meinung nach besten Microsoft Partner in Deutschland.
“10 Finger System” Fehlanzeige"! Aber die meisten Tasks auf meinem Windows System kann ich recht sicher, schnell und effizient umsetzen. Auf macOS bin ich ein absoluter Anfänger und ich habe so meine Startschwierigkeiten. Ich bin auf der Suche nach einem Schnellstart für macOS für Benutzer die Windows schon lange sicher bedienen. Ich suche also euer Feedback und möchte meine Erfahrungen teilen.
Aufgabenstellung
Um einen besseren Eindruck zu bekommen, hier eine Liste der Tasks, die ich täglich oder wöchentlich durchführe:
- Microsoft Teams ist das Herz unserer Unternehmenskommunikation (Chat und Meetings)
- Arbeiten mit Office Dokumenten (Word, PowerPoint), Loop und Copilot
- Arbeiten mit browserbasierten Systemen (Ticketsystem, Technische Dokumentation, …)
- Administration von Microsoft 365 Umgebungen (PROD / LAB)
- Web via verschiedener Microsoft Edge Profile
- PowerShell
- Virtueller Privilege Admin Workstation (PAW)
- Fido Key Anmeldung
- Leichte Dev Tätigkeiten
- Visual Studio 2022
- VS Code
- GitHub
Hardware
Anfang Juni 2024 hatte ich die Chance, “kurzfristig” ungenutzte Apple Hardware im produktiven Einsatz zu testen. Ich habe eine Woche lang ein MacBook Pro M3 13’’ verwendet und meine ersten Gehversuche gemacht. Aktuell habe ich ein “Downgrade” mit einem “abgelegten” MacBook Pro M1 13’’ im Einsatz. Es hat sich auch die Gelegenheit ergeben, ein MacBook Air M3 13’’ (8 GB RAM!) zu testen. Wenn ich aber Öko-System sage, dann MUSS da auch noch ein iPhone 15 Pro mitspielen. Allerdings nutze ich das nur mit WLAN, denn meine SIM-Karte bleibt in meinem Pixel ❤️.

In meinem Alter hat man auf der Windows Seite schon einige Erfahrungen gesammelt. Einige Highlights:
- Toshiba Protege M200
- Surface Pro 1
- Surface Pro 2
- Surface Book 1
- Surface Book 2
- Dell XPS 15 (i7 11800H mit RTX 3050 TI)
Aktuell bin ich auf einem top ausgerüsteten Dell XPS 15 (i7 13700H mit RTX 4060) unterwegs. Seit dem Absprung von Windows Phone mit dem Microsoft Lumia 950 XL bin ich beim nativen Google Pixel geblieben (2 Pro, 4 Pro und aktuell 6 Pro). Für kurze Zeit hatte ich ein Apple iPad Air (4th Gen mit USB-C), welches ich gegen ein Samsung Tab S9 FE “getauscht” habe.
Wenn unsere Mitarbeiter keinen speziellen Wunsch haben, setzen wir seit einiger Zeit auf HP Elitebooks und auch die habe ich hin und wieder getestet. Im Jahr 2024 setzt Apple noch immer hohe Standards aber eben auch mit “wenig” Auswahl und passenden Preisen. Auf der Windows Seite gibt es ein breites Spektrum mit jeder Menge “Nieten”. Im Business Umfeld kann das schnell gefährlich werden und es kann sich rentieren an die etablierten Business Laptop Hersteller zu halten (Dell, Lenovo und HP).
Mein aktueller Dell muss sich nicht hinter den Apple Geräten verstecken. Der Mac hat eine sehr gute Webcam. Mein Dell leider eine sehr schlecht. Tastatur, Trackpad und die gesamte Verarbeitung sind für mich gleich auf. Die Funktion, das iPhone als Web-Kamera zu verwenden, funktioniert und stürzt nicht nach ein paar Minuten ab wie bei meinem Google Pixel. Allerdings habe ich keinen Nutzen bei der bereits guten Webcam im MacBook selbst.
Fazit: Hier kann man auf keiner Seite was falsch machen.
Installation
Mein Windows Device ist natürlich per Autopilot via Intune gemanaged und nach der Out-Of-The-Box Experience in 30 Minuten compliant und mit Office/Teams sofort einsetzbar. Die “Installation” von Windows ist also bei meinen Geräten ein absoluter Traum, aber wir machen so was halt auch professionell.
Für Apple Geräte erfordern wir das Onboarding via Apple Business Manager. Bevor ich also den Desktop sehe, MUSS ich mich mit meiner Entra ID anmelden und das Gerät wird via Intune konfiguriert und mit dem Company Portal + Microsoft Edge vorinstalliert. Noch muss ich einen lokalen Benutzer anlegen und ein dediziertes Passwort festlegen. Hier hat der Windows PC noch die Nase vorn. Es folgt das Onboarding von Touch ID und schon ist das Leben ein ganzes Stück leichter. Allerdings gibt es immer wieder Situationen (z.B. Reboot), wo ich das Passwort eingeben muss. Als neuer Benutzer muss man auch die Touch ID Prompts lesen… sonst gibt man permanent sein Passwort ein, statt sein Fingerabdruck zu verwenden (UAC Like Prompts).
Auf dem Desktop angekommen, muss der Business User bei uns das Microsoft Company Portal öffnen und den Mac final onboarden. Gleich noch Microsoft 365 Apps for Enterprise zur Installation angeklickt und dann den Reboot für die Aktivierung des Filevault (Bitlocker für Mac) durchgeführt. Erst jetzt ist der Mac compliant und kann mit dem Entra ID Konto wie auf Windows genutzt werden.
Beim Zurücksetzen des Mac (zum Beispiel via Intune) ist der Mac in gefühlt wenigen Minuten bereit für den nächsten Benutzer. Die Windowsgeräte brauchen hier schon deutlich länger. Klappt der Reset nicht, dann muss man ins Recovery Menü und die Installation dauert ähnlich lang, wie ein Windows Wipe&Reload.
Fazit: Die Entra ID Anmeldung, die OOBE und die Softwareverteilung machen Windows für mich zum Gewinner, allerdings nur solange der Mac noch den lokalen Benutzer benötigt. Kein Grund, um nicht zum Mac zu wechseln.
User Interface
Die Unterschiede könnten hier nicht deutlicher sein. Es gibt ähnliche Konzepte, aber die Ausführung unterscheidet sich deutlich.
Taskleiste, Dock
Das Dock am unteren Rand erlaubt den schnellen Zugriff auf Anwendungen wie die Taskleiste auf Windows. Hat das Programm ein schwarzen Punkt unter seinem Icon, dann ist es gerade gestartet. Im Dock gibt es rechts neben den gepinnten Apps ein Bereich für “empfohlene und zuletzt verwendete Apps”. Ich habe mir meine 11 Anwendungen, die ich häufig benötige gepinnt. Der zusätzlich Bereich mit den letzten und empfohlenen Apps hat mich ständig gestört, weil dann nicht relevante Elemente sichtbar sind. Beispiel: Activity Monitor, Preview, … und mehr. Ich habe den Teil über die Einstellungen ausgeblendet.
Nach dem ersten Boot sitzen im Dock 17 Anwendungen. Da ich nicht im Ökosystem bin, habe ich 15 davon mühsam über Rechtsklick “Option -> Keep in dock” ausgeblendet. Im Verlauf meiner Nutzung habe ich gelernt, dass man die Apps auch ins “Nichts” ziehen kann, um sie aus dem Dock zu entfernen. Macht man nur einmal nach dem Setup, aber man fragt sich immer, ob es nicht eleganter geht.

Ganz rechts im Dock sitzt der Papierkorb, den ich noch nicht einmal gebraucht habe. Daneben sitzt dann der Download Ordner, welcher auch das letzte Element als Preview-Icon anzeigt. Beim Download eines Bildes hat man es also permanent in Sicht. Ich nutze unter Windows den Download Ordner auch recht häufig, aber immer über den “Umweg” Datei Explorer. Den Download Teil kann man immerhin ausblenden. Den Papierkorb nicht.
Startmenü
Das Startmenü des Mac sieht aus wie ein iPad-Homescreen und heißt “Launchpad”. Das Windows Startmenü hat eine lange Reise hinter sich. Ich war selbst zu Windows 8 Zeiten nicht unzufrieden. Ich persönlich nutze das Startmenü nur wenig. Ich navigiere nicht zu Apps sondern ich Suche und auch wenn es keiner glauben mag: mit Erfolg! Ich habe eine paar Apps ins Windows-Startmenü gepinnt. Das Launchpad wird dann wichtig, wenn man “einige” Apps deinstallieren will. Im Launchpad einfach die OPTION Taste festhalten, dann fangen die Apps an zu wackeln und kann über den Apps mit Uninstall Option das kleine X Drücken. Ich glaube zu wissen, dass Apps die nicht “Wackeln” aus dem Finder über den Ordner “Applications” gelöscht werden können.
Spotlight
Meine Mac Kollegen schwören auf Spotlight und finden, dass es auf dem PC keine Alternative gibt. Ich kann das nicht nachvollziehen. Ich bin sicher man kann sich an Spotlight gewöhnen. Ich suche auf meinem Windows entweder eine App, eine Datei oder will eine Websuche starten. Ich bin Microsoft 365 Benutzer und unsere Entra ID-joined Geräte bieten per Default bei der Suche zugriff auf unsere Inhalte in der Cloud. Teams, Groups, Kontakte, Dateien, … alles da und ich persönlich bin begeistert von der Umsetzung. Es mag sein, dass Spotlight besser in den Lokalen Dateien suchen kann. Ich frage nur: Welche lokalen Dateien? Ja, es mag Use Cases geben, aber das ist mein Bericht und ich habe schon lange nicht mehr nach einer lokalen Datei gesucht. Auf dem Windows nutze ich die Windows Taste, um alle genannten Aktionen zu starten. Auf dem Mac ist es COMMAND + Leertaste. Es ist sicher ein effektives System, aber ich bevorzuge die Integration von Microsoft 365 in meinem Windows Startmenü/Suche.
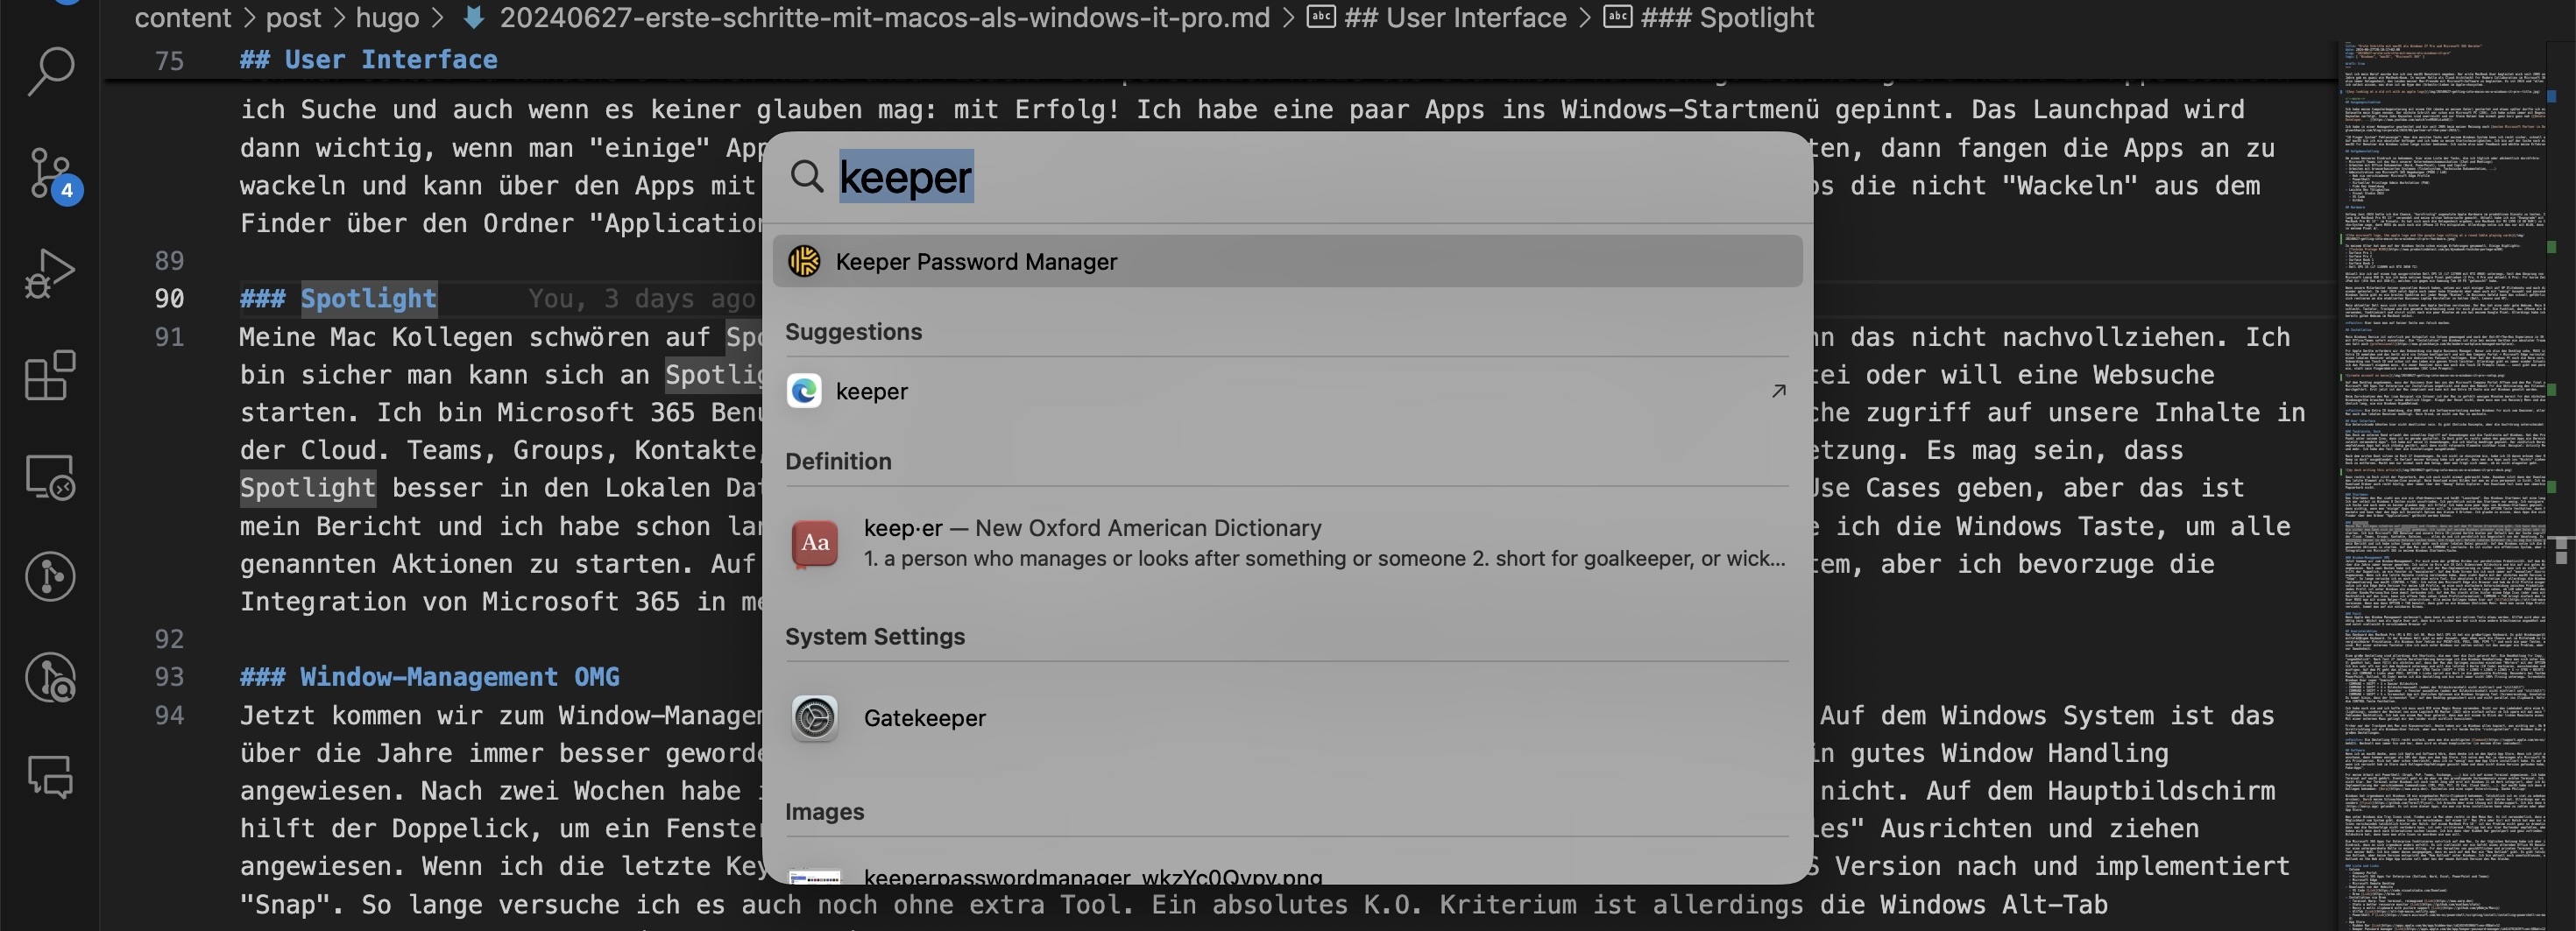
Window-Management OMG
Jetzt kommen wir zum Window-Management. Für mich eine der größten Hürden zur persönlichen Prduktivität. Auf dem Windows System ist das über die Jahre immer besser geworden. Ich nutze im Büro ein 34 Zoll Widescreen Bildschirm und bin auf ein gutes Window Handling angewiesen. Nach zwei Wochen habe ich gelernt, mit der Mac-Implementierung zu leben. Lieben kann ich es nicht. Auf dem Hauptbildschirm hilft der Doppelick, um ein Fenster zu “maximieren”. Auf dem Wide Screen bin ich noch immer auf “manuelles” Ausrichten und ziehen angewiesen. Wenn ich die letzte Keynote richtig verstanden habe, dann zieht Apple mit der nächsten macOS Version nach und implementiert “Snap”. So lange versuche ich es auch noch ohne extra Tool. Ein absolutes K.O. Kriterium ist allerdings die Windows Alt-Tab Implementierung von macOS (CONTROL + TAB). Ich nutze den Microsoft Edge als Browser und hab da 8-12 Profile eingerichtet. Auf Windows nutze ich die Edge Beta Version für meine LAB Profile, um eine noch einfachere Unterscheidung zwischen Produktion und LAB zu haben. Jedes Profil ist unter Windows ein eigenes Task Symbol. Ich kann also am Beta Logo sehen, ob LAB oder PROD und das Profilbild zeigt, welcher Kunde/Persona/Use Case damit verbunden ist. Auf dem Mac steckt alles hinter einem Edge Icon (oder zwei mit Beta). Über ein Rechtsklick auf das Icon, kann ich offene Tabs sehen (ohne Profilinformation). COMMAND + TAB bringt einfach den letzten Tab nach vorne. Hier MUSS man mit einem Helper-Tool unterstützen. Alle meine Kollegen haben hier auf AltTab verwiesen. Wenn man dann OPTION + TAB benutzt, dann gibt es ein Windows ähnliches Menü. Wenn man seine Edge Profile noch mit Farben versieht, kommt man auf ein nutzbares Niveau.
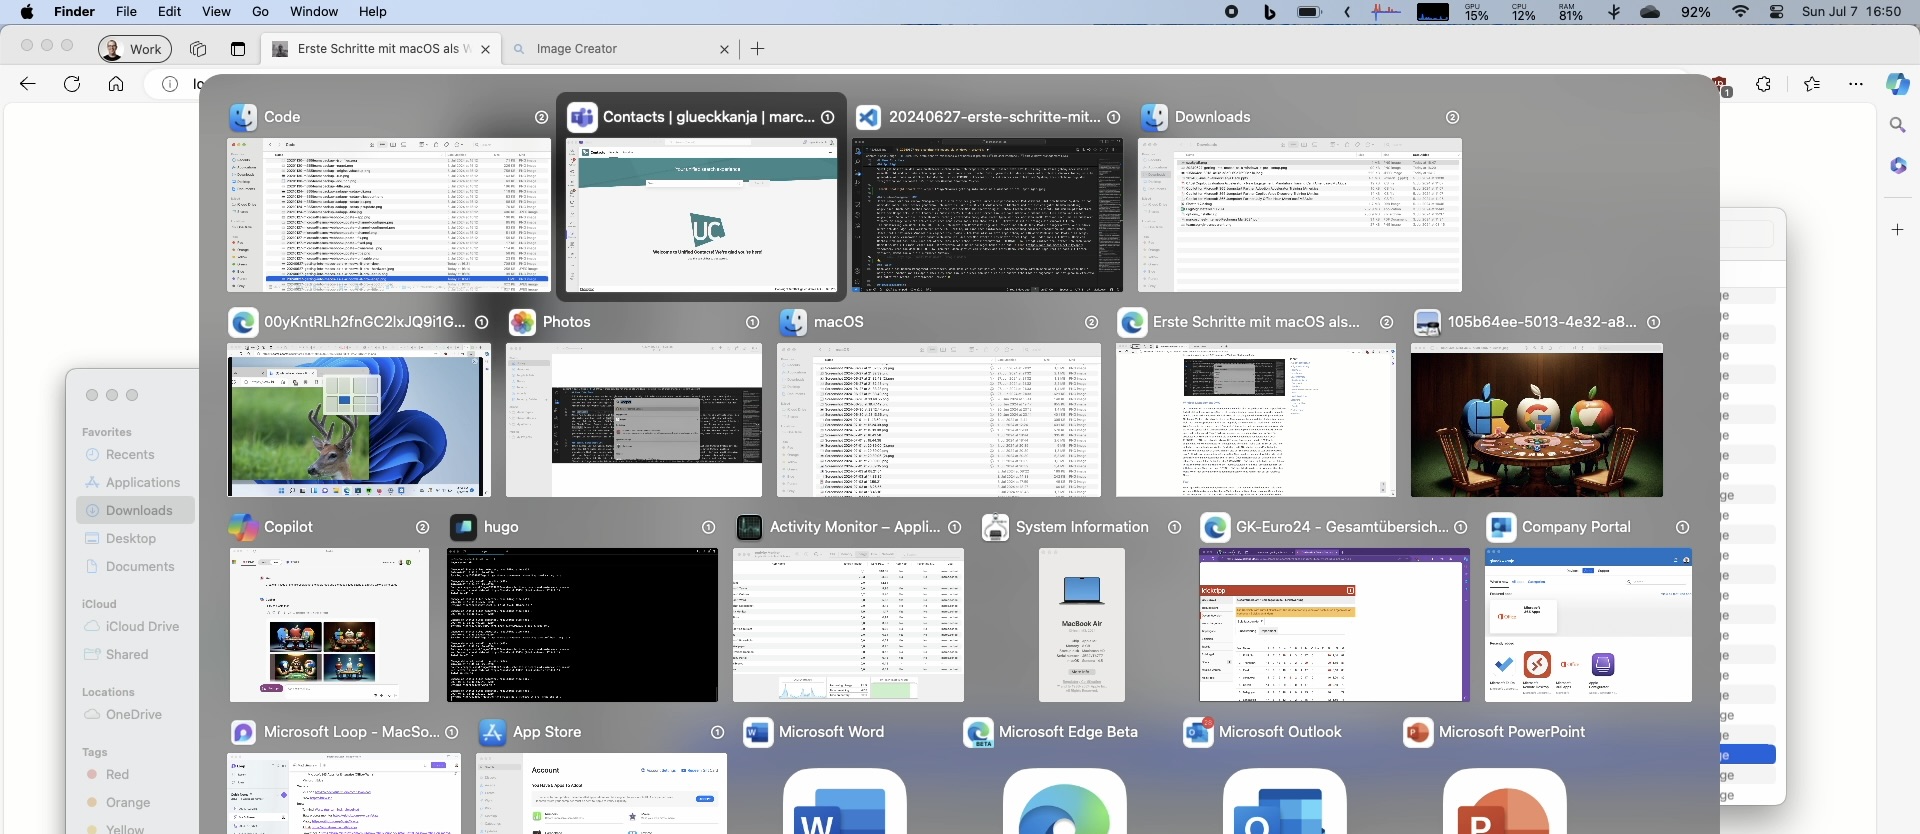
Fazit
Wenn Apple das Window Management verbessert, dann kann es auch mit nativen Tools etwas werden. AltTab wird aber wohl noch eine Weile nötig sein. Wächst man als Apple User auf, dann bin ich sicher man hat sich eine andere Arbeitsweise angewöhnt und ist genauso effektive und nutzt vielleicht 8 verschiedene Browser 😆
Userinteraktion
Das Keyboard des MacBook Pro (M1 & M3) ist OK. Mein Dell XPS 15 hat ein großartiges Keyboard. Es gibt Windowsgeräte mit schlechten oder mittelmäßigem Keyboard. In der Windows Welt gibt es mehr Auswahl, aber eben auch die Chance mal im Mittelmaß zu landen, bei vergleichbarer Preisklasse. Als Windows User fehlen mir PRINT-SCR, POS1, END, PIPE “|” und noch ein paar Tasten, welche “falsch” belegt sind. Mit einer externen Tastatur (die ich auch unter Windows nur selten nutze) ist das weniger ein Problem, aber am Ende sicher einfach nur Gewohnheit.
Eine große Umstellung sind allerdings die Shortcuts, die man über die Zeit gelernt hat. Die Handhaltung für Copy, Cut und Paste ist “ungewöhnlich”. Nach fast 27 Jahren Berufserfahrung bevorzuge ich die Windows Handhaltung. Wenn man sich unter macOS mal an COMMAND+C(X/V) gewöhnt hat, dann fällt als nächstes auf, dass der Mac das Springen zwischen einzelnen “Wörtern” mit der OPTION Taste implementiert. Ich bin sehr oft nur mit dem Keyboard unterwegs und will die letzten 3 Worte (C# Code) markieren, ausschneiden und 2 Worte weiter rechts einfügen. Auf dem PC geht das alles mit der STRG Taste (SHIFT + STRG + LINKS + LINKS + LINKS + X -> STRG + RECHTS + RECHTS + V). Auf dem Mac ist COMMAND + Links aber POS1. OPTION + Links sprint ein Wort in die gewünschte Richtung. Besonders bei Textbearbeitung (Word, PowerPoint, Outlook, VS Code) merke ich die Umstellung und bin noch immer nicht 100% flüssig unterwegs. Screenhots sind ebenfalls als Windows User super “komisch”.
- COMMAND + SHIFT + 3 = Ganzer Bildschirm
- COMMAND + SHIFT + 4 = Bildschirmauswahl (wobei der Bildschirminhalt nicht einfriert und “stillhält”)
- COMMAND + SHIFT + 4 + Spacebar = Fenster auswählen (wobei der Bildschirminhalt nicht einfriert und “stillhält”)
- COMMAND + SHIFT + 5 = Screenshot App mit ähnlichen Optionen wie Windows Snipping Tool (Screenrecoding, Annotations, …)
Es kommt hinzu, dass der Screenshot “nur” auf den Desktop gespeichert wird und nicht parallel ins Clipboard. Dafür muss man zusätzlich die CONTROL Taste festhalten.
Ich habe noch nie und ich hoffe ich muss auch NIE eine Magic Mouse verwenden. Nicht nur das Ladekabel wäre eine K.O. Kriterium (Lightning), sondern der Wechsel von eine Logitech MX Master (2&3) wäre einfach unfair 😂 Ich spare mit mal mein “Fake” Dad-Joke zum fehlenden Rechtsklick. Ich hab von einem Mac User gelernt, dass man mit einem 3x Klick der linken Maustaste einen ganzen Block markiert. Mit einer externen Maus gelingt mir das leider nicht wirklich konsistent.

Früher war der Trackpad des Mac ein Riesenvorteil. Heute haben wir im Windows alles kopiert, was wichtig war. Ob Maus oder Trackpad die Scrollrichtung ist als Windows-User falsch, aber man kann es für beide Geräte “richtigstellen”. Als Windows User gab es sonst hier keine großen Umstellungen.
Fazit: Die Umstellung fällt recht einfach, wenn man die wichtigsten Command im Kopf behält. Wechselt man immer hin und her, dann wird es etwas komplizierter (in meinem Alter zumindest).
Software
Wenn ich an macOS denke, wenn ich Apple und Software höre, dann denke ich an den Apple App Store. Wenn ich jetzt allerdings mein System anschaue, dann kommen weniger als 50% der Apps aus dem App Store. Ich nutze den Mac ja überwiegen als Microsoft 365 Berater und nicht als Privatperson. Mich hat aber schon überrascht, dass ich so “wenig” aus dem App Store installiert habe. Es war besonders irritieren, wenn ich versucht hab im Store nach Kollegen-Empfehlungen gesucht habe und dann nicht diese Version gefunden habe, sondern ähnliche und Fake-Apps".
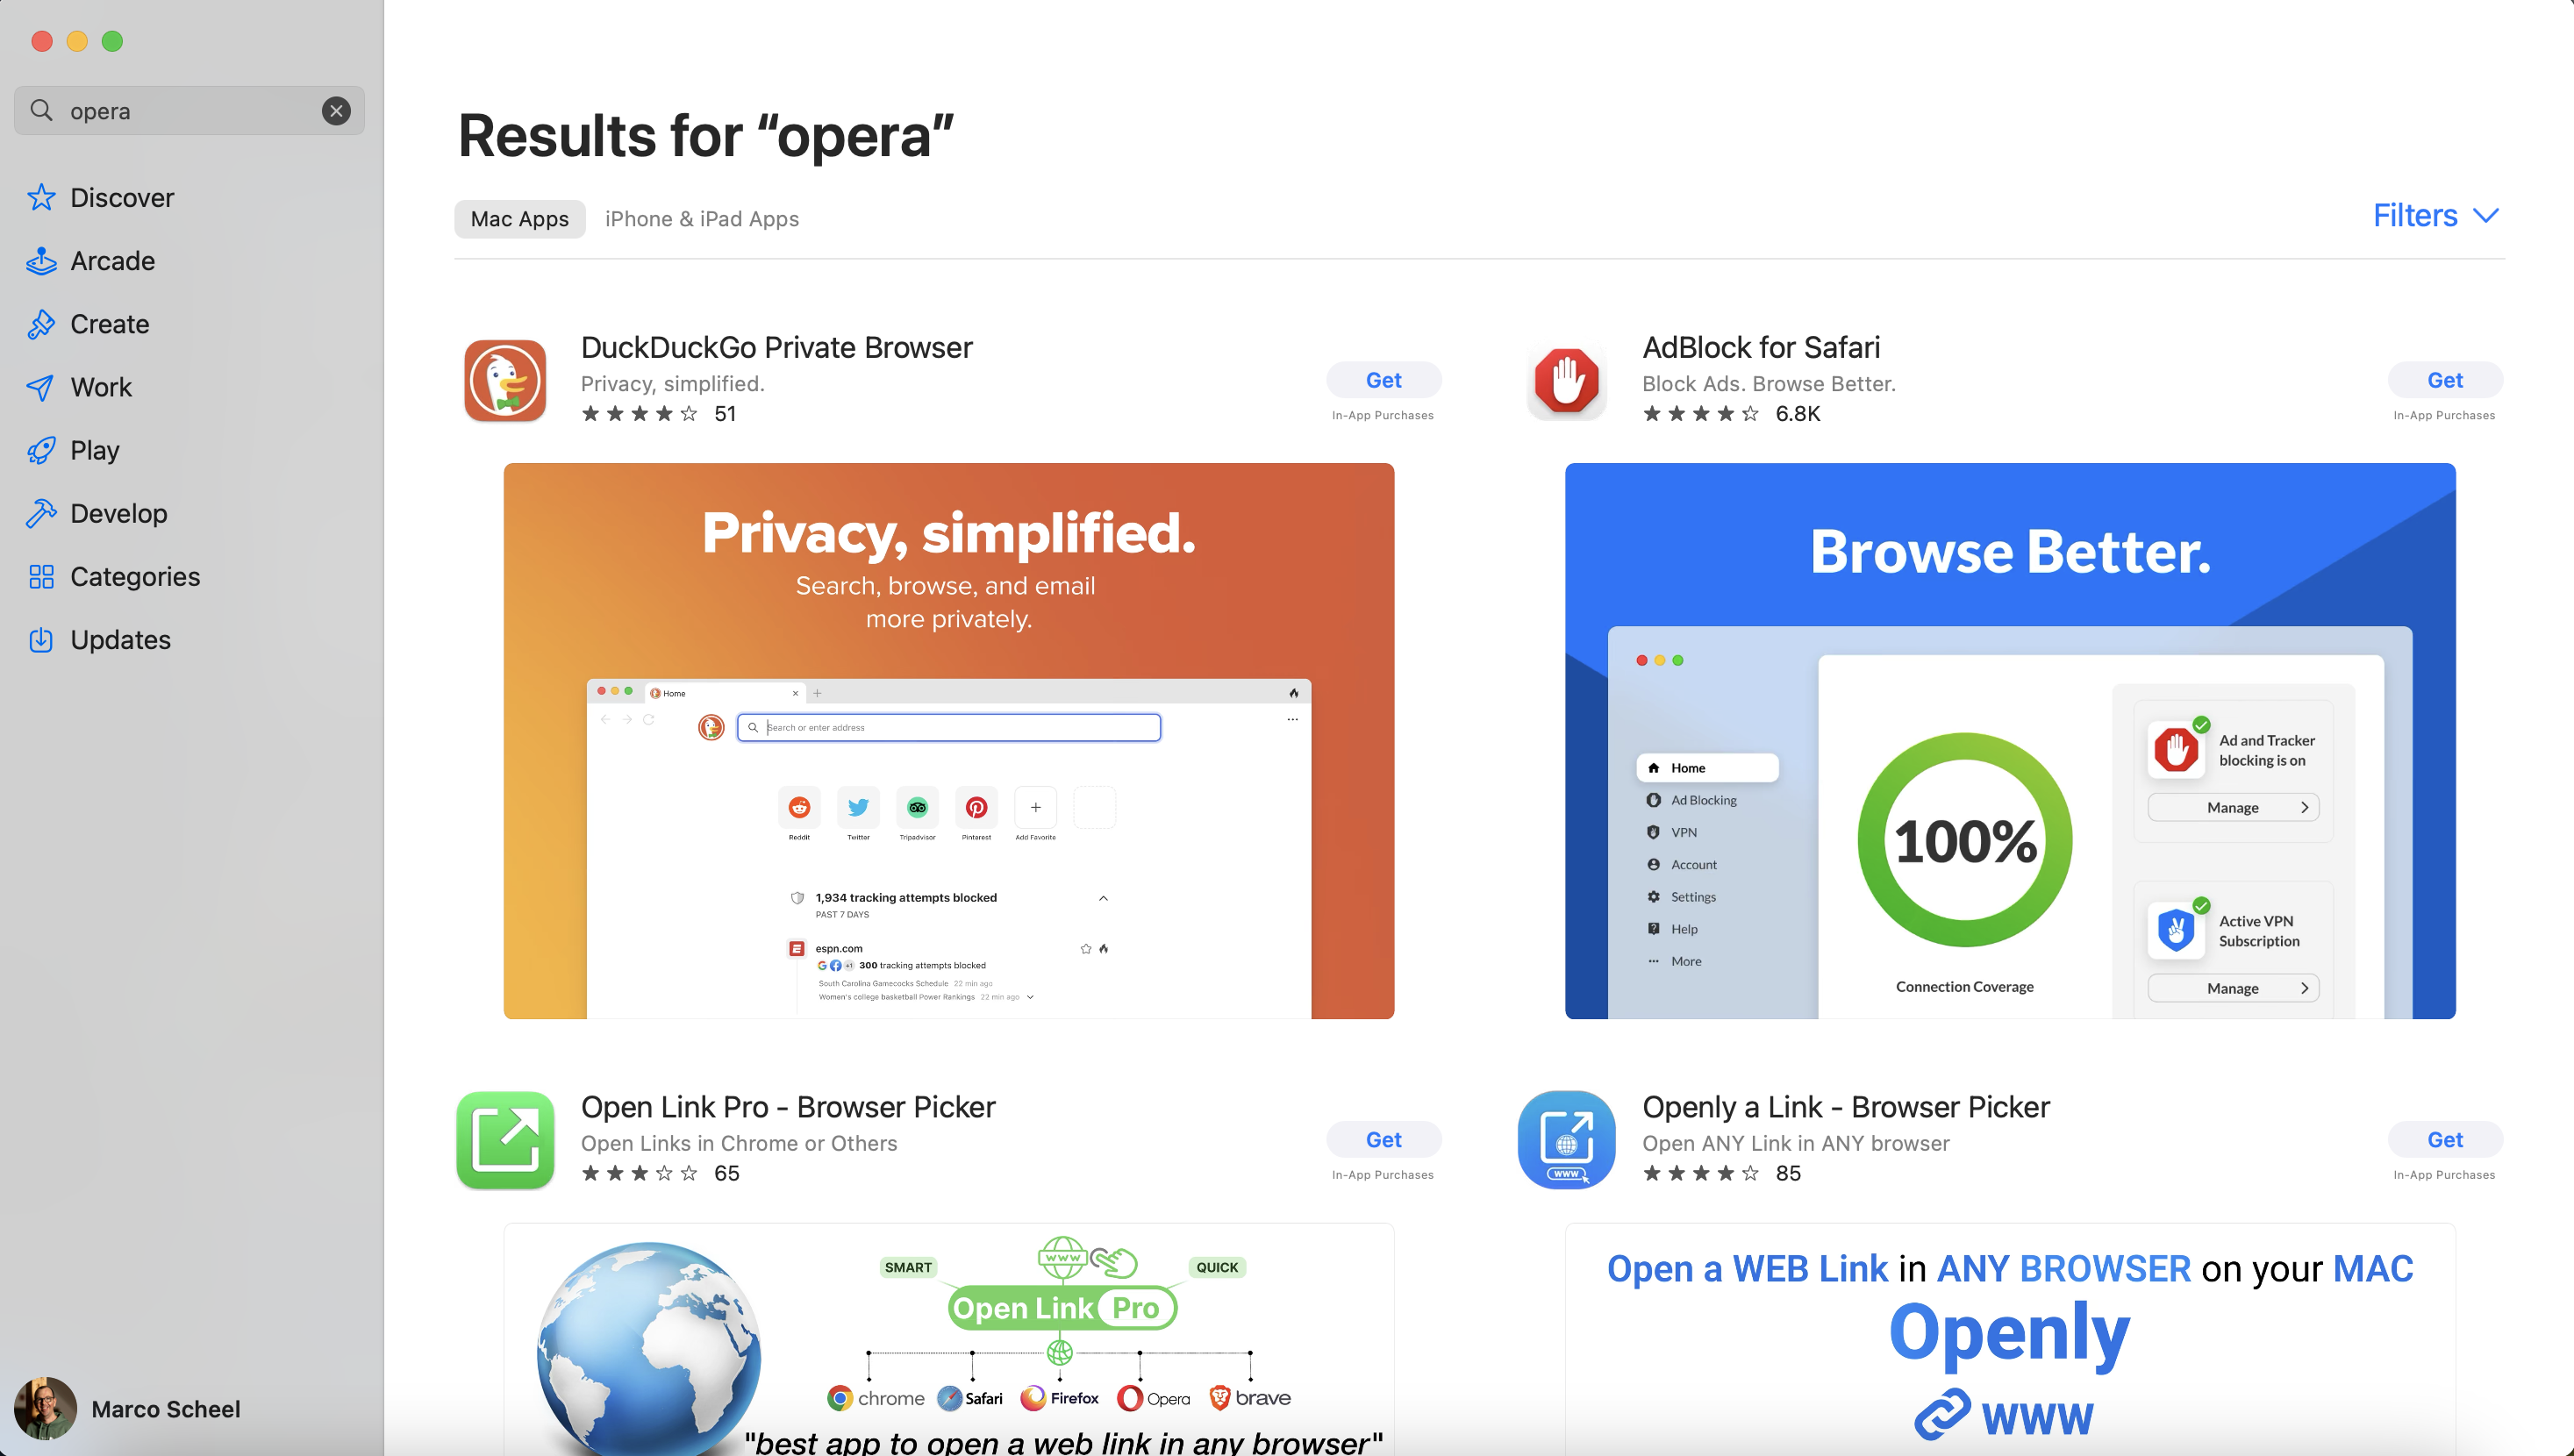
Für meine Arbeit mit PowerShell (Graph, PnP, Teams, Exchange, …) bin ich auf einen Terminal angewiesen. Ich habe schon viel gutes vom Terminal auf macOS gehört. Eventuell geht es da aber um das grundlegende Vorhandensein eines echten Terminal. Ich persönlich komme damit nicht klar. Der Terminal unter Windows ist noch recht Jung und erst mit Windows 11 ab Werk integriert, aber ich bin sehr happy mit der Implementierung der verschiedenen Commandlines (CMS, PS5, PS7, VS Cmd, Cloud Shell, ..). Auf macOS habe ich dann den Tipp von einem Kollegen bekommen: Warp. Kostenlos und eine super Unterstützung. Danke Philipp!
Windows hat irgendwann mit Windows 10 ein eingebautes Multi-Clipboard bekommen. Tatsächlich ist es viel zu unbekannt (alle mal WIN+V drücken). Durch meine Sitznachbarin dachte ich tatsächlich, dass macOS es schon seit Jahren hat. Allerdings war es keine Systemoption, sondern flycut. Ich brauche aber eine Lösung mit Bildersupport. Ich bin dann hier bei maccy gelandet. Es ist eine dieser Apps, die man via Brew installieren kann ohne zu zahlen oder aber für 10 Euro aus dem App Store.
Was unter Windows die Tray Icons sind, finden wir im Mac oben rechts in den Menu Bar. Es ist verwunderlich, dass es hier keine Möglichkeit vom System gibt, diese Icons zu verschieben. Auf einem 13’’ Mac (Pro oder Air) mit Notch hat man nur wenig Platz und die Icons verschwinden tatsächlich hinter der Notch. Auf einem MacBook Pro 16’’ ist das Problem nicht ganz so dramatisch, aber die Tatsache, dass man die Reihenfolge nicht verändern kann, ist sehr irritierend. Philipp hat mir hier Bartender empfohlen, aber die 20 Euro !!! haben mich dann doch nach Alternativen suchen lassen. Ich bin dann über Hidden Bar gestolpert und ganz zufrieden. Wenn man einen zweiten Bildschirm hat, dann kann man alle Icons so anordnen wie man will.
Die Microsoft 365 Apps for Enterprise funktinieren natürlich auf dem Mac. In der täglichen Nutzung habe ich aber immer wieder den Eindruck, dass es sich irgendwie anders anfühlt. Es ist vielleicht nur ein Gefühl eines alternden Office 95 Benutzers. Outlook spielt nur eine untergeordnete Rolle in meinem Alltag. Für das Verwalten von geschäftlichen und privaten Terminen ist es aber noch immer das Tool meiner Wahl. Ich bin immer davon ausgegangen, dass es auch auf dem Mac ein “New Outlook” gibt. Es gibt tatsächlich zwei Versionen von Outlook, aber keine Version entspricht dem “New Outlook” unter Windows. Ich bin aktuell noch unentschlossen, ob ich deswegen wieder Outlook on the Web als Edge App nutzen soll oder bei der neuen Outlook Version des Mac bleibe.
Liste und Links
- Intune
- Company Portal
- Microsoft 365 Apps for Enterprise (Outlook, Word, Excel, PowerPoint und Teams)
- Microsoft Edge
- Microsoft Remote Desktop
- Downloads von der Website
- Installation via Brew
- Terminal Warp: Your terminal, reimagined Link
- Stats a better ressource monitor Link
- Maccy a multi clipboard with picture support Link
- AltTab Link
- PowerShell 7 Link
- App Store
- Hidden Bar [Link]https://apps.apple.com/de/app/hidden-bar/id1452453066?l=en-GB&mt=12
- Keeper Password manager Link
- WhatsApp Link
- Lightshot a screenshot tool Link
- Azure VPN Client Link
Ich habe auch nach etwas wie Zoomit gesucht aber leider nicht gefunden. Allerdings gibt es eine Teil-Lösung für den Zoom aus dem System (Accessability)
- System Settings - Zoom - Finger double tap
Gaming
Auf meinem Windows ist das kein Problem. Ich habe eine Xbox und seit Jahren ein Xbox Ultimate Abo. Meine Kids und ich können so mit eigenem Konto auf der Xbox eine Menge Games nutzen. Das Ultimate Abo unterstützt auch Windows und so nutze ich immer wieder Games aus dem Angebot (Minecraft, Age of Empires und zuletzt Valheim). Auf dem Mac gibt es keines der Angebote lokal. Durch das Xbox Cloud Gaming gibt es die Möglichkeit, die Spiele aus der Cloud zu streamen.
Meine Steam Library ist nicht riesig, aber es sind schon ein paar Games enthalten. Es gibt einige Spiele die automatisch mit einer macOS Version kommen. Ich habe Stelaris und Age of Wonders - Planetfall getestet. Aktuelle im Angebot für 2,49 Euro ist X-Com 2. Es hat funktioniert. Leider sind Spiele wie Counter Strike 2 nicht nativ verfügbar. Auf dem PC spiele ich ab und an Age Of Wonders 4 und genau das Spiel gibt es nicht für macOS.

Auf dem PC kann ich dank einer RTX 4060 eine Menge spiele gute Gewissens kaufen und spielen. Ich mache es selten, aber ein Wechsel auf macOS würde bedeuten, dass ich einige Spiele nicht spielen kann oder neu kaufen muss.
Ich nutze die Systeme im Business Kontext. Microsoft ist weit gekommen, was das Mac Management angeht, aber es ist offensichtlich, dass auf Windows viel mehr Kontrolle möglich ist. Wir nutzen auf Windows die volle Palette aus dem Security Stack. Überall steckt der Defender drin und passt auf uns auf. Auf keinem meiner Systeme hatte ich aber über die letzten Jahre den Eindruck, dass ich behindert wurde. Meine Development Tasks sind aber alle sehr Windows nah (Azure Function mit C#). Microsoft Teams mit viel Video und vielen Teams war der Performance Killer der letzten Jahre. Nach 3 Wochen und am Ende mit einem Low Tier Apple MacBook Air 13’’ (8 GB RAM, 265 GB Disk für ca 1.300 Euro) bin ich von der Performance beindruckt. Allerding fühlt sich auch das MacBook 13’’ M1 (16 GB) und M3 (16 GB) nicht viel schneller an. Es geht hier um meinen Einsatzzweck ohne Video Editing oder ähnlichen Medien lastigen Aufgaben. Wir nutzen auch auf dem Mac alles, was im Defender und Microsoft Security Stack geht. Meine Kollegen sagen mir aber immer, dass noch längst nicht alle geht. Vielleicht braucht der Mac das auch gar nicht… bekomme ich immer wieder zu hören. Ich sehe hier also keinen klaren Vorteil, was die reine Rechenleistung für meine tägliche Arbeit angeht.

Im Bereich Akkuleistung muss ich den Hut ziehen. Alles was man hört ist wahr. Das kleine MacBook Air hat gerade VS Code, Hugo Server, Teams, Outlook, 5 Edgeprofile mit einiges Tabs offen und ich sitze seit 2 Stunden auf der Couch und schreibe den Artikel. Das Gerät ist warm. Aber ich habe noch immer 64% Akku. Mein Dell XPS 15 wäre nach 1 Stunde bei 10%. Wenn ich den Hugo Server stoppe, dann wäre die Laufzeit nochmal länger. Steckdosen sind für Mac User nicht so relevant wie für uns Windows User. Vielleicht wird es mit den neuen Snapdragon X Elite/Pro besser, aber der Mac ist der deutliche Gewinner im Bereich mobile Nutzung.
Resümee
Jedes System hat seine Stärken und Schwächen. Ich nutze nicht nur Windows, sondern bin auch privat im Microsoft und Google Ökosystem verwurzelt, so dass ein Wechsel für mich kein Sinn macht. Bei glueckkanja leben wir schon seit vielen Jahren mit einer großen Zahl an macOS Benutzern. Microsoft 365 und Apple funktionieren zusammen. In meiner Rolle fehlen, dann aktuell noch ein paar Stücke Software, um wirklich wechseln zu können. Ich werde weiter in der Nähe von Steckdosen meine erarbeitete Produktivität genießen und von einer ARM-basierten Revolution im Windows-Lager warten.

Ich hoffe meine Gedanken und Experimente helfen anderen schneller in der Plattform Fuß zu fassen. Ich bin sehr an euren Kommentaren interessiert und an euren Geschichten. Meldet euch doch via Twitter oder LinkedIn.
TL;DR summary: Check out the LLamaSharp Quick Start and you will find everything that you need to know
ChatGPT (and all those Microsoft Copilots out there that were build on top of this) is currently the synonym for AI based chat systems. As a dev you can just use the Azure OpenAI Services and integrate this in your app - I blogged about this last year.
The only “downside” is, that you rely on a cloud system, that costs money and you need to trust the overall system and as a tech nerd it is always “cool” to host stuff yourself.
Of course, there are a lot of other good reasons why hosting such a system yourself is a good idea, but we just stick with “it is cool” for this blogpost. (There are tons of reasons why this is a stupid idea as well, but we might do it anyway just for fun.)
Is there something for .NET devs?
My AI knowledge is still quite low and I’m more a “.NET backend developer”, so I was looking for an easy solution for my problem and found “LLamaSharp”.
This blogpost and my experiment was inspired by Maarten Balliauws blog post “Running Large Language Models locally – Your own ChatGPT-like AI in C#”, which is already a year old, but still a good intro in this topic.
LLamaSharp
From their GitHub Repo:
LLamaSharp is a cross-platform library to run 🦙LLaMA/LLaVA model (and others) on your local device. Based on llama.cpp, inference with LLamaSharp is efficient on both CPU and GPU. With the higher-level APIs and RAG support, it’s convenient to deploy LLM (Large Language Model) in your application with LLamaSharp.
Be aware: This blogpost is written with LLamaSharp version 0.12.0 - Maartens blogpost is based on version 0.3.0 and the model he was using is not working anymore.
This sounds really good - let’s checkout the quick start
The basic steps are easy: Just add the LLamaSharp and LLamaSharp.Backend.Cpu NuGet package to your project and then search for a model… but where?
The model
From the quick start:
There are two popular format of model file of LLM now, which are PyTorch format (.pth) and Huggingface format (.bin). LLamaSharp uses GGUF format file, which could be converted from these two formats. To get GGUF file, there are two options:
Search model name + ‘gguf’ in Huggingface, you will find lots of model files that have already been converted to GGUF format. Please take care of the publishing time of them because some old ones could only work with old version of LLamaSharp.
Convert PyTorch or Huggingface format to GGUF format yourself. Please follow the instructions of this part of llama.cpp readme to convert them with the python scripts.
Generally, we recommend downloading models with quantization rather than fp16, because it significantly reduce the required memory size while only slightly impact on its generation quality.
Okay… I ended up using the huggingface-search-approach and picked the Phi-3-mini-4k-instruct-gguf, because I heard about it somewhere.
Code
After the initial search and download I could just copy/paste the quick start code in my project and hit run:
using LLama.Common;
using LLama;

string modelPath = @"C:\temp\Phi-3-mini-4k-instruct-q4.gguf"; // change it to your own model path.

var parameters = new ModelParams(modelPath)
{
    ContextSize = 1024, // The longest length of chat as memory.
    GpuLayerCount = 2 // How many layers to offload to GPU. Please adjust it according to your GPU memory.
};
using var model = LLamaWeights.LoadFromFile(parameters);
using var context = model.CreateContext(parameters);
var executor = new InteractiveExecutor(context);

// Add chat histories as prompt to tell AI how to act.
var chatHistory = new ChatHistory();
chatHistory.AddMessage(AuthorRole.System, "Transcript of a dialog, where the User interacts with an Assistant named Bob. Bob is helpful, kind, honest, good at writing, and never fails to answer the User's requests immediately and with precision.");
chatHistory.AddMessage(AuthorRole.User, "Hello, Bob.");
chatHistory.AddMessage(AuthorRole.Assistant, "Hello. How may I help you today?");

ChatSession session = new(executor, chatHistory);

InferenceParams inferenceParams = new InferenceParams()
{
    MaxTokens = 256, // No more than 256 tokens should appear in answer. Remove it if antiprompt is enough for control.
    AntiPrompts = new List<string> { "User:" } // Stop generation once antiprompts appear.
};

Console.ForegroundColor = ConsoleColor.Yellow;
Console.Write("The chat session has started.\nUser: ");
Console.ForegroundColor = ConsoleColor.Green;
string userInput = Console.ReadLine() ?? "";

while (userInput != "exit")
{
    await foreach ( // Generate the response streamingly.
        var text
        in session.ChatAsync(
            new ChatHistory.Message(AuthorRole.User, userInput),
            inferenceParams))
    {
        Console.ForegroundColor = ConsoleColor.White;
        Console.Write(text);
    }
    Console.ForegroundColor = ConsoleColor.Green;
    userInput = Console.ReadLine() ?? "";
}
The result is a “ChatGPT-like” chat bot (maybe not so smart, but it runs quick ok-ish on my Dell notebook:

Summary
After some research which model can be used with LLamaSharp it went really smoothly (even for a .NET dummy like me).
Hope this helps!
Kürzlich wollte ich zu einer bestehenden Tabelle zwei neue Felder hinzufügen. Die Ausführung brach mit einer Fehlermeldung ab. Zusätzlich hat sich die Performance des gesamten Rechners verschlechtert. Aber alles der Reihe nach.
Beim Ausführung einer ALTER TABLE-Query kam in der MySQL Workbench zu folgendem Fehler:
Error Code: 2013. Lost connection to MySQL server during query
Damit wurde nicht angezeigt, dass die Query in ein Timeout läuft, sondern, dass eventuell ein schwerwiegenderes Problem besteht. Die Zeitspanne, nach der diese Meldung kam (30 Sekunden), ließ aber dennoch auf ein Timeout hinweisen.
Nun kann man sich mit dem nachfolgenden Befehl die aktuellen Prozesse auflisten lassen:
show full processlist;
Hier wurde angezeigt, dass die Query noch läuft und Daten in eine Temp-Tabelle kopiert werden. Das sollte meiner Meinung nach, beim Erweitern um zwei Attribute (ohne spezielle Berechnungen etc.) so nicht sein. Zudem lief die Query auch nach 30 Minuten noch. Die Tabelle selbst hat ca. 300.000 Einträge – nicht viel.
Ein
show create table TABELLEN_NAME;
zeigte, dass sich ein Volltext-Index auf der Tabelle befindet. Das lenkte meine Aufmerksamkeit auf sich. Im nächsten Schritt habe ich den Index entfernt:
alter table TABELLEN_NAME drop index INDEX_NAME;
Nun habe ich erneut das ALTER TABLE probiert und siehe da, die lange Ausführungszeit hat sich auf ein Minimum verkürzt.
Daher mein Tipp: Volltext-Index vor einem ALTER TABLE abdrehen, die notwendige Aktualisierung vornehmen und danach den Index wieder neu generieren.
Der Beitrag MySQL: ALTER TABLE extrem langsam erschien zuerst auf Norbert Eder.
If you start developing a ASP.NET Core application you will notice that your site is running under “http s ://localhost:1234” and that your browser is happy to accept it - so there are some questions to be asked.
Why HTTPS on your local dev box?
The first question might be: Why is HTTPS on your local dev box even needed?
At least two reasons for this (from my perspective):
- Browsers love HTTPS nowadays. There are some features, like websockets, that refuse to work with HTTP. I’m not 100% aware of all the problems, but running a webapp under HTTP in 2024 is painful (and rightfully so!).
- Integration with other services is mostly forbidden. If you rely on a 3rd party authentication system (e.g. Microsoft/Facebook/Google/Apple Login) they might accept “localhost” as a reply address, but might deny HTTP addresses.
I wouldn’t count “security” as an issue here, because you are developing on your own system. If there is something on your machine HTTPS won’t help you at that point.
How does ASP.NET Core issues a valid & trusted cert?
I’m not exactly sure when this happens, as it was already installed on my development machine.
Either when you install the Visual Studio workload for ASP.NET Core or if you create your very first ASP.NET Core application the dev cert for localhost will be issued.
But how?
The .NET SDK ships with a CLI tool called dotnet dev-certs https and this tool issues the certificate.
The output of this command will look like this if a valid and trusted certificate is found::
PS C:\Users\muehsig> dotnet dev-certs https
A valid HTTPS certificate is already present.
dev-certs https
There are other options available:
PS C:\Users\muehsig> dotnet dev-certs https --help


Usage: dotnet dev-certs https [options]

Options:
  -ep|--export-path  Full path to the exported certificate
  -p|--password      Password to use when exporting the certificate with the private key into a pfx file or to encrypt the Pem exported key
  -np|--no-password  Explicitly request that you don't use a password for the key when exporting a certificate to a PEM format
  -c|--check         Check for the existence of the certificate but do not perform any action
  --clean            Cleans all HTTPS development certificates from the machine.
  -i|--import        Imports the provided HTTPS development certificate into the machine. All other HTTPS developer certificates will be cleared out
  --format           Export the certificate in the given format. Valid values are Pfx and Pem. Pfx is the default.
  -t|--trust         Trust the certificate on the current platform. When combined with the --check option, validates that the certificate is trusted.
  -v|--verbose       Display more debug information.
  -q|--quiet         Display warnings and errors only.
  -h|--help          Show help information
What happens when the cert is no longer valid?
This is an interesting one, because I had this experience just this week (and that’s the reason for this blogpost).
A certificate needs to be in the certification store to be considered trusted. That means your “localhost”-dev cert will be stored in your personal certification store (at least on Windows):

As you can see, the command dotnet dev-certs https --check --trust will return something like this:
A trusted certificate was found: E7A2FB302F26BCFFB7C21801C09081CF2FAAAD2C - CN=localhost - Valid from 2024-03-13 11:12:10Z to 2025-03-13 11:12:10Z - IsHttpsDevelopmentCertificate: true - IsExportable: true
If the certificate is stale, then your browser won’t accept it anymore and your web application will start, but can’t be viewed because your browser will refuse it.
How to repair invalid certificates?
Use the two commands and it should work again:
dotnet dev-certs https --clean
…which will remove the old certification and…
dotnet dev-certs https --trust
… to issue a new cert and invoke the trust dialog from Windows.
If it works…
There are some more options, e.g. to export the certificate, which can be useful in certain scenarios, but if you can use HTTPS on your local development machine and everything works you shouldn’t have to bother.
If you want to learn more, checkout the dotnet dev-certs documentation.
Hope this helps!
For those facing the challenge of migrating their .NET Framework-based application to the modern .NET stack, Microsoft’s “Upgrade Assistant” is highly recommended:
What is the “Upgrade Assistant”?
The “Upgrade Assistant” is a tool that can integrate into Visual Studio or be accessed via CLI.
If you install the extension for Visual Studio you will have a new option “Upgrade project” available in your Solution Explorer.
.NET Framework to “new” and more…
Its main use case is upgrading .NET Framework-based WPF, WinForms, class libraries, or web applications to the newest .NET version. Besides this, the tool offers some other migration paths as well, e.g. from UWP to WinUI 3.
You even can use the tool to migrate from an older .NET Core version to a newer version (but - to be honest: those upgrades are quite easy in contrast to the .NET Framework to .NET Core migration).
Depending on the project type, the assistant allows for an “In-Place Upgrade,” “Side-by-Side,” or “Side-by-Side Incremental” upgrade.
- “In-Place Upgrade” means that the existing code is directly modified.
- “Side-by-Side” means that a new project is created and migration to the latest version is based on a copy.
- “Side-by-Side Incremental,” to my knowledge, is only available for ASP.NET web applications. Here, a new .NET Core project is added in parallel, and a sort of “bridge” is built in the original .NET project. This seems to me to be clever on the one hand but also very risky on the other.
You can see those upgrade methods in the video above.
Is it good?
We have used (or at least tested) the Assistant for upgrading WPF and class libraries to .NET Core and it helps to identify problems (e.g. if a NuGet package or any “old” framework code is not compatible).
My verdict: If you need to upgrade your code, you should give it a try.
In a more complex code base, it will sometimes mess with the code, but it still helps to give directions.
Hope this helps!
In my last post “First steps with WinUI 3” I already mentioned the “WinUI 3 Gallery”-App, but I missed mentioning two great resources.
If you take a deeper look at the “Home” page, you will spot the Community Toolkit Gallery (another app) and the “Template Studio for WinUI”.

The Community Toolkit is a community-driven collection of components and other helpers.

The “home” of the Community Toolkit can be found on GitHub
As of today, the Community Toolkit seems “alive” with recent commits in February 2024.
Interesting fact: The controls from the toolkit seems to work with the Uno Platform as well.
What is the Template Studio?
Template Studio is an addin for Visual Studio and can be installed from the Marketplace.
This adds the ‘Template Studio for WinUI’ template to Visual Studio:

After the usual “pick a name and location” you will be greeted with this Wizard:
The first step is to select a “Project type”:

In the next step you choose a “Design pattern” - which has only one item… well.

In “Pages” you can create your “views/pages” based on a given layout:
Some pages can only be added once (e.g. the “Settings”), but most pages can be added multiple times.

In “Features” you can add some WinUI 3 related features:

In the last setting you can decide if you want to add an MSTest project as well:

The result is the following Visual Studio solution, which includes two projects and a number of TODO items:

If you run the code a pretty simple app with your configured pages will be found:

Warning: Such code generators might be a good starting point, but (as always with such generators) the code might be “too stupid” or “too complicated” - depending on your needs.
Any other useful resource?
I’m a newbie with WinUI 3. The Community Toolkit looks promising and even the Template Studio looks good - at least from a few minutes playtime. If anyone has other useful resource: Please let me know (e.g. in the comments or via email).
Hope this helps!
At the .NET Conf 2023, Microsoft announced a kind of toolset to build cloud-native applications. That announcement was kind of hidden in a talk done by Glenn Condron and David Fowler about building cloud-native applications using .NET 8, which was also announced at that conference. This talk actually was about .NET Aspire, which I will quickly introduce with this post.
Let's start first by answering a question.
When I did a talk about .NET Aspire recently at the .NET user group in Basel (CH), one individual in the audience asked me the following question:
What is a cloud-native application?
Let's ask the internet to find the right answer:
Amazon:
"Cloud native is the software approach of building, deploying, and managing modern applications in cloud computing environments. Modern companies want to build highly scalable, flexible, and resilient applications that they can update quickly to meet customer demands. To do so, they use modern tools and techniques that inherently support application development on cloud infrastructure. These cloud-native technologies support fast and frequent changes to applications without impacting service delivery, providing adopters with an innovative, competitive advantage."
(https://aws.amazon.com/what-is/cloud-native/)
Google:
"A cloud-native application is specifically designed from the ground up to take advantage of the elasticity and distributed nature of the cloud. "
(https://cloud.google.com/learn/what-is-cloud-native)
RedHat:
"Cloud-native applications are a collection of small, independent, and loosely coupled services."
(https://www.redhat.com/en/topics/cloud-native-apps)
Oracle:
"The term cloud native refers to the concept of building and running applications to take advantage of the distributed computing offered by the cloud delivery model. Cloud-native apps are designed and built to exploit the scale, elasticity, resiliency, and flexibility the cloud provides."
(https://www.oracle.com/cloud/cloud-native/what-is-cloud-native/)
Microsoft:
"Cloud-native architecture and technologies are an approach to designing, constructing, and operating workloads that are built in the cloud and take full advantage of the cloud computing model."
(https://learn.microsoft.com/en-us/dotnet/architecture/cloud-native/definition)
Cloud Native Computing Foundation (CNCF):
"Cloud native technologies empower organizations to build and run scalable applications in modern, dynamic environments such as public, private, and hybrid clouds. Containers, service meshes, microservices, immutable infrastructure, and declarative APIs exemplify this approach.
These techniques enable loosely coupled systems that are resilient, manageable, and observable. Combined with robust automation, they allow engineers to make high-impact changes frequently and predictably with minimal toil."
(https://github.com/cncf/toc/blob/main/DEFINITION.md)
Every answer is a little different. Basically, it means a cloud-native application is built for the cloud and uses the services the cloud provides to be scalable and resilient.
What is .NET Aspire doing?
.NET Aspire helps with tooling in VS and the CLI to create and interact with .NET Aspire apps. It also brings some project templates to create new .NET Aspire apps. .NET Aspire helps with orchestrating, means running and connecting to multi-project applications and their dependencies. It also provides components that connect to cloud dependencies like queues, caches, databases, or even prebuild containers. All those components can be orchestrated and connected to your applications using C#. .NET Aspire creates a deployment-ready development environment. Using the Azure Development CLI (azd) you can easily deploy your cloud native application to Azure.
.NET Aspire is made for local development and it is made for Microsoft Azure. Developments and deployments to other clouds might be possible in the future with the support of the developer community. In the first stage, Microsoft will not support other cloud providers. Which makes sense since Azure is the number one platform for Microsoft.
.NET Aspire uses Docker Desktop to run your cloud-native application. When you press F5 in VS, your apps will be deployed to containers and will run on Docker Desktop locally. When you deploy your cloud-native application, a Bycep script will be created and your apps will be deployed to a new Azure Resource Group inside Azure Container Apps. App Service Containers are not supported yet. AKS is only supported via the community tool Aspirate.
Currently, .NET Aspire is Preview 3. Which means some features might not work or are not yet implemented.
But those limitations are absolutely fine for the moment.
Why is .NET Aspire needed?
Actually, it is not needed. There are good tools out there to set up the local development environment the way you can develop cloud-native applications locally. There are also tools that set up your development environment inside the cloud to develop in the same environment where your application will live. This is great and super helpful. Unfortunately, these possibilities are sometimes hard to set up and some teams can't use it for some reason. The easiest way to set up an environment locally for me as a developer on Windows using .NET was to use Docker Compose or to load or emulate the services I needed locally or to be connected to the cloud environment all the time and to use the cloud services directly. Both options are not perfect.
So, you see that .NET Aspire is not needed. But it is super helpful for me as a C# developer.
Let's have a quick look at .NET Aspire in action
Therefore, I created a frontend app using the new Blazor Web App and a backend that provides me with the data via a Web API endpoint. Both apps are just the default templates with the weather data demos. I just did a small modification: Instead of generating the weather data in the front end, it now loads them from the API.
When doing right-click on one of the projects and select "Add", you will see two new entries in the context menu:
- ".NET Aspire Component..."
- ".NET Aspire Orchestration Support..."
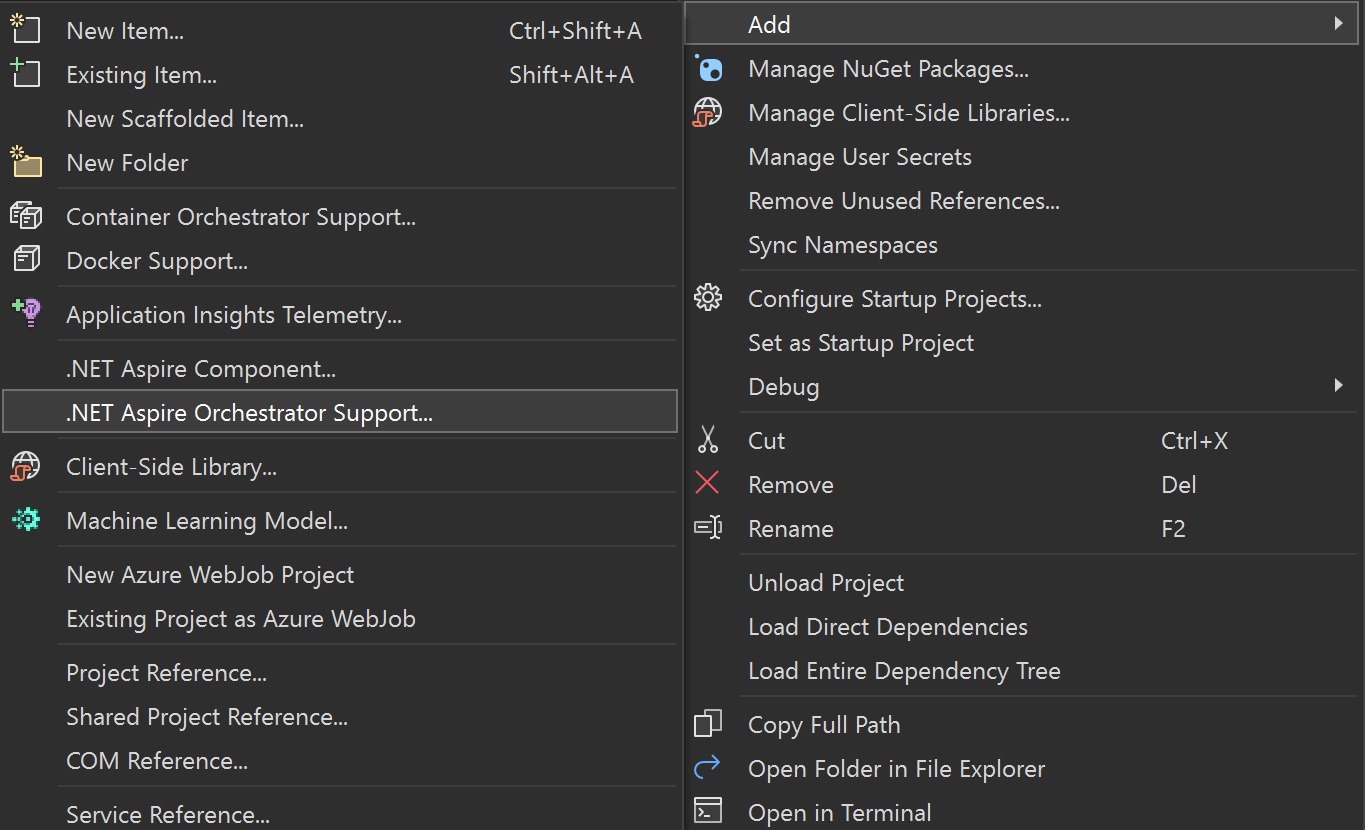
Selecting ".NET Aspire Orchestration Support...", it creates two new projects in your solution:
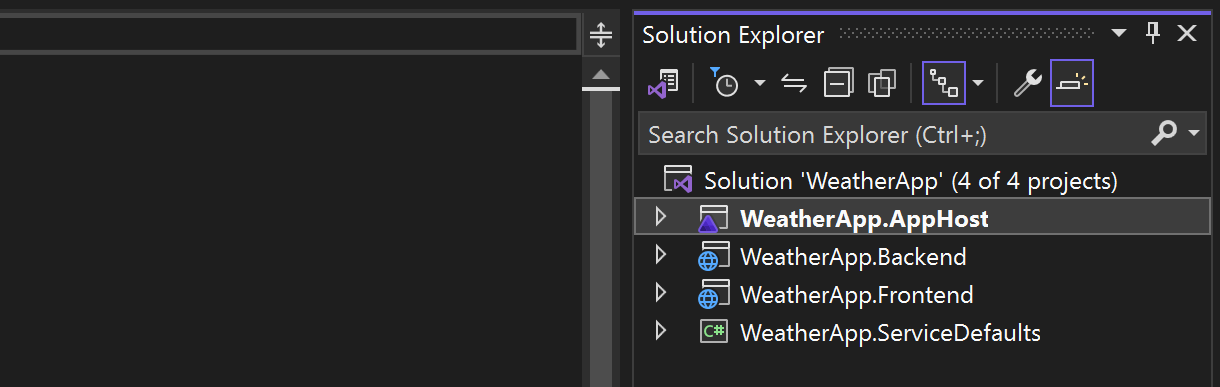
The AppHost is the project where you will do the actual composition, we will have a more detailed look later. The ServiceDefaults contains one single code file with extension methods that configure default services and Middlewares the actual projects need to use. Mainly Telemetry and HelthChecks. Actually, these service defaults are added to the actual projects when adding the Aspire Orchestration support. The following code shows the usage of the default in lines 5 and 17:
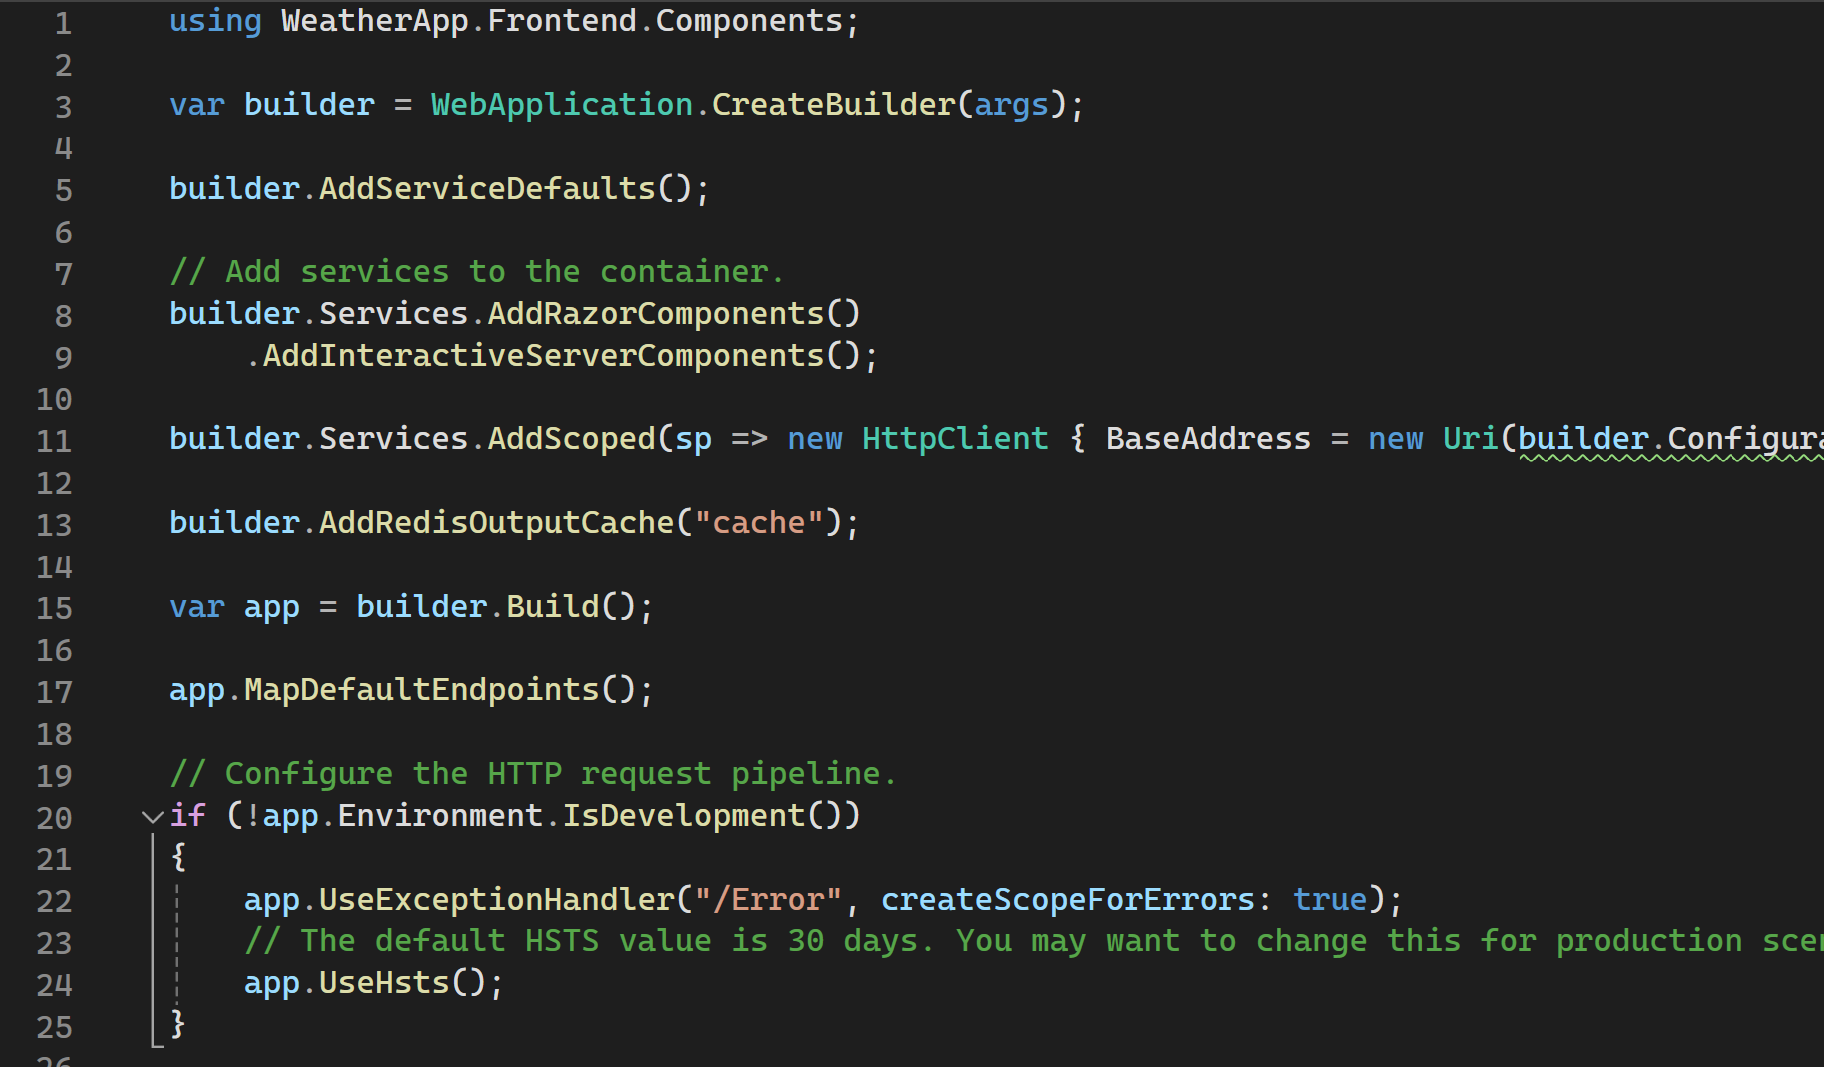
As you can see, I also configured a HttpClient that connects to the backend API.
I also added the Aspire orchestration support to the backend API and the service defaults are added to that project as well. In this project, I configured a distributed Redis cache in line 14:
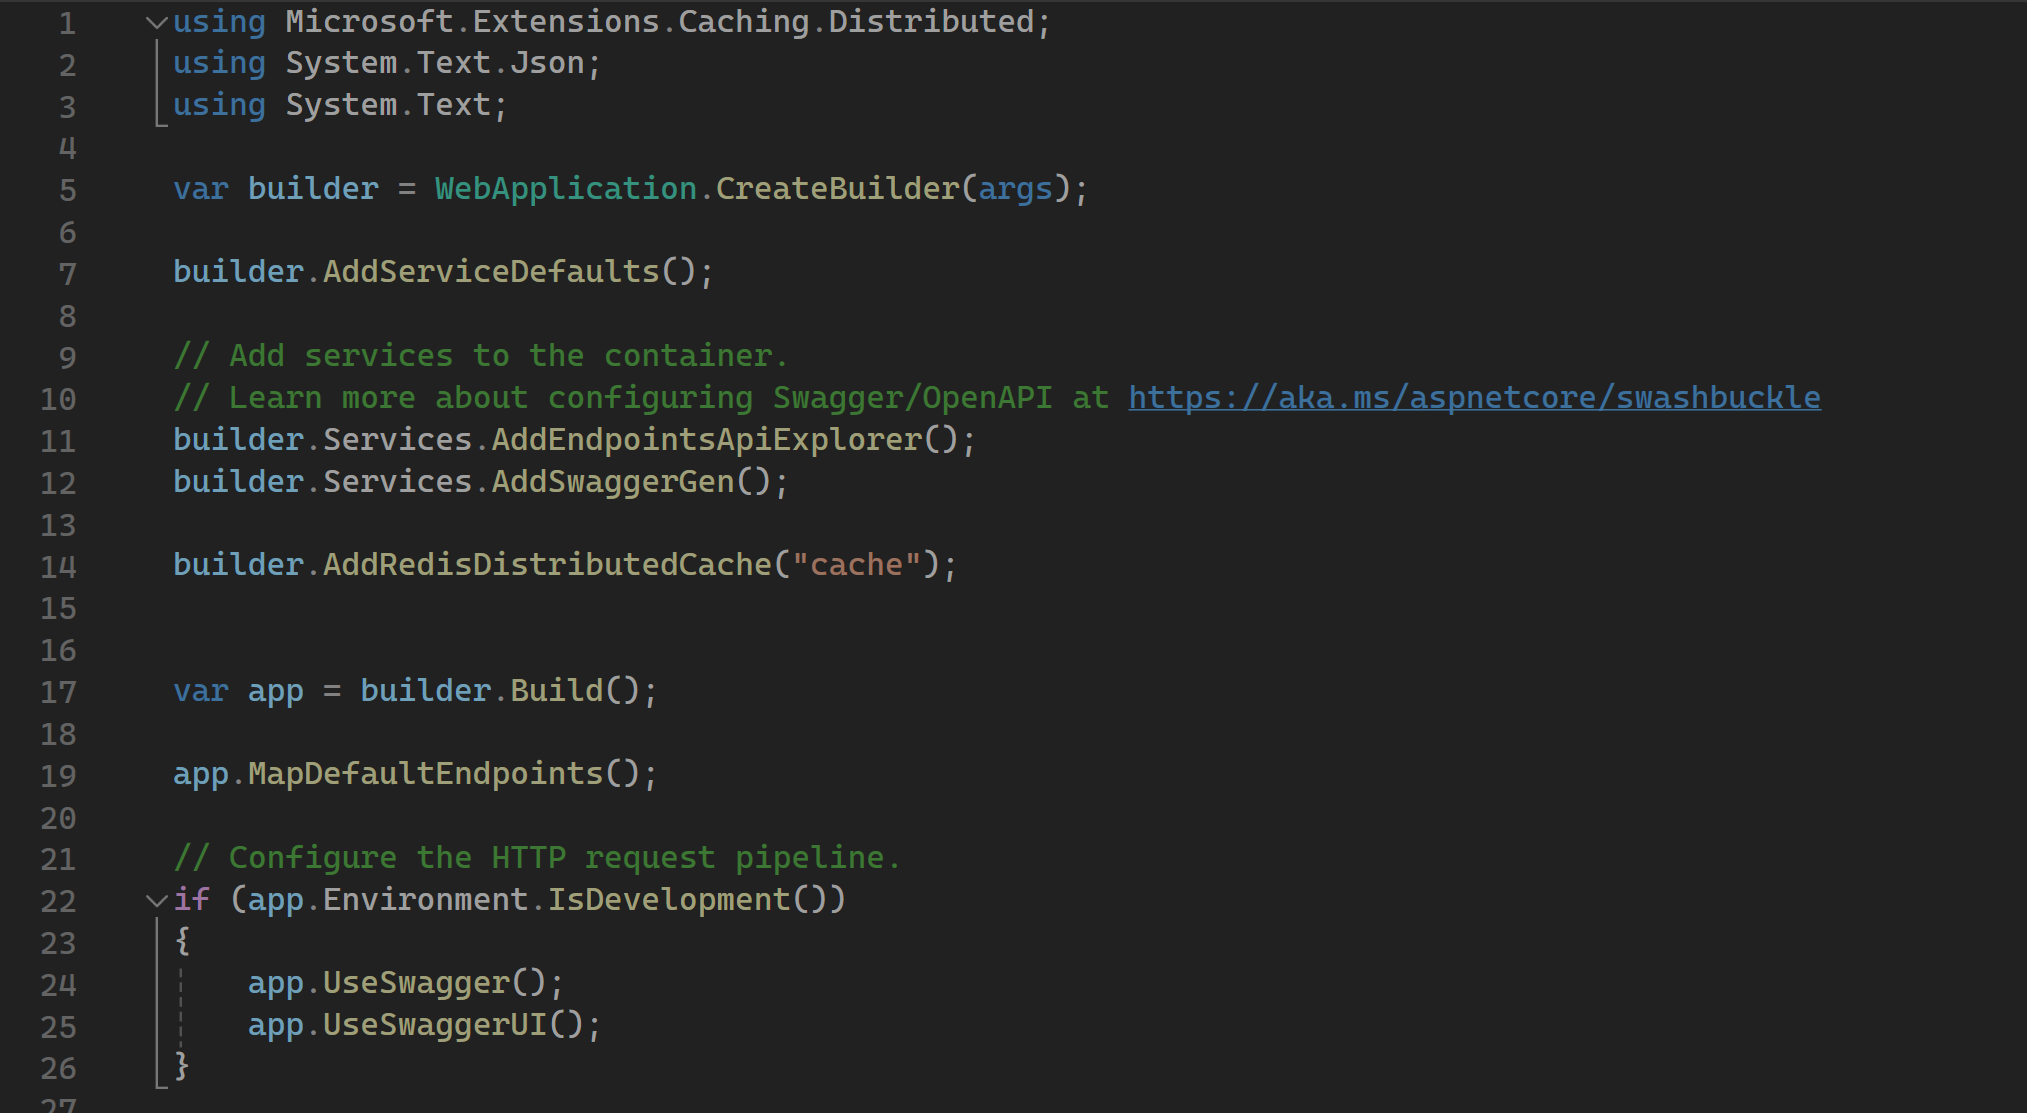
This application contains three components: A frontend which is a Blazor web app, a backend which is a minimal API and a Redis cache. These three components need to be orchestrated to run and debug it locally. The problem is, that I don't have a local instance of Redis yet.
This is where Aspire can help us. Let's have a look into the Program.cs of the AppHost Project:
var builder = DistributedApplication.CreateBuilder(args);

var cache = builder.AddRedis("cache");

var backend = builder.AddProject<Projects.WeatherApp_Backend>("backend")
    .WithReference(cache)
    .WithReplicas(2);

builder.AddProject<Projects.WeatherApp_Frontend>("frontend")
    .WithReference(backend);

builder.Build().Run();
This looks pretty similar to a regular minimal API without any ASP.NET Core stuff. The first line defines a DistributedApplicationBuilder which is the orchestrator.
Line 3 adds Redis to the orchestration with the name "cache". Remember that we configured the distributed cache with the exact same name in the backend project.
Line 5 adds a project reference to the orchestration with the name backend. It references the cache and it should start two instances of the backend.
Line 9 adds a project reference to the front end. This one needs the backend and adds it as a reference.
How does the frontend know the backend address when the apps are running in orchestration? I do have the same problem when I use docker-compose to orchestrate apps. In this case, i just need to read the endpoint URL from the environment variables:
IIbuilder.Services.AddScoped(sp => new HttpClient
{
    BaseAddress = new Uri(builder.Configuration.GetValue<string>("services:backend:0"))
});
You will see why this is working a little later.
Let's start the application but ensure Docker Desktop is running first. Since it is all in preview at the moment, you may need to start the application two times. Once the app is started you'll see the URL in the console that pops up. In case no browser opens automatically copy the URL and open it in a browser.:
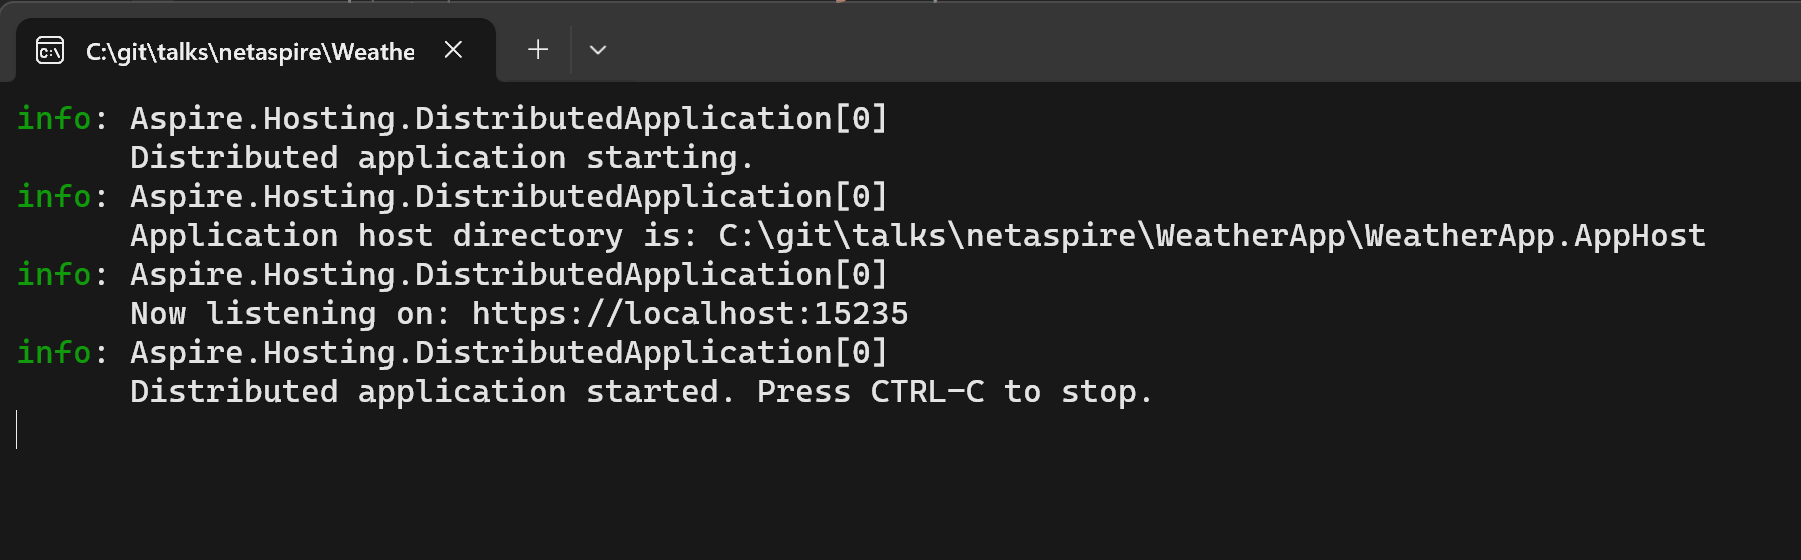
You will see the really cool Aspire portal in the browser that shows you all the running apps:

This Portal is built with the new ASP.NET Core Blazor web.
On the start screen, you see all the running services. Two instances of the backend app and one instance of the frontend app. You will also recognize the instance of the Redis cache. This is coming from a docker image that got pulled by Aspire and is running as a container now. You will also see that the backends have two endpoint URLs. One is equal to both instances and the other one is the individual URL for that specific container. The one that is equal to both is routed through a kid of a proxy.
This portal doesn't show you only the running services. Because of the Service defaults that got injected into the apps, it can read the health states, the logs, and the telemetry information of your apps. This will help you to debug your locally running apps. Just click through the portal to see the logs, the traces, and the metrics.
When you click on the details link of a specific running service, you can also see the environment variables that got passed to the service. In the next screenshot, you can see that the URL of the backend app will be passed as an environment variable to the frontend. This is the environment variable we used in the frontend to connect to the backend:
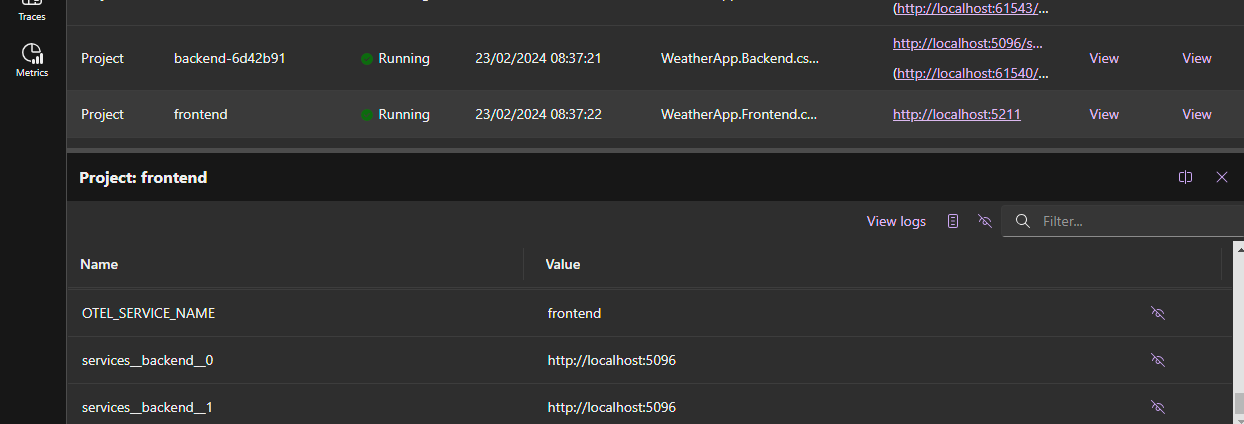
The orchestration makes the services to know each other this way. The backend gets the connection string to Redis via the environment variable. This is why the services can interact. So there is almost no magic here. Just C# to orchestrate and environment variables to connect the services to each other.
Deployment
As mentioned your cloud-native app will be orchestrated to be cloud-ready. You can easily deploy your application to your Azure subscription. The tool that helps you with that is the Azure Developer CLI (azd). This CLI is super easy to use prepares your app for you and can do the deployment. After the installation of azd you just use it.
With the console of your choice, cd to your solution folder and type azd login. This will open up a browser that you can use to log in with your Azure account.
The following command will prepare your application to be ready for deployment:
azd init
It creates some configuration files and a Bycep script to set up your environment on Azure. Take a look at it to learn about Bycep.
The next command does the deployment:
azd up
If you own more than one subscription you are asked which one to use. The CLI is super awesome. It is an interactive one that guides you through the entire deployment. Just follow the instructions.
If the deployment is done your app is up and running on Azure. It is really that easy.
It sets all up on Azure. A Redis is up and running. Your apps are running in Azure Container Apps and if you would have a SQL Server configured in .NET Aspire, it would also set up a SQL Azure for you
Just don't use preview versions of .NET. That won't run on Azure and it took me some time to figure out why my cloud native app is not running on Azure. The easiest way to not stumble into that issue is to create a global.json and pin your solution to an SDK version of .NET that is supported on Azure.
Conclusion
This is just an introduction post about .NET Aspire. I hope it gives you a good overview of it.
I will definitely follow the releases of .NET Aspire and I'm really looking forward to using the final release for the development of real applications that will go into production.
I really like it and will - for sure - write more deep dive about it. I also did a talk at the .NET user group Basel and would also do it at your user group, if you like. I'm also open to conference talks.
Just one thing I would really like to have is the Aspire portal to be deployed as well. I think this will be super helpful to monitor applications in production. As far as I know, there are no plans yet to have this portal as a tool for production. On the other hand, if you don't properly secure this portal, it could be a really dangerous security risk and all the information that the portal provides is also available on the Azure portal. So there isn't a real need for that.
Do you want to learn more about .NET Aspire? Follow the docs that are super complete and also contain super helpful tutorials about all the built in components: https://learn.microsoft.com/de-de/dotnet/aspire/
Developing desktop apps for Windows is quite complex in 2024. There are some “old school” frameworks like WPF or WinForms (or even older stuff) and there is this confusing UWP (but I think it’s dead).
The “modern stack” seems to be WinUI - so let’s take a look.

See here
What is WinUI?
WinUI is the “modern” version of WPF without the (dumb?) constraints from UWP. You can of course use your typical “Windows” programming languages (like C# or C++).
If you heard of UWP. The “Universal Windows Platform” was a good idea but failed, because - at least from my limited testing - the platform was very strict and you couldn’t do the same stuff that you can do with WPF/WinForms.
WinUI 1 and 2 were targeted at UWP (if I remember correctly) and with WinUI 3 Microsoft decided to lift those UWP constraints and with it we get a modern desktop stack based on the “known” XAML.
In summary:
WinUI 3 apps can be used for apps that run on Windows 11 and Windows 10 and can be distributed via the Microsoft Store and you can do the same crazy stuff that you love about WPF/WinForms.
Does anybody outside of Microsoft use WinUI?
WinUI is used in Windows 11, e.g. the settings or the new explorer - which is nice, but it would be good, if we found a non-Microsoft app that uses this tech, right?
Thankfully last week Apple decided to release Apple Music (and other apps) as a native Windows app and it seems (confirmed) like it was written with WinUI:

If Apple uses this tech, it seems “safe enough” for some exploration.
How to get started?
You will need Visual Studio 2022. Be aware, that even if you check all those desktop related workloads in the installer the WinUI 3 templates are still missing.

For the WinUI 3 templates you will need to install the Windows App SDK.
Visual Studio Templates
After the Windows App SDK is installed we finally have the templates in Visual Studio:

The default Blank App, Packaged (WinUI 3 in Desktop) is… well… quite blank:

If you start the application, you will see this:

Packaged vs. Unpacked
If you check the toolbar, you will notice the App 6 (Package) debug button. Packaged Apps can access some Windows APIs (e.g. custom context menu extensions) that Unpackaged Apps can’t. Unpackaged Apps on the other hand act like WPF apps - e.g. they have a “normal” .exe and can be distributed like any .exe-file.
This documentation page should cover this topic.
Let’s say we want to have a “proper” myApp.exe app, then the Unpackaged App is the way to go. If you choose the App 6 (Unpackaged) debug option you might see this weird error:
XamlCheckProcessRequirements();

Exception Unhandled:
System.DllNotFoundException: 'Unable to load DLL 'Microsoft.ui.xaml.dll' or one of its dependencies: The specified module could not be found. (0x8007007E)'
To fix this, you will need to add this to the .csproj:
	<PropertyGroup>
		...
		<WindowsPackageType>None</WindowsPackageType>
        ...
	</PropertyGroup>
After that the debug button should start the application and you should be able to start the .exe.
Samples
Ok, the most basic steps are done - now what?
To get a feeling about what is possible and what not, you should install the WinUI 3 Gallery app.

This application should give a some guidiance.
Hope this helps!
Note: I’m a beginner with WinUI 3 and just want to show other people the first few steps - if I miss something, just write me a comment! Thanks <3
If you’ve ever worked with the Windows operating system, especially in a programming context, you might have used the Process.Start(yourapp) (e.g. Process.Start(Outlook)) method in languages like C#.
This method is used to start a process - essentially to run an executable file. But have you ever stopped to think about how Windows knows where to find the executables you’re trying to run? Let’s dive into the inner workings of Windows and uncover this mystery.
Understanding the PATH Environment Variable
One of the first things that come into play is the PATH environment variable. This variable is crucial for the operating system to locate the executables.
What is the PATH Variable?
The PATH environment variable is a system-wide or user-specific setting that lists directories where executable files are stored. When you run a command in the command prompt or use Process.Start(...), Windows looks through these directories to find the executable file.
The PATH environment variable can be viewed via the system settings:

… there is also a nice editor now build into Windows for the PATH environment variable:

How Does PATH Work?
If the executable is not in the current directory, Windows searches through each directory specified in the PATH variable. The order of directories in PATH is important - Windows searches them in the order they are listed. If it finds the executable in one of these directories, it runs it.
However, the PATH variable isn’t the only mechanism at play here.
The Role of App Paths in the Windows Registry
Another less-known but equally important component is the “App Paths” registry key. This key is located in HKEY_LOCAL_MACHINE\SOFTWARE\Microsoft\Windows\CurrentVersion\App Paths.
Understanding App Paths
The App Paths key is used to specify paths to specific applications. Each application can have its entry under the App Paths key, which means that Windows can find and run these applications even if their directories are not listed in the PATH variable.

How Do App Paths Work?
When you use Process.Start(...) and specify an application name like “OUTLOOK”, Windows first checks the App Paths registry key before it checks the PATH variable. If it finds an entry for the application here, it uses this path to start the application. This is particularly useful for applications that are not in common directories or have multiple executables in different locations.
Conclusion
Both PATH and App Paths play significant roles. While PATH is great for general-purpose directory searching (especially for system utilities and command-line tools), App Paths is more specific and tailored for individual applications.
There are probably even more options out there besides PATH and App Paths - Windows is full of hidden gems like this 😉.
Fun fact: I only discovered App Paths while debugging a problem. We use Process.Start(OUTLOOK) to start Microsofts Outlook Client and I was wondering why this even works.
Hope this helps!
If your .NET (“.NET Core”) program is running on a system that specifies strict proxy settings, you must either handle these settings in your application itself or use these environment variables.
Since I had this problem from time to time and the procedure was not 100% clear to me, I am now recording it here on the blog.
“DefaultProxy”
If you don’t specify any proxy, then the DefaultProxy is used and depending on your operation system the following will be used:
(Copied from here)
For Windows: Reads proxy configuration from environment variables or, if those are not defined, from the user’s proxy settings.
For macOS: Reads proxy configuration from environment variables or, if those are not defined, from the system’s proxy settings.
For Linux: Reads proxy configuration from environment variables or, in case those are not defined, this property initializes a non-configured instance that bypasses all addresses.
The environment variables used for DefaultProxy initialization on Windows and Unix-based platforms are:
HTTP_PROXY: the proxy server used on HTTP requests.
HTTPS_PROXY: the proxy server used on HTTPS requests.
ALL_PROXY: the proxy server used on HTTP and/or HTTPS requests in case HTTP_PROXY and/or HTTPS_PROXY are not defined.
NO_PROXY: a comma-separated list of hostnames that should be excluded from proxying. Asterisks are not supported for wildcards; use a leading dot in case you want to match a subdomain. Examples: > NO_PROXY=.example.com (with leading dot) will match www.example.com, but will not match example.com. NO_PROXY=example.com (without leading dot) will not match www.example.com. This behavior might be > revisited in the future to match other ecosystems better.
Scenario: Web-App that needs external & “internal” Web-APIs
We often had the following problem:
Our web application needs to contact external services. This means, that we must use the proxy.
At the same time, our web application also wants to communicate with other web APIs on the same machine, but the proxy does not allow this (the proxy can’t return the request to the same machine - not sure why).
It should be noted that the “IIS account” or “Network Service” did NOT have a proxy setting itself, i.e. the “User Proxy Settings” were always empty.
Solution:
We used the following proxy settings and it worked:
ALL_PROXY = proxyserver.corp.acme.com
NO_Proxy = internalserver.corp.acme.com
Our web application and our internal web api were running on “internalserver.corp.acme.com”. Each request to external services were routed through the proxy and each “internal” request didn’t touch the proxy.
IE-Proxy Settings:
This solution should work fine on “Server-Environments”. If you have a desktop application, then the “Default Proxy” handling should do the trick. In some special cases the “IE proxy setting” handling might be needed. If you want to learn more about this, read this blogpost: How to use IE proxy settings with HttpClient.
Hope this helps!
Due to the regular calls for articles about the SOLID principles, I decided some time ago to offer this series in the form of a small book. This book can now be ordered (as a paperback and as an e-book) from all well-known bookshops and digital platforms. In addition to the SOLID principles, the book also addresses the KISS, DRY, LoD and YAGNI principles.
Of course, the previous articles are still available free of charge here on the blog. This means that everyone is free to decide whether they would prefer to read the articles online, on an e-book reader or as a printed book.
The price for the almost 100-page book is €6.99 for the printed version (ISBN-13: 9783757892227) and €4.99 for the e-book (ISBN-13: 9783758356148).
The 5 SOLID principles were presented in the previous posts. In addition to the SOLID principles, however, there are other principles that are also briefly presented here. What all these principles have in common is the goal of making software more maintainable and more reusable.
Don’t Repeat Yourself (DRY)
The DRY principle states (as the name suggests) that program code should not be duplicated unnecessarily. Instead, a function should be implemented only once and called at desired points in the program.
The DRY principle can help improve the maintainability of code, as it becomes easier to make changes to a function if it is implemented in only one place in the program code. In addition, the DRY principle can help reduce errors in the program, since duplicated code often leads to unexpected behaviour when a change is made in only one of the duplicated locations. Thus the DRY principle is an important principle in the software development, which can contribute to the improvement of the code quality.
Although the DRY principle is easy to understand and implement, it is probably the most disregarded principle. Because nothing is easier than to repeat source code by copy & paste. Especially when the time pressure is particularly high. Therefore, you should always try to implement shared functions in separate modules.
The following short example shows the application of the DRY principle. A PLC program receives different temperature values from several sensors. All temperature values are to be displayed in an HMI and written to a log file. To make the temperature values more readable, the formatting should be done in the PLC:
FUNCTION F_DisplayTemperature : STRING
VAR_INPUT
  fSensorValue  : LREAL;
  bFahrenheit   : BOOL;
END_VAR
IF (fSensorValue > 0) THEN
  IF (bFahrenheit) THEN
    F_DisplayTemperature := CONCAT('Temperature: ',
                   REAL_TO_FMTSTR(fSensorValue * 1.8 + 32, 1, TRUE));
    F_DisplayTemperature := CONCAT(F_DisplayTemperature, ' °F');
  ELSE
    F_DisplayTemperature := CONCAT('Temperature: ',
                   REAL_TO_FMTSTR(fSensorValue, 1, TRUE));
    F_DisplayTemperature := CONCAT(F_DisplayTemperature, ' °C');
  END_IF
ELSE
    F_DisplayTemperature := 'No sensor data available';
END_IF
In this example the function F_DisplayTemperature() is implemented only once. For the formatting of the temperature values this function is called at the desired places in the program. By avoiding duplicated code, the program becomes clearer and easier to read. If, for example, it is necessary to change the number of decimal places, this only has to be done in one place, namely in the function F_DisplayTemperature().
In addition to the use of functions, inheritance can also help to comply with the DRY principle by relocating a functionality in a base FB and using it by all derived FBs.
However, there may be cases in which the DRY principle should be deliberately violated. This is always the case if the readability of the source code is worsened by the use of DRY. Thus for the circle computation the formula for the circumference (U=2rπ) or for the area (A=r2π) is sufficiently readable. An outsourcing into separate functions does not increase the code quality, but only the dependence to further modules, in which the functions for the circle computation are. Instead, a global constant should be created for π and used in the calculations.
In summary, the DRY principle helps make program code cleaner and shorter by avoiding code duplication.
Law Of Demeter (LoD)
The Law of Demeter is another principle whose observance can significantly minimize the couplings between function blocks. The Law of Demeter specifies that only elements in the immediate vicinity should be accessed from a function block (or method or function). In concrete terms, this means that only accesses to the following elements are permitted:
- Variables of the own function block (everything between VAR/END_VAR)
- Methods/properties of the own function block
- Methods/properties of the function blocks that were created in the own function block
- Parameters passed to methods or function blocks (VAR_INPUT)
- Global constants or parameters contained in a parameter list
The Law of Demeter could therefore also be called: Don’t talk to strangers. Strangers are elements that are not directly present in the function block. In contrast, the own elements are called friends.
Also this principle originates from the 1980s years, thus from the time, in which the object-oriented software development increased strongly in popularity. The name Demeter is to be led back on a software project of the same name, in which this principle was recognized for the first time (Demeter is in the Greek mythology the sister of Zeus and the Goddess of the agriculture). At the end of the 1980s, this principle was further elaborated by Ian Holland and Karl J. Lieberherr and published under the title Assuring Good Style for Object-Oriented Programs.
The following graphic is intended to illustrate the Law of Demeter in a little more detail:

FB_A contains an instance of FB_B (fbB). Therefore, FB_A can directly access the methods and properties of FB_B.
FB_B contains an instance of FB_C. Therefore, FB_B can access FB_C directly.
FB_B could offer a property or a method that returns the reference to FB_C (refC). Access from FB_A to the instance of FB_C via FB_B would thus theoretically be possible:
nValue := fbB.refC.nValue;
The instance on FB_C is created in FB_B. If FB_A accesses this instance directly, a fixed coupling between FB_A and FB_C is created. This fixed coupling can lead to problems in the care, maintenance and testing of the program. If FB_A is tested, not only FB_B must be present, but FB_C as well. A frequent violation of the Law of Demeter is therefore also helpful in the early detection of maintenance problems.
Even creating a corresponding local variable in which the reference to FB_C is stored does not solve the actual problem:
refC : REFERENCE TO FB_C;
refC REF= fbB.refC;
nValue := refC.nValue;
At first glance, these dependencies are not always apparent, as FB_C is accessed indirectly via FB_B.
Example
Here is a concrete example that illustrates the problem again and also offers a solution.
The function blocks FB_Building, FB_Floor, FB_Room and FB_Lamp represent the structure of a building and its lighting. The building consists of 5 floors, each containing 20 rooms and each room contains 10 lamps.
Each function block contains the corresponding instances of the underlying elements. The function blocks each provide a property that offers a reference to these elements. FB_Lamp contains the property nPowerConsumption, via which the current power consumption of the lamp is output.

A function is to be developed that determines the power consumption of all lamps in the building.
One solution could be to access each individual lamp via several nested loops and add up the power consumption:
FUNCTION F_CalcPowerConsumption : UDINT
VAR_INPUT
  refBuilding : REFERENCE TO FB_Building;
END_VAR
VAR
  nFloor, nRoom, nLamp : INT;
END_VAR
IF (NOT __ISVALIDREF(refBuilding)) THEN
  F_CalcPowerConsumption := 0;
  RETURN;
END_IF
FOR nFloor := 1 TO 5 DO
  FOR nRoom := 1 TO 20 DO
    FOR nLamp := 1 TO 10 DO
      F_CalcPowerConsumption := F_CalcPowerConsumption + refBuilding
                                  .refFloors[nFloor]
                                  .refRooms[nRoom]
                                  .refLamps[nLamp].nPowerConsumption;
    END_FOR
  END_FOR
END_FOR
The „diving‟ into the object structure down to each lamp seems somehow impressive. But this makes the function dependent on all function blocks, even those that are only indirectly addressed via a reference.
The access of refBuilding to refFloors does not violate the Law of Demeter, since refFloors is a direct property of FB_Building. However, all further accesses to the references have the consequence that our function also becomes dependent on the other function blocks.
If, for example, the structure of FB_Room or FB_Floor changes, the function for power consumption may also have to be adapted.
To comply with the Law of Demeter, each function block could offer a method (CalcPowerConsumption()) in which the power consumption is calculated. In each of these methods, the underlying method CalcPowerConsumption() is called:

The CalcPowerConsumption() method in FB_Building only accesses its own elements. In this case, it accesses the property refFloors to call the method CalcPowerConsumption() of FB_Floor:
METHOD CalcPowerConsumption : UDINT
VAR
  nFloor : INT;
END_VAR
FOR nFloor := 1 TO 5 DO
  CalcPowerConsumption := CalcPowerConsumption +
                             refFloors[nFloor].CalcPowerConsumption();
END_FOR
In CalcPowerConsumption() of FB_Floor, only FB_Room is accessed:
METHOD CalcPowerConsumption : UDINT
VAR
  nRoom : INT;
END_VAR
FOR nRoom := 1 TO 20 DO
  CalcPowerConsumption := CalcPowerConsumption +
                             refRooms[nRoom].CalcPowerConsumption();
END_FOR
Finally, the power consumption of all lamps in the room is calculated in FB_Room:
METHOD CalcPowerConsumption : UDINT
VAR
  nLamp : INT;
END_VAR
FOR nLamp := 1 TO 10 DO
  CalcPowerConsumption := CalcPowerConsumption +
                             refLamps[nLamp].nPowerConsumption;
END_FOR
The structure of the function F_CalcPowerConsumption() is thus much simpler:
FUNCTION F_CalcPowerConsumption : UDINT
VAR_INPUT
  refBuilding : REFERENCE TO FB_Building;
END_VAR
IF (NOT __ISVALIDREF(refBuilding)) THEN
  F_CalcPowerConsumption := 0;
  RETURN;
END_IF
F_CalcPowerConsumption := refBuilding.CalcPowerConsumption();
After this adjustment, F_CalcPowerConsumption() is only dependent on FB_Building and its method CalcPowerConsumption(). How FB_Building calculates the power consumption in CalcPowerConsumption() is irrelevant for F_CalcPowerConsumption(). The structure of FB_Room or FB_Floor could change completely, F_CalcPowerConsumption() would not have to be adapted.
The first variant, in which all function blocks were iterated through, is very susceptible to changes. No matter which function block the structure changes, an adjustment of F_CalcPowerConsumption() would be necessary every time.
Sample 1 (TwinCAT 3.1.4024) on GitHub
However, it must be taken into account that nested structures do make sense. The Law of Demeter does not have to be applied here. It can be helpful to distribute the configuration data hierarchically over several structures in order to increase readability.
Keep It Simple, Stupid (KISS)
The KISS principle states that code should be as „simple‟ as possible so that it is as easy to understand as possible and thus effective to maintain. Here, „simple‟ is also to be understood as „plain‟. This means a simplicity that tries to leave out the unnecessary but still fulfils the customer’s requirements. By following the KISS principle, a system is:
- easy to understand
- easy to extend
- easy to maintain
If the requirement is to sort ten million records, using the bubblesort algorithm would be simple to implement, but the low speed of the algorithm will not meet the client’s requirements. Therefore, a solution must always be found that meets the customer’s required expectations, but whose implementation is as simple (plain) as possible.
Basically, two types of requirements are to be distinguished:
Functional requirement: The customer or stakeholder demands a specific feature. The exact requirements for this feature are then defined together with the customer and only then is it implemented. Functional requirements extend an application with clear functions (features) desired by the customer.
Non-functional requirements: A non-functional requirement is, for example, the splitting of an application into different modules or the provision of interfaces, e.g. to enable unit tests. Non-functional requirements are performance features that are not necessarily visible to the customer. However, these may be necessary so that the software system can be maintained and serviced.
The KISS principle is always about the non-functional requirements. The focus is on the „how‟. In other words, the question of how the required functions are achieved. The YAGNI principle, which is described in the following chapter, refers to the functional requirements. Here the focus is on the „what‟.
The KISS principle can be applied at several levels:
Formatting source code
Although the following source code is very compact, the KISS principle is violated here because it is difficult to understand and thus very error-prone:
IF(x<=RT[k-1](o[n+2*j]))THEN WT[j+k](l AND NOT S.Q);END_IF;
IF(x>RI[k+1](o[n+2*k]))THEN WO[j-k](l OR NOT S.Q);END_IF;
The source code should be formatted in such a way that the sequence is better recognised. Also, the identifiers for variables and functions should be chosen in such a way that their meaning is easier to understand.
Unnecessary source code
Source code that does not help to improve readability also violates the KISS principle:
bCalc := F_CalcFoo();
IF (bCalc = TRUE) THEN
  bResult := TRUE;
ELSE
  bResult := FALSE;
END_IF
Although the source code is well structured and the identifiers have been chosen so that their meaning is easier to recognise, the source code can be significantly reduced:
This one line is much easier to understand than the 6 lines before. The source code is „simpler‟, with the same range of functions.
Software design / software architecture
The design or structure of software can also violate the KISS principle. If, for example, a complete SQL database is used to store configuration data, although a text file would suffice, the KISS principle is also violated.
The division of a PLC programme into several CPU cores only makes sense if it also produces a practical benefit. In this case, appropriate mechanisms must be built into a PLC program to synchronise access to shared resources. These increase the complexity of the system considerably and should only be used if the application requires them.
I have deliberately placed the chapters on the KISS principle and the YAGNI principle at the end. From here, I would like to take a brief look back at the beginning of the series on the SOLID principles.
When introducing the SOLID principles, I occasionally pointed out the danger of overengineering. Abstractions should only be provided if they are necessary for the implementation of features.
To clarify this, I will use the example for the explanation of the SOLID principles again (see: IEC 61131-3: SOLID – The Dependency Inversion Principle).

There is a fixed dependency between the three lamp types and the controller. If the application is to be extended by another lamp type, it is necessary to adapt the programme at various points. By applying the Dependency Inversion Principle (DIP) and the Single Responsibility Principle (SRP), the programme became much more flexible. The integration of additional lamp types has been significantly simplified. However, the complexity of the programme was also significantly increased by these adjustments, as the UML diagram shows:
 (abstract elements are displayed in italics)
Before additional levels of abstraction are realised by applying the SOLID principles, one should always critically question the extra effort involved.
The structure of the first variant is completely sufficient if the program is used exclusively in a project to this extent. The program is small enough to understand the structure of the software and to make small adjustments. The KISS principle was followed. No more complexity than necessary has been built in.
However, if the first variant is only an intermediate step, e.g. in the development of a comprehensive light management system, it is to be expected that the application will increase in complexity. It is also possible that at a later stage the development will have to be distributed among several people. The use of unit tests is another point that justifies the implementation of SOLID principles. Without decoupling the individual lamp types through interfaces, the use of unit tests is difficult or even impossible. Here, too, the KISS principle is not violated. The KISS principle must therefore always be considered in context.
You Ain’t Gonna Need It (YAGNI)
YAGNI stands for You Ain’t Gonna Need It and also means You will not need it. It means that in software development you should only implement the features that are needed. No functions or features should be implemented, which might be needed someday.
In contrast to the KISS principle, which always focuses on the non-functional requirements, the YAGNI principle focuses on the functional requirements.
When developing software, it can be tempting to implement additional features without a concrete requirement. This can be the case, for example, if features are implemented during development without consulting the customer, in the firm belief that the customer will demand them later.
Referring to our example above, the YAGNI principle would be violated if the operating hours recording were implemented (see: IEC 61131-3: SOLID – The Interface Segregation Principle), although this was not requested by the customer.
If it is determined during development that a particular feature could be useful, it should only be implemented after consultation with the customer. Otherwise, a system will gradually receive more and more source code for features that no one needs.
This example makes it clear once again that all the principles described so far are not fixed rules or even laws. However, the principles are a powerful tool for improving the code quality of software.

In den vorherigen Posts wurden die 5 SOLID-Prinzipien vorgestellt. Neben den SOLID-Prinzipien gibt es noch weitere Prinzipien, von denen ich einige ebenfalls kurz vorgestellen möchte. All diese Prinzipen haben das gemeinsame Ziel, die Wartbarkeit und die Wiederverwendbarkeit von Software zu verbessern.
Don’t Repeat Yourself (DRY)
Das DRY-Prinzip besagt (wie der Name schon vermuten lässt), dass man Programmcode nicht unnötig duplizieren sollte. Stattdessen sollte eine Funktion nur einmal implementiert und an gewünschten Stellen im Programm aufgerufen werden.
Das DRY-Prinzip kann helfen, die Wartbarkeit von Code zu verbessern, da es einfacher wird, Änderungen an einer Funktion vorzunehmen, wenn sie nur an einer Stelle im Programmcode implementiert wurde. Außerdem kann das DRY-Prinzip dazu beitragen, Fehler im Programm zu reduzieren, da duplizierter Code oft zu unerwarteten Verhaltensweisen führt, wenn eine Änderung nur an einer der duplizierten Stellen vorgenommen wird. Somit ist das DRY-Prinzip ein wichtiger Grundsatz in der Softwareentwicklung, welcher zur Verbesserung der Codequalität beitragen kann.
Obwohl das DRY-Prinzip einfach zu verstehen und umzusetzen ist, ist es wahrscheinlich das am meisten missachtete Prinzip. Denn nichts ist einfacher, als Quellcode durch Copy & Paste zu wiederholen. Gerade dann, wenn der Zeitdruck besonders hoch ist. Deshalb sollte man sich immer bemühen, gemeinsam genutzte Funktionen in separate Module zu implementieren.
Das folgende kurze Beispiel zeigt die Anwendung des DRY-Prinzips. Ein SPS-Programm erhält von mehreren Sensoren unterschiedliche Temperaturwerte. Alle Temperaturwerte sollen in einem HMI angezeigt und in eine Log-Datei geschrieben werden. Damit die Temperaturwerte besser lesbar sind, soll die Formatierung in der SPS erfolgen:
FUNCTION F_DisplayTemperature : STRING
VAR_INPUT
  fSensorValue  : LREAL;
  bFahrenheit   : BOOL;
END_VAR
IF (fSensorValue > 0) THEN
  IF (bFahrenheit) THEN
    F_DisplayTemperature := CONCAT('Temperature: ',
                   REAL_TO_FMTSTR(fSensorValue * 1.8 + 32, 1, TRUE));
    F_DisplayTemperature := CONCAT(F_DisplayTemperature, ' °F');
  ELSE
    F_DisplayTemperature := CONCAT('Temperature: ',
                   REAL_TO_FMTSTR(fSensorValue, 1, TRUE));
    F_DisplayTemperature := CONCAT(F_DisplayTemperature, ' °C');
  END_IF
ELSE
  F_DisplayTemperature := 'No sensor data available';
END_IF
In diesem Beispiel wird die Funktion F_DisplayTemperature() nur einmal implementiert. Für die Formatierung der Temperaturwerte wird diese Funktion an den gewünschten Stellen im Programm aufgerufen. Durch das Vermeiden von dupliziertem Code wird das Programm übersichtlicher und einfacher zu lesen. Ist es z.B. notwendig die Anzahl der Nachkommerstellen zu verändern, so muss dieses nur an einer Stelle, nämlich in der Funktion F_DisplayTemperature(), erfolgen.
Neben den Einsatz von Funktionen kann auch die Vererbung helfen das DRY-Prinzip einzuhalten, indem eine Funktionalität in einen Basis-FB verlagert und von allen abgeleiteten FBs verwendet wird.
Es kann aber Fälle geben, in denen das DRY-Prinzip bewusst verletzt werden sollte. Dieses ist immer dann der Fall, wenn sich durch den Einsatz von DRY die Lesbarkeit des Quellcode verschlechtert. So ist für die Kreisberechnung die Formel für den Umfang (U=2rπ) oder für die Fläche (A=r2π) ausreichend lesbar. Eine Auslagerung in separate Funktionen erhöht nicht die Codequalität, sondern nur die Abhängigkeit zu weiteren Modulen, in denen sich die Funktionen für die Kreisberechnung befinden. Stattdessen sollte für π eine globale Konstante angelegt und in den Berechnungen verwendet werden.
Zusammenfassend lässt sich sagen, dass das DRY-Prinzip dazu beiträgt, das Programmcode sauberer und kürzer wird, indem es die Duplizierung von Code vermeidet.
Law Of Demeter (LoD)
Das Law of Demeter ist ein weiteres Prinzip, dessen Beachtung die Kopplungen zwischen Funktionsblöcken deutlich minimieren kann. Das Law of Demeter legt fest, dass aus einem Funktionsblock (bzw. Methode oder Funktion) nur auf Elemente in unmittelbarer Nähe zugegriffen werden sollte. Konkret bedeutet dieses, dass nur Zugriffe auf die folgenden Elemente erlaubt sind:
- Variablen des eigenen Funktionsblocks (alles zwischen VAR/END_VAR)
- Methoden/Eigenschaften des eigenen Funktionsblocks
- Methoden/Eigenschaften der Funktionsblöcke die im eigenen Funktionsblock angelegt wurden
- Parameter die an Methoden oder Funktionsblöcke übergeben wurden (VAR_INPUT)
- Globale Konstanten oder Parameter die in einer Parameterliste enthalten sind
Das Law of Demeter könnte somit auch heißen: Don’t talk to strangers. Als Strangers (Fremde) werden hierbei die Elemente bezeichnet, die nicht unmittelbar in dem Funktionsblock vorhanden sind. Im Gegensatz dazu, werden die eigenen Elemente Friends (Freunde) genannt.
Auch dieses Prinzip stammt aus den 1980iger Jahren, also aus der Zeit, in der die objektorientierte Softwareentwicklung stark an Popularität zugenommen hat. Der Name Demeter ist auf ein gleichnamiges Softwareprojekt zurückzuführen, in dem dieses Prinzip erstmal erkannt wurde (Demeter ist in der griechischen Mythologie die Schwester von Zeus und die Göttin der Landwirtschaft). Ende der 1980iger Jahre wurde dieses Prinzip von Ian Holland und Karl J. Lieberherr weiter ausgearbeitet und unter dem Titel Assuring Good Style for Object-Oriented Programs veröffentlicht.
Die folgende Grafik soll das Law of Demeter etwas genauer verdeutlichen:

In FB_A ist eine Instanz von FB_B (fbB) enthalten. Deshalb kann FB_A direkt auf die Methoden und Eigenschaften von FB_B zugreifen.
FB_B enthält eine Instanz von FB_C. Deshalb kann FB_B direkt auf FB_C zugreifen.
FB_B könnte eine Eigenschaft oder eine Methode anbieten, welche die Referenz auf FB_C zurückgibt (refC). Ein Zugriff aus FB_A auf die Instanz von FB_C über FB_B wäre somit theoretisch möglich:
nValue := fbB.refC.nValue;
Die Instanz auf FB_C wird in FB_B angelegt. Wenn FB_A auf diese Instanz direkt zugreift, entsteht eine feste Kopplung zwischen FB_A und FB_C. Diese feste Kopplung kann zu Problemen bei der Pflege, Wartung und dem Testen des Programms führen. Wird FB_A getestet, so muss nicht nur FB_B vorhanden sein, sondern auch FB_C. Ein häufiges Verletzen des Law of Demeter ist somit auch hilfreich bei der Früherkennung von Wartungsproblemen.
Auch das Anlegen einer entsprechenden lokalen Variablen, in der die Referenz auf FB_C abgelegt wird, löst das eigentliche Problem nicht:
refC : REFERENCE TO FB_C;
refC REF= fbB.refC;
nValue := refC.nValue;
Auf dem ersten Blick sind diese Abhängigkeiten nicht immer zu erkennen, da der Zugriff auf FB_C indirekt über FB_B erfolgt.
Beispiel
Hierzu ein konkretes Beispiel, welches das Problem nochmal verdeutlicht und auch einen Lösungsansatz anbietet.
Mit den Funktionsblöcken FB_Building, FB_Floor, FB_Room und FB_Lamp wird die Struktur eines Gebäudes und dessen Beleuchtung abgebildet. Das Gebäude besteht aus 5 Etagen, in der sich jeweils 20 Räume befinden und jeder Raum enthält 10 Lampen.
In jedem Funktionsblock sind die entsprechenden Instanzen der darunterliegenden Elemente enthalten. Die Funktionsblöcke stellen jeweils eine Eigenschaft zur Verfügung, welche eine Referenz auf diese Elemente anbietet. FB_Lamp enthält die Eigenschaft nPowerConsumption, über der die aktuelle Leistungsaufnahme der Lampe ausgegeben wird.
Es soll eine Funktion entwickelt werden, welche die Leistungsaufnahme aller Lampen in dem Gebäude ermittelt.
Ein Lösungsansatz könnte darin bestehen, dass über mehrere verschachtelte Schleifen auf jede einzelne Lampe zugegriffen und die Leistungsaufnahme addiert wird:
FUNCTION F_CalcPowerConsumption : UDINT
VAR_INPUT
  refBuilding : REFERENCE TO FB_Building;
END_VAR
VAR
  nFloor, nRoom, nLamp : INT;
END_VAR
IF (NOT __ISVALIDREF(refBuilding)) THEN
  F_CalcPowerConsumption := 0;
  RETURN;
END_IF
FOR nFloor := 1 TO 5 DO
  FOR nRoom := 1 TO 20 DO
    FOR nLamp := 1 TO 10 DO
      F_CalcPowerConsumption := F_CalcPowerConsumption + refBuilding
                                  .refFloors[nFloor]
                                  .refRooms[nRoom]
                                  .refLamps[nLamp].nPowerConsumption;
    END_FOR
  END_FOR
END_FOR
Das „Eintauchen‟ in die Objektstruktur bis hinunter zu jeder Lampe wirkt schon irgendwie beeindruckend. Doch dadurch ist die Funktion abhängig von allen Funktionsblöcken, auch von denen, die nur indirekt über eine Referenz angesprochen werden.
Der Zugriff von refBuilding auf refFloors verstößt nicht gegen das Law of Demeter, da refFloors eine direkte Eigenschaft von FB_Building ist. Alle weiteren Zugriffe auf die Referenzen haben aber zur Folge, dass unsere Funktion auch von den anderen Funktionsblöcken abhängig wird.
Ändert sich z.B. die Struktur von FB_Room oder FB_Floor, so muss evtl. auch die Funktion zur Leistungsaufnahme angepasst werden.
Um das Law of Demeter einzuhalten, könnte jeder Funktionsblock eine Methode anbieten (CalcPowerConsumption()), in welcher die Leistungsaufnahme berechnet wird. In jeder dieser Methoden, wird wiederrum die darunter liegende Methode CalcPowerConsumption() aufgerufen:

Die Methode CalcPowerConsumption() in FB_Building greift nur auf die eigenen Elemente zu. In diesem Fall auf die Eigenschaft refFloors, um darüber die Methode CalcPowerConsumption() von FB_Floor aufzurufen:
METHOD CalcPowerConsumption : UDINT
VAR
  nFloor : INT;
END_VAR
FOR nFloor := 1 TO 5 DO
  CalcPowerConsumption := CalcPowerConsumption + refFloors[nFloor].CalcPowerConsumption();
END_FOR
In CalcPowerConsumption() von FB_Floor wird wiederrum nur auf FB_Room zugegriffen:
METHOD CalcPowerConsumption : UDINT
VAR
  nRoom : INT;
END_VAR
FOR nRoom := 1 TO 20 DO
  CalcPowerConsumption := CalcPowerConsumption + refRooms[nRoom].CalcPowerConsumption();
END_FOR
Zuletzt wird in FB_Room die Leistungsaufnahme aller Lampen in dem Raum berechnet:
METHOD CalcPowerConsumption : UDINT
VAR
  nLamp : INT;
END_VAR
FOR nLamp := 1 TO 10 DO
  CalcPowerConsumption := CalcPowerConsumption + refLamps[nLamp].nPowerConsumption;
END_FOR
Der Aufbau der Funktion F_CalcPowerConsumption() gestaltet sich dadurch deutlich einfacher:
FUNCTION F_CalcPowerConsumption : UDINT
VAR_INPUT
  refBuilding : REFERENCE TO FB_Building;
END_VAR
IF (NOT __ISVALIDREF(refBuilding)) THEN
  F_CalcPowerConsumption := 0;
  RETURN;
END_IF
F_CalcPowerConsumption := refBuilding.CalcPowerConsumption();
F_CalcPowerConsumption() ist nach dieser Anpassung nur noch abhängig von FB_Building und dessen Methode CalcPowerConsumption(). Wie FB_Building in CalcPowerConsumption() die Leistungsaufnahme berechnet, ist für F_CalcPowerConsumption() ohne Bedeutung. Der Aufbau von FB_Room oder FB_Floor könnte sich komplett ändern, F_CalcPowerConsumption() müsste nicht angepasst werden.
Die erste Variante, in der durch alle Funktionsblöcke iteriert wurde, ist sehr anfällig gegenüber Änderungen. Egal bei welchem Funktionsblock sich der Aufbau ändert, eine Anpassung von F_CalcPowerConsumption() wäre jedes Mal notwendig.
Beispiel 1 (TwinCAT 3.1.4024) auf GitHub
Allerdings ist zu berücksichtigen, dass verschachtelte Strukturen durchaus Sinn ergeben. Hier muss das Law of Demeter nicht anwendet werden. So kann es hilfreich sein, die Konfigurationsdaten über mehrere Strukturen hierarchisch zu verteilen, um so die Lesbarkeit zu erhöhen.
Keep It Simple, Stupid (KISS)
Das KISS-Prinzip besagt, dass Code so „simple‟ wie möglich sein sollte, damit dieser möglichst einfach zu verstehen und somit effektiv zu warten ist. Hierbei sollte „simple‟ mit „schlicht‟ übersetzt werden. Damit ist eine Schlichtheit gemeint, die versucht Unnötiges wegzulassen aber weiterhin die Anforderungen des Kunden zu erfüllen. Durch die Beachtung des KISS-Prinzips wird ein System:
- einfach zu verstehen
- einfach zu erweitern
- einfach zu pflegen
Besteht die Anforderung darin zehn Millionen Datensätze zu sortieren, so wäre die Verwendung des Bubblesort-Algorithmus zwar einfach in der Umsetzung, doch wird die geringe Geschwindigkeit des Algorithmus nicht den Anforderungen des Kunden entsprechen. Es muss also immer eine Lösung gefunden werden, die den geforderten Erwartungen des Kunden entspricht und deren Umsetzung aber möglichst einfach (schlicht) ist.
Grundsätzlich sind zwei Arten von Anforderungen zu unterscheiden:
Funktionale Anforderung: Der Kunde bzw. Stakeholder fordert ein bestimmtes Leistungsmerkmal. Gemeinsam mit dem Kunden werden dann die genauen Anforderungen für dieses Leistungsmerkmal festgelegt und erst danach wird dieses implementiert. Funktionale Anforderungen erweitern eine Anwendung um eindeutige, von dem Kunden gewünschte, Funktionen (Leistungsmerkmale).
Nicht funktionale Anforderungen: Eine nicht funktionale Anforderung ist z.B. das Aufteilen einer Anwendung auf verschiedene Module oder das Vorsehen von Schnittstellen, um z.B. Unit-Tests zu ermöglichen. Nicht funktionale Anforderungen sind Leistungsmerkmale, die für den Kunden nicht unbedingt sichtbar sind. Diese können aber notwendig sein, damit das Softwaresystem gepflegt und gewartet werden kann.
Bei dem KISS-Prinzip geht es immer um die nicht funktionalen Anforderungen. Das „Wie‟ steht im Mittelpunkt. Also die Frage, wie die geforderten Funktionen erreicht werden. Das YAGNI-Prinzip, welches im folgenden Kapitel beschrieben wird, bezieht sich auf die funktionalen Anforderungen. Hier steht das „Was‟ im Mittelpunkt.
Das KISS-Prinzip kann auf mehrere Ebene angewendet werden:
Formatierung Quellcode
Der folgende Quellcode ist zwar sehr kompakt, doch wird hier das KISS-Prinzip verletzt, da dieser nur schwer zu verstehen und somit sehr fehleranfällig ist:
IF(x<=RT[k-1](o[n+2*j]))THEN WT[j+k](l AND NOT S.Q);END_IF;
IF(x>RI[k+1](o[n+2*k]))THEN WO[j-k](l OR NOT S.Q);END_IF;
Der Quellcode sollte so formatiert werden, dass der Ablauf besser erkannt wird. Auch sollten die Bezeichner für Variablen und Funktionen so gewählt werden, dass deren Bedeutung leichter zu verstehen ist.
Unnötiger Quellcode
Quellcode, der nicht dazu beiträgt, die Lesbarkeit zu verbessern, verletzt ebenfalls gegen das KISS-Prinzip:
bCalc := F_CalcFoo();
IF (bCalc = TRUE) THEN
  bResult := TRUE;
ELSE
  bResult := FALSE;
END_IF
Der Quellcode ist zwar gut strukturiert, auch wurden die Bezeichner so gewählt damit die Bedeutung leichter zu erkennen ist, doch kann der Quellcode deutlich reduziert werden:
Diese eine Zeile ist deutlich einfacher zu verstehen, wie die 6 Zeilen zuvor. Der Quellcode ist „schlichter‟, bei gleichem Funktionsumfang.
Softwaredesign / Softwarearchitektur
Auch das Design oder die Struktur einer Software kann gegen das KISS-Prinzip verstoßen. Wird z.B. für das Abspeichern von Konfigurationsdaten eine komplette SQL-Datenbank eingesetzt, obwohl eine Textdatei ausreichen würde, so wird ebenfalls das KISS-Prinzip verletzt.
Das Aufteilen eines SPS-Programms auf mehrere CPU-Cores ist nur dann sinnvoll, wenn es auch einen praktischen Nutzen hervorbringt. In einem SPS-Programm müssen in diesem Fall entsprechende Mechanismen eingebaut werden, um den Zugriff auf gemeinsame Ressourcen zu synchronisieren. Diese erhöhen die Komplexität des Systems erheblich und sollten nur dann zum Einsatz kommen, wenn die Anwendung dieses auch erfordert.
Ganz bewusst habe ich die Kapitel zu dem KISS-Prinzip und zu dem YAGNI-Prinzip an das Ende gesetzt. Von hier aus möchte ich nochmal einen kurzen Rückblick auf den Anfang der Serie über die SOLID-Prinzipien werfen.
Bei der Vorstellung der SOLID-Prinzipien habe ich gelegentlich auf die Gefahr des Overengineering hingewiesen. Abstraktionen sollten nur dann vorgesehen werden, wenn diese für die Umsetzung von Features notwendig sind.
Um dieses zu verdeutlichen, will ich das Beispiel für die Erklärung der SOLID-Prinzipien noch einmal verwenden (siehe: IEC 61131-3: SOLID – Das Dependency Inversion Principle).
Zwischen den drei Lampentypen und dem Controller besteht eine feste Abhängigkeit. Soll die Anwendung um einen weiteren Lampentyp erweitert werden, so ist es notwendig das Programm an verschiedenen Stellen anzupassen. Durch das Anwenden des Dependency Inversion Principle (DIP) und des Single Responsibility Principle (SRP) wurde das Programm deutlich flexibler. Das Integrieren von zusätzlichen Lampentypen wurde dadurch signifikant vereinfacht. Aber auch die Komplexität des Programms wurde durch diese Anpassungen deutlich größer, wie das UML-Diagramm zeigt:
(abstrakte Elemente werden in kursiver Schriftart dargestellt)
Bevor zusätzliche Abstraktionsebenen durch die Anwendung der SOLID-Prinzipien realisiert werden, sollte man den Mehraufwand immer kritisch hinterfragen.
Die erste Variante ist vom Aufbau vollkommen ausreichend, wenn das Programm in diesem Umfang ausschließlich in einem Projekt eingesetzt wird. Das Programm ist klein genug, um den Aufbau der Software zu verstehen und um kleine Anpassungen vorzunehmen. Das KISS-Prinzip wurde befolgt. Es wurde nicht mehr Komplexität als notwendig eingebaut.
Ist die erste Variante allerdings nur ein Zwischenschritt, z.B. bei der Entwicklung eines umfangreichen Lichtmanagementsystem, so ist damit zu rechnen, dass die Anwendung an Komplexität noch zunehmen wird. Auch ist es möglich, dass zu einem späteren Zeitpunkt die Entwicklung auf mehrere Personen verteilt werden muss. Der Einsatz von Unit-Tests ist ein weiterer Punkt, der die Umsetzung der SOLID-Prinzipien rechtfertigt. Ohne die Entkopplung der einzelnen Lampentypen durch Schnittstellen, ist der Einsatz von Unit-Tests nur schwer bzw. gar nicht möglich. Auch hier wird das KISS-Prinzip nicht verletzt. Das KISS-Prinzip muss somit immer im Kontext betrachtet werden.
You Ain’t Gonna Need It (YAGNI)
YAGNI steht für You Ain’t Gonna Need It und bedeutet frei übersetzt Du wirst es nicht brauchen. Es besagt, dass man in der Softwareentwicklung nur die Leistungsmerkmale realisieren sollte, die benötigt werden. Es sollen keine Funktionen oder Features implementiert werden, die vielleicht irgendwann einmal gebraucht werden könnten.
Im Gegensatz zu dem KISS-Prinzip, bei dem es immer um die nicht funktionalen Anforderungen geht, liegt der Fokus bei dem YAGNI-Prinzip auf den funktionalen Anforderungen.
Bei der Entwicklung von Software kann die Versuchung groß sein, zusätzliche Leistungsmerkmale ohne konkrete Anforderung zu implementieren. Das kann z.B. dann der Fall sein, wenn während der Entwicklung Leistungsmerkmale ohne Absprache mit dem Kunden implementiert werden, in dem festen Glauben, dass der Kunde diese später noch fordern wird.
Bezogen auf unser obiges Beispiel, wird das YAGNI-Prinzip dann verletzt, wenn man die Betriebsstundenerfassung implementieren würde (siehe: IEC 61131-3: SOLID – Das Interface Segregation Principle), obwohl dieses vom Kunden nicht gefordert wurde.
Wird während der Entwicklung festgestellt, dass ein bestimmtes Leistungsmerkmal sinnvoll sein könnte, so sollte die Implementierung erst nach Absprache mit dem Kunden erfolgen. Ansonsten erhält ein System nach und nach immer mehr Quellcode für Leistungsmerkmale, die niemand benötigt.
Durch dieses Beispiel wird noch einmal deutlich, dass alle bisher beschriebenen Prinzipien keine festen Regeln oder gar Gesetze sind. Die Prinzipien sind aber ein mächtiges Werkzeug, um die Codequalität von Software zu verbessern.

Wieder mal eine tolle Geschichte wie Kunden auf uns als Softwarehersteller sauer werden, weil Microsoft ein nicht funktionierendes Update veröffentlicht.
Die Story:
- Wir nutzen intern COM für sehr viele Objekte, um unsere eigene Software via VB-Script zu steuern.
- Wir haben auch die Möglichkeit Controls vom Typ WebView2 anzulegen.
- Am 07.12. veröffentlichte Microsoft für den WebView2 den Build 120.
- Unsere Software benutzt im Allgemeinen „Evergreen“, d.h. es wird immer die aktuelle WebView2 ohne eigne Installation benutzt.
Effekt:
Seit dem Update kann man nach dem, ein WebView2 Fenster zerstört wurde, keine COM Class Factory in unserem Programm aufrufen.
Intern scheint das WebView2 CoSuspendClassObjects aufzurufen wenn das Control zerstört wird. Die Folge unser IMessageFilter springt an und es kommt ein Dialog, der auf einen nicht reagierenden COM Server hinweist.
Der nicht reagierende COM-Server ist unsere eigene Anwendung… 
Toll! 
Einziger für uns möglicher Workaround für uns ist leider, die alte Version 119 auf jedem Client lokal zu installieren. Dann über einen Registry Eintrag (HKEY_LOCAL_MACHINE\SOFTWARE\Policies\Microsoft\Edge\WebView2\BrowserExecutableFolder) den Aufruf von der aktuellen Version umzubiegen.
Netterweise kann man das für jede Anwendung separat steuern.
Details zum Nachlesen auf GitHub.
Nachtrag: Der Bug verschwand mit dem Update 120.0.2210.77 in der evergreen Version. Bei mir wurde der Fix am Montag den 18.12.2023 automatisch installiert.
Copyright © 2017 Martin Richter
Dieser Feed ist nur für den persönlichen, nicht gewerblichen Gebrauch bestimmt. Eine Verwendung dieses Feeds bzw. der hier veröffentlichten Beiträge auf anderen Webseiten bedarf der ausdrücklichen Genehmigung des Autors.
(Digital Fingerprint: bdafe67664ea5aacaab71f8c0a581adf)
Leidvoll musste ich erleben, dass ein Visual Studio 2022 Rollback auf die ältere vormals installierte Version leider auch einige VS-Extensions deinstalliert. Bzw. diese gehen verloren.
Man sollte also einen Rollback mit Vorsicht verwenden. Er eignet sich also nicht einfach und schnell ein Problem zu umgehen. Es sind einige Nacharbeiten nötig.
Copyright © 2017 Martin Richter
Dieser Feed ist nur für den persönlichen, nicht gewerblichen Gebrauch bestimmt. Eine Verwendung dieses Feeds bzw. der hier veröffentlichten Beiträge auf anderen Webseiten bedarf der ausdrücklichen Genehmigung des Autors.
(Digital Fingerprint: bdafe67664ea5aacaab71f8c0a581adf)
In der letzten Zeit habe ich regelmäßig die aktuellsten Visual-Studio 2022 installiert. Ich muss ehrlich sagen, dass ich seit VS-2029 nicht einmal schlechte Erfahrungen gemacht habe.
Das hat sich mit dem heutigen Tag geändert  !
!
Nach der Installation des Updates ging keine Step-Debug-Funktion mehr (Step-In, Step-Over, Step-Out, etc.) im Mixed Mode Debugging. Native Mode Debugging scheint zu gehen.
Egal was man macht man bekommt den Fehler:
Unable to step. Operation not supported. Unknown error: 0x8ede0018.
In der Developer Community für VS ist dieser Bug auch bereits bekannt und angeblich gibt es einen Fix. Der ist aber noch nicht öffentlich.
Leider arbeite ich an einigen C++/CLI Modulen und benötige den Mixed-Mode.
Das erste mal habe im Visual Studio Installer einen Rollback versucht. Leider hat der Rollback meine Extension zum Teil deinstalliert. Mein Visual Assist von Whole Tomato war auf einmal nicht mehr vorhanden. Toll…
Nachtrag: Das Problem ist in der Version 17.8.4 behoben, die am 10.01.2024 veröffentlicht wurde.
Copyright © 2017 Martin Richter
Dieser Feed ist nur für den persönlichen, nicht gewerblichen Gebrauch bestimmt. Eine Verwendung dieses Feeds bzw. der hier veröffentlichten Beiträge auf anderen Webseiten bedarf der ausdrücklichen Genehmigung des Autors.
(Digital Fingerprint: bdafe67664ea5aacaab71f8c0a581adf)
Es gibt mittlerweile viele KI-Tools, die C#-Entwicklern bei verschiedenen Aufgaben helfen können, z.B. bei der Codegenerierung, Codevervollständigung, Dokumentation, Fehlersuche und Optimierung. Zum einen fühlt man sich beim Einsatz solcher Tools wie in einer Pair-Programming Session, sprich...
Are you tired of cleaning? Discover the advantages of professional cleaning services.
Save time, effort, and enjoy a healthier environment. Don’t miss out on the benefits of hiring a cleaning service.
- Time-Saving Convenience:
- Enhanced Health and Hygiene
Impeccable Cleaning Standards - Customized Cleaning Plans
- Cost-Effective Solution
10 Key Benefits of Professional Cleaning Services
Hiring an insured gutter cleaner is crucial for home maintenance.
It ensures safety and protects property and workers.
This article emphasizes the importance of hiring an insured gutter cleaner for homeowners
- Protection against Accidents and Liability
- Safeguarding Your Property
- Professionalism and Reliability
- Peace of Mind
Why Is It Important to Hire an Insured Gutter Cleaner? - Crestview Window Cleaning
Water damage is costly and can be harmful.
Recognizing visual signs is important.
Let’s explore common signs and how to protect your property.
Cracking the Code: Recognizing Visual Cues for Water Damage - Protech Restoration | Water Damage Restoration In Chicago
Effective Roof Cleaning Techniques for a Spotless Home
Maintaining a clean roof is crucial for the appearance and structure of your home.
Roofs can gather dirt, debris, algae, and moss, which not only affect the visual appeal but can also cause damage.
This blog post will discuss effective roof cleaning techniques for keeping your roof in excellent condition.
15 Effective Roof Cleaning Techniques| Crestview
Stay updated on weather alerts. Prepare an emergency kit.
Share an evacuation plan with family. Move valuables to higher ground.
Avoid floodwaters for safety. Follow evacuation orders. Turn off utilities before leaving.
Find higher ground during a flood. Stay connected with a radio or charged phone. Assist others and report emergencies.
Be aware: I’m not a full time administrator and this post might sound stupid to you.
The Problem
We access certain Active Directory properties with our application, and on one customer domain, we couldn’t retrieve any data via our Active Directory component.
Solution
After some debugging and doubts about our functionality, the customer admin and I found the reason:
Our code was running under a Windows account that was very limited and couldn’t read those properties.
If you have similar problems, you might want to look into the AD User & Group management.
First step: You need to active the advanced features:

Now navigate to your “user OU” or the target users and check the security tab. The goal is to grant your service account the permission to read the needed property. To do that, go to the advanced view, and add a new permission or change an existing one:

Here you should be able to see a huge dialog with all available properties and grant the read permission for the target property for your service account.

Solution via CMD
The UI is indeed quite painful to use. If you know what you are doing you can use dsacls.exe.
To grant the read permission for tokenGroups for a certain service account you can use the tool like this:
dsacls "OU=Users,DC=company,DC=local" /I:S /G "service_account":rp;tokenGroups;user
Hope this helps!
The Problem
We are using Azure App Service for our application (which runs great BTW) and deploy it automatically via ZipDeploy.
This basic setup was running smoth, but we noticed that at some point the deployment failed with these error messages:
2023-08-24T20:48:56.1057054Z Deployment endpoint responded with status code 202
2023-08-24T20:49:15.6984407Z Configuring default logging for the app, if not already enabled
2023-08-24T20:49:18.8106651Z Zip deployment failed. {'id': 'temp-b574d768', 'status': 3, 'status_text': '', 'author_email': 'N/A', 'author': 'N/A', 'deployer': 'ZipDeploy', 'message': 'Deploying from pushed zip file', 'progress': '', 'received_time': '2023-08-24T20:48:55.8916655Z', 'start_time': '2023-08-24T20:48:55.8916655Z', 'end_time': '2023-08-24T20:49:15.3291017Z', 'last_success_end_time': None, 'complete': True, 'active': False, 'is_temp': True, 'is_readonly': False, 'url': 'https://[...].scm.azurewebsites.net/api/deployments/latest', 'log_url': 'https://[...].scm.azurewebsites.net/api/deployments/latest/log', 'site_name': '[...]', 'provisioningState': 'Failed'}. Please run the command az webapp log deployment show
2023-08-24T20:49:18.8114319Z                            -n [...] -g production
or this one (depending on how we invoked the deployment script):
Getting scm site credentials for zip deployment
Starting zip deployment. This operation can take a while to complete ...
Deployment endpoint responded with status code 500
An error occured during deployment. Status Code: 500, Details: {"Message":"An error has occurred.","ExceptionMessage":"There is not enough space on the disk.\r\n","ExceptionType":"System.IO.IOException","StackTrace":"
“There is not enough space on the disk”?
The message There is not enough space on the disk was a good hint, but according to the File system storage everything should be fine with only 8% used.
Be aware - this is important: We have multiple apps on the same App Service plan!

Kudu to the rescure
Next step was to check the behind the scene environment via the “Advanced Tools” Kudu and there it is:

There are two different storages attached to the app service:
c:\home is the “File System Storage” that you can see in the Azure Portal and is quite large. App files are located here.c:\local is a much smaller storage with ~21GB and if the space is used, then ZipDeploy will fail.
Who is using this space?
c:\local stores “mostly” temporarily items, e.g.:
Directory of C:\local

08/31/2023  06:40 AM    <DIR>          .
08/31/2023  06:40 AM    <DIR>          ..
07/13/2023  04:29 PM    <DIR>          AppData
07/13/2023  04:29 PM    <DIR>          ASP Compiled Templates
08/31/2023  06:40 AM    <DIR>          Config
07/13/2023  04:29 PM    <DIR>          DomainValidationTokens
07/13/2023  04:29 PM    <DIR>          DynamicCache
07/13/2023  04:29 PM    <DIR>          FrameworkJit
07/13/2023  04:29 PM    <DIR>          IIS Temporary Compressed Files
07/13/2023  04:29 PM    <DIR>          LocalAppData
07/13/2023  04:29 PM    <DIR>          ProgramData
09/05/2023  08:36 PM    <DIR>          Temp
08/31/2023  06:40 AM    <DIR>          Temporary ASP.NET Files
07/18/2023  04:06 AM    <DIR>          UserProfile
08/19/2023  06:34 AM    <SYMLINKD>     VirtualDirectory0 [\\...\]
               0 File(s)              0 bytes
              15 Dir(s)  13,334,384,640 bytes free
The “biggest” item here was in our case under c:\local\Temp\zipdeploy:
 Directory of C:\local\Temp\zipdeploy

08/29/2023  04:52 AM    <DIR>          .
08/29/2023  04:52 AM    <DIR>          ..
08/29/2023  04:52 AM    <DIR>          extracted
08/29/2023  04:52 AM       774,591,927 jiire5i5.zip
This folder stores our ZipDeploy package, which is quite large with ~800MB. The folder also contains the extracted files - remember: We only have 21GB on this storage, but even if this zip file and the extracted files are ~3GB, there is still plenty of room, right?
Shared resources
Well… it turns out, that each App Service on a App Service plan is using this storage and if you have multiple App Services on the same plan, than those 21GB might melt away.
The “bad” part is, that the space is shared, but each App Services has it’s own c:\local folder (which makes sense). To free up memory we had to clean up this folder on each App Service like that:
rmdir c:\local\Temp\zipdeploy /s /q
TL;DR
If you have problems with ZipDeploy and the error message tells you, that there is not enough space, check out the c:\local space (and of course c:\home as well) and delete unused files. Sometimes a reboot might help as well (to clean up temp-files), but AFAIK those ZipDeploy files will survive that.
 ALT
ALTWater damage can occur in homes and businesses due to various reasons such as floods, leaking pipes, or sewage backups. When faced with water damage, it is crucial to take immediate action to minimize the extent of the damage and prevent further problems. This is where water damage restoration services come into play. In this article, we will explore six benefits of water damage restoration services and why they are essential for restoring your property.
6 Benefits of Water Damage Restoration Service
Water damage restoration services are designed to mitigate the effects of water damage and restore your property to its pre-damaged condition. These services employ trained professionals equipped with specialized tools and techniques to address water-related issues efficiently. Let’s explore the benefits of hiring water damage restoration services in more detail.
Swift Water Extraction
One of the primary benefits of water damage restoration services is their ability to quickly extract water from your property. Time is of the essence when it comes to water damage, as prolonged exposure to water can lead to further damage and mold growth. Restoration professionals use powerful pumps and vacuums to remove standing water efficiently. This swift water extraction minimizes the risk of structural damage and reduces the chances of mold formation.
Professional Assessment and Restoration Plan
When you hire water damage restoration services, professionals conduct a thorough assessment of the affected area. They identify the extent of the damage and create a detailed restoration plan tailored to your specific needs. This assessment ensures that all areas, including hidden spaces and structural components, are accounted for during the restoration process. With a well-defined plan in place, restoration efforts are targeted and efficient.
Mold Prevention and Remediation
Water damage often creates an environment conducive to mold growth. Mold can pose serious health risks and cause further damage to your property if left untreated. Water damage restoration services include mold prevention and remediation as part of their comprehensive approach. Professionals use specialized equipment and techniques to detect and eliminate mold, ensuring a safe and healthy environment for occupants.
Drying and Dehumidification
After water extraction, thorough drying and dehumidification are essential to prevent secondary damage. Water damage restoration services employ industrial-grade drying equipment such as air movers and dehumidifiers to remove excess moisture from the air and surfaces. This process eliminates moisture that can seep into walls, furniture, and other materials, minimizing the risk of warping, swelling, or mold growth.
Structural Repair and Restoration
Water damage can weaken the structural integrity of your property, compromising its safety and stability. Water damage restoration services encompass structural repair and restoration to bring your property back to its pre-damaged condition. Whether it’s repairing damaged walls, floors, or ceilings, these professionals have the expertise to restore the structural elements of your property effectively.
Safety and Health Measures
Water damage restoration services prioritize safety and health measures throughout the restoration process. Professionals are equipped with personal protective equipment (PPE) to ensure their safety while working in hazardous conditions. They also take precautions to prevent cross-contamination and ensure the overall safety of occupants during the restoration process. By adhering to strict safety guidelines, water damage restoration services provide peace of mind to property owners.
Conclusion
Water damage restoration services offer a range of benefits when it comes to addressing water-related issues in your property. From swift water extraction and professional assessment to mold prevention and structural repair, these services play a vital role in minimizing damage and restoring your property to its original condition. By hiring water damage restoration services, you can save time, mitigate risks, and ensure the safety and well-being of your property and its occupants.
 ALT
ALTWater damage can be a distressing and overwhelming experience for homeowners. Whether it’s caused by a burst pipe, heavy rain, or a plumbing mishap, water damage can lead to structural issues, mold growth, and the loss of personal belongings. However, with prompt action and the right knowledge, it is possible to mitigate the damage and restore your property to its pre-loss condition. In this article, we will provide you with a step-by-step guide to water damage restoration, helping you navigate through the process effectively.
A Step-By-Step Guide to Water Damage Restoration
Water damage can be a nightmare for any homeowner. Whether it’s caused by a burst pipe, heavy rainfall, or a leaky roof, the consequences can be devastating. But fear not! With a step-by-step guide to water damage restoration, you can navigate through this challenging process and restore your home to its former glory.
Step 1: Assess the Damage
The first step in water damage restoration is to assess the extent of the damage. Check for structural damage, mold growth, and any items that may need immediate attention. Take photos or videos as evidence for insurance claims.
Step 2: Remove Standing Water
Once you’ve assessed the damage, the next step is to remove any standing water. Use buckets, mops, or wet vacuums to extract the water from your home. Be cautious of potential electrical hazards and wear protective gear if necessary.
Step 3: Dry Out the Area
After removing standing water, it’s crucial to dry out the affected area properly. Open windows, use fans, or employ dehumidifiers to increase air circulation and speed up the drying process. This will help prevent mold growth and further damage.
Step 4: Salvage or Discard
Next, evaluate the items affected by water damage. Determine what can be salvaged through cleaning and drying, and what needs to be discarded. Be thorough in your assessment to avoid potential health hazards or future problems.
Step 5: Clean and Disinfect
To prevent mold growth and ensure a safe living environment, clean and disinfect all surfaces that came into contact with water. Use appropriate cleaning agents and follow recommended guidelines for effective sanitation.
Step 6: Repair and Restore
Once the area is dry and cleaned, it’s time to repair and restore any damaged structures or materials. This may involve fixing structural issues, replacing damaged flooring or walls, and repainting or refinishing surfaces. Hire professionals if needed to ensure proper repairs are made.
Step 7: Monitor for Mold
Even after completing the restoration process, it’s important to monitor for any signs of mold growth. Keep an eye out for musty odors, discolored patches on walls or ceilings, or increased allergy symptoms. If mold is detected, take immediate action to prevent further damage and health risks.
Step 8: Evaluate Prevention Measures
Finally, evaluate Finally, evaluate the prevention measures you can take to avoid future water damage. This may include installing a sump pump, waterproofing your basement, sealing gaps and cracks, or regularly inspecting and maintaining your plumbing system. Implement these measures to minimize the risk of future water damage.

Important things need to grow to last. The German says “gut ding will weile haben” – good things take time.
The Roman Theatre of Verulamium (St.Albans) built in about 140AD
I did it: almost exactly four years after Nick Tune suggested me a conference in London as the best place to start talking at conferences, I had my first in-person talk at the DDD Meetup in London. Given the timespan, you could say, “What is so special in this? Why should I continue reading?”. Well, you don’t need to  . For me, it feels like quite a wonder that by looking at where I was four years ago (I was completely unknown in the international community) and what happened in the meantime, I can put a
  behind this bucket list item.
Writing about the last four years would transform this post into a small book – I won’t do that now. Instead, I will tell you a bit about the talk and how I applied the same ideas to prepare for it. The talk is about Feedback-driven Product Development. This post is about Feedback-driven Self-Development .
.
 slides on miro
With this talk, I wanted to show how broken our product development processes, long and short-term outcomes, hell, the whole industry is, and they don’t need to be! We have everything we need to improve our life as product developers to enjoy this most creative job, but instead, we feel frustrated, overwhelmed and not fulfilled. In the presentation, I talked about the three things organisations (or single persons) can use to change this.
Disclaimer: I don’t mean software developers here. I mean all the different roles and skills needed to create something good.
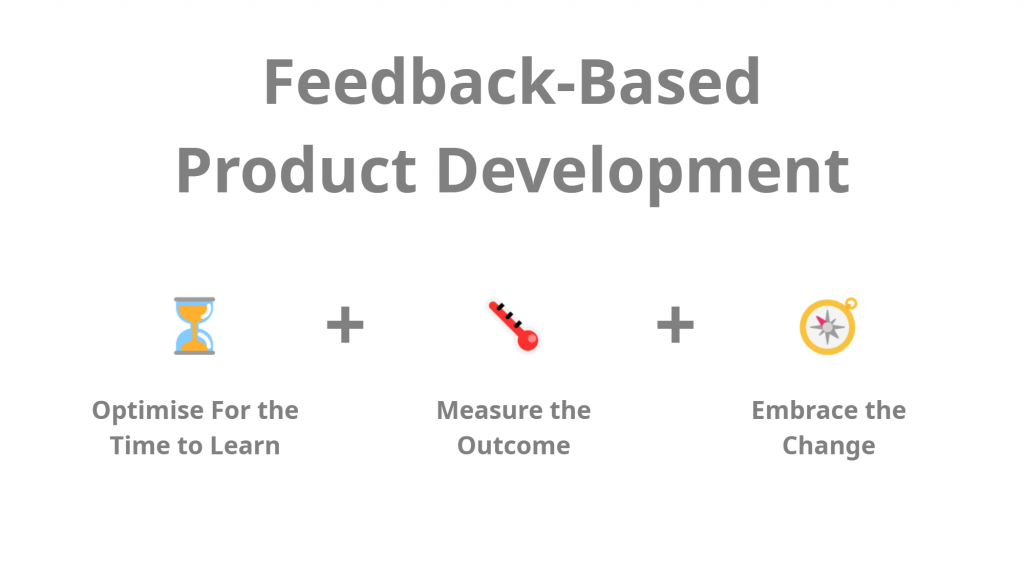
Now back to the story I want to tell you: how did I use these three ideas to develop the talk and myself at the same time?
Optimise For the Time to Learn
As I said, I have never written a talk with slides and all. I have even switched from Windows to Linux to never land in a situation where I needed to write a PowerPoint presentation. But the talk itself is only the output, it is not my goal. My goal is to learn if I can do this, if I am good at it. If I enjoy it? I started to speak in international circles on Virtual DDD, and the pandemic made it very easy to meet great people. After three years of interactions, it felt natural to me. We became online friends. Last year I proposed my first workshop at the biggest DDD conference in Europe because I wanted to meet them and knew that I wouldn’t be able to support the trip financially otherwise. It worked, and now I am part of this very special community. It stopped becoming a challenge; I needed something new: a talk presented on a podium, completely out of my comfort zone.
You need to know that I am not a consultant (and I still don’t want to become one), so there are not too many reasons for all the effort needed to travel abroad to conferences and give a high-quality workshop or talk. One (and still the main reason) is to meet and exchange with other nerds. The other is my personal development: can I do this? Where are my boundaries?
So that in January, Nick convinced me to dare the next step. We agreed on a date and on a (vague) topic and set the first milestone with this: learn. Learn about the fun, the (lack) of skills in presenting my thoughts, and the reaction of others. If they are interested at all in what I want to say. My slides (the output) needed to be good enough (on my own quality scale) so that I could achieve these goals.
Measure the Outcome
The outcome was great! Even if it was a complicated plan, everything worked out, and I was ready to go. This meetup, in a city where almost no one knew me (so that they were unbiased), with a topic which could have been everything or nothing, the splendid location at Mastercard providing the conference feeling – all this was on purpose to get the most honest feedback. After seeing several people nicking during the talk, making multiple connections on LinkedIn and mastodon directly after the session, and getting several “Thank you for addressing this” comments, I could tick one important question: people want to know what I am speaking about
The question about joy, about having fun, was answered too: yes, I had fun. I had great conversations with myself while I was writing the talk, and I had better conversations with the people in the room .
Embrace the Change
The best outcome I learned by giving this talk was that it is not good enough yet. Imagine the other situation: having it perfect for the first time. Where am I going from here? What a boring (hence scary) thought! After this first practice, I now know (and not guess) that I will need to rework everything, but my first “walking skeleton” is the right one; the first step was exactly in the right direction. The next iterations can come.
The next milestone is at the beginning of October at KanDDDinsky. The steps towards it will be small and several based on feedback from Nick, Andrea, or anyone up to it. My journey to find my boundaries can continue.
Whether it’s a burst pipe, a flooded basement, or a leaky roof, water damage in your home can quickly become a nightmare. Not only can it lead to costly repairs, but it can also pose health risks if left untreated. That’s why it’s essential to address the issue as soon as possible with residential water damage restoration services.
With so many restoration companies out there, it can be overwhelming to know where to start. Today we’ll discuss the necessary steps you should take as soon as possible after discovering water damage in your home. So keep reading for more information. When you need an useful content about water damage restoration, click over here.
Step-by-Step Guide to Quickly Restore Residential Water Damage
Here are some essential steps you need to follow when restoring residential water damage:
Step 1: Assess the Damage
The first step in any water damage restoration process is to assess the damage. This means identifying the source of the water and determining the extent of the damage. It’s important to assess any potential hazards to ensure everyone’s safety. Once you’ve identified the source, shut off the water or electricity if necessary. Remember, if the water damage is severe or contaminated, it’s best to contact a professional rather than attempting to fix it yourself.
Step 2: Remove Any Standing Water
The next step is to remove any standing water from your home. A professional restoration company will use industrial-grade equipment such as pumps, vacuums, and dehumidifiers to speed up the process. Standing water can quickly cause mold and mildew to form, which can be hazardous to your health if not treated quickly.
Step 3: Dry and Dehumidify
After all standing water has been removed, dry and dehumidify the affected areas to prevent further damage. A professional restoration service will use specialized equipment such as air movers and dehumidifiers to ensure that the area is completely dry. They’ll also inspect and replace any damaged insulation or drywall if necessary.
Step 4: Cleaning and Sanitizing
Once the area is completely dry, it’s time to clean and sanitize the affected area. This will ensure that any potential contaminants such as mold and mildew are eliminated. A professional cleaning and sanitizing company will use specialized chemicals and equipment to clean and sanitize your home.
Step 5: Restoration
The final step in the water disturbance restoration process is restoration. This means repairing any damage that has occurred to the property such as replacing drywall, flooring, or insulation. A professional restoration company will ensure that the restoration process is done correctly, preventing any further damage or future issues.
Take Quick Action to Overcome Water Damage
Water damage can be devastating to homeowners, but with the right resources and guidance, it can be overcome. Remember to always address the issue immediately and avoid attempting to solve it yourself if the damage is severe. It’s important to find a reputable restoration company that you can trust to get your home back to its former state. By following the steps mentioned above, you’ll be well on your way to restoring your home and peace of mind.